micro:bit Name Badge | How To Display Your Name on micro:bit?
- Sachin Upadhayay |
- May 30, 2024
Updated By
Reviewed By
The name badge project on micro:bit is about displaying your name on micro:bit and is one of the basic micro:bit projects that is taught to kids to understand the fundamentals of coding and game development. You can easily program the micro:bit to display your name since micro:bit LEDs can display both decimal and hex characters.
Now, let’s scroll down to get the step-by-step tutorial on how to create a name badge project on micro:bit!
Looking to learn Robotics? Explore Wiingy’s Online Micro:bit Classes For Kids to learn from top micro:bit experts.
How to program your name on micro:bit?
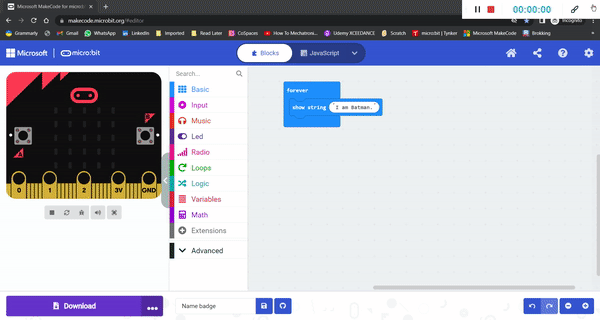
In the following GIF, you can see that the micro:bit is displaying the name “I am Batman.” Furthermore, you can see that the micro:bit displays an icon before displaying the name. Soon after displaying the icon, it pauses for a while and shows the name.
To display one’s name on micro:bit, we will use forever, show string, pause, show icon, and clear screen blocks. The detailed steps on how to use each block in the micro:bit name badge project have been explained on this page. Scroll down to find out more.
The following section explains in detail how this game was created on the micro:bit.
How to make a name tag project on a micro:bit?
The steps to create a name tag on micro:bit are explained below:
- Step 1: Visit the official website of MakeCode micro:bit.
- Step 2: Click the New Project button and give your project a name.
- Step 3: Click on the “Create” button.
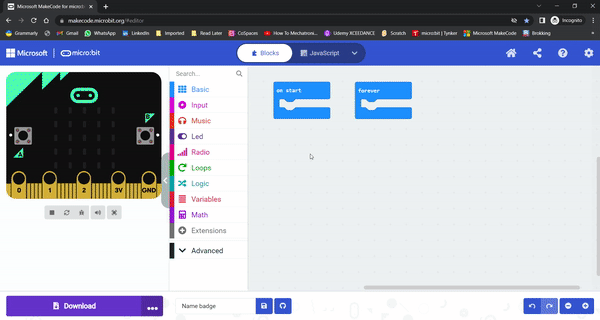
- Step 4: Now remove the “on start” block from the screen.
- Step 5: Click on the “Basic” blocks section and choose “show string block”. Place the show block under the “Forever” block.
- Step 6: In the show string block, type the name of your choice that needs to be displayed on micro:bit. In the example, we are using the name “I am Batman.”
- Step 7: Click on the “Start Simulator” button. Here you will see your name displayed and then the screen becomes blank, as shown in the following GIF.
- Step 8: Click on “Basic” and choose the “show icon” block. From the “show icon” block, select an icon block of your choice.
- Step 9: Add the “pause block” below the “show icon block” with a time limit of 2 seconds.
- Step 10: Place the “clear screen” block under the “pause” block.
- Step 11: Start the stimulator and you will see the micro:bit displaying your name on the screen.
There you go! you have now created the name badge project on micro:bit. If you have a micro:bit connected, click “Download” to transfer your code and watch the name badge!
micro:bit name badge code
Students who want to create the micro:bit name badge project, can use the following code:
Now that you are provided with all the necessary information on how to display your name on micro:bit. If you have any questions related to this page, ping us through the comment box below and we will get back to you as soon as possible.
More micro:bit projects
- Coin Game
- Apple Catching Game
- Space Invaders Game
- Flappy Bird Game
- Flashing Heart Project
- Beating Heart Project
- Snap the Dot Game
- Emoji Project
- Animated Animals Project
Looking to learn Robotics? Explore Wiingy’s Online Micro:bit Classes For Kids to learn from top micro:bit experts.
FAQs on name badge project on micro:bit
What is Microsoft MakeCode?
Microsoft MakeCode is a simple visual coding language. It has a drag-and-drop interface, which means the codes are in the shape of blocks and can be dragged and dropped onto the editor in order to create and run a script.
What are some of the cool micro:bit projects I can make?
You can make many cool and easy micro:bit projects like flashing heart, beating heart, apple catching game, coin game, flappy bird game, snap the dot game, space invaders game, and many more.
What are Scratch micro:bit projects?
Scratch is a blocked-based programming language. You can use the language to create projects in micro:bit. You just have to connect micro:bit to your computer and open the Scratch editor in your web browser and add micro:bit from the extension block.
What are Microsoft MakeCode projects?
MakeCode is a programming language. In micro:bit, one can create projects using the MakeCode coding language. It is a simple block-based programming language that uses a drag-and-drop interface. The projects created on micro:bit using Microsoft MakeCode language are called Microsoft MakeCode projects.
Is name badge micro:bit project beginner-friendly?
Yes, the Name Badge project, also known as “What’s Your Name?”, is a beginner-friendly project that one can create on micro:bit as this project doesn’t involve many complex steps. You only need to use blocks under the “Basic” block category.
What are some of the micro:bit robot projects that I can create?
You can create many exciting beginner-friendly robot projects with micro:bit. Some of the projects are line follower robot, milk carton robot, ticklebot, robot car, robotic disinfection system, and many more!
What are some of the micro:bit simple projects?
Some of the simple projects that can be created with micro:bit are flashing heart, sunlight sensor, step counter, emoji maker, rock paper scissors, magic 8-ball, music player, and many more!
How do I clear my micro:bit screen?
To clear the display of micro:bit just press the reset button located on the back of the micro:bit. Doing this will stop the current program from running and will reset your micro:bit.
Is micro:bit name badge project an easy project?
Yes, absolutely. Micro:bit name badge project is one of the easier projects to create on micro:bit. It involves very few easy steps and only a few blocks are used to create this project.
We hope that the above blog has helped you in creating an exciting project like the name badge. If you have any doubts or want tutorials on other micro:bit projects, then ping us in the comment section below and we will get back to you!