How to Make a Flappy Bird Game on Micro:bit? | Making A Game On Micro:bit
- Pallabi Mohanty |
- May 30, 2024
Updated By
Reviewed By

What is Micro:bit?
A micro:bit is a pocket-sized computer that introduces kids to how software and hardware work together. It is an interactive and programmable device that consists of various input-output features such as LED light displays, sensors, buttons, etc. It is also referred to as the BBC micro:bit since the BBC designed the device to encourage young kids to become the digital innovators of the future.
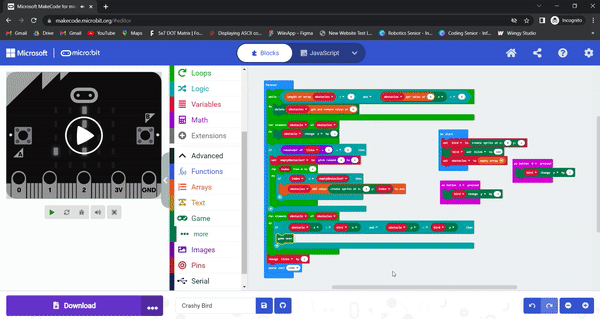
In this tutorial, we will create a simple version of the Flappy Bird game on micro:bit. The objective of this game is to direct the flying bird, which is moving continuously in the right direction, between a set of obstacles. You have to avoid touching the obstacles because once you touch any obstacles, you would lose. The purpose of this tutorial is to teach the basics of game sprites, arrays, and loops. Now, let’s learn a step-by-step guide to create this simple micro:bit project.
Looking to learn Robotics? Explore Wiingy’s Online Micro:bit Classes For Kids to learn from top micro:bit experts.
What Things Are Required for Making a Flappy Bird Game on Micro:bit?
The list of things required for making a flappy bird game on micro:bit is as follows:
- micro:bit or MakeCode simulator
- MakeCode or Python Editor
The detailed steps for creating this flappy bird game are explained on this page along with the sample code. Scroll down to find out more.
How to Make A Flappy Bird Game on Micro:bit?
There are a total of seven steps involved in making this game. The step is given below:
- Add the Bird to the Game
- Make the Bird fly
- Generating obstacles
- Make obstacles move
- Make obstacles disappear
- Generate more obstacles
- Game Over
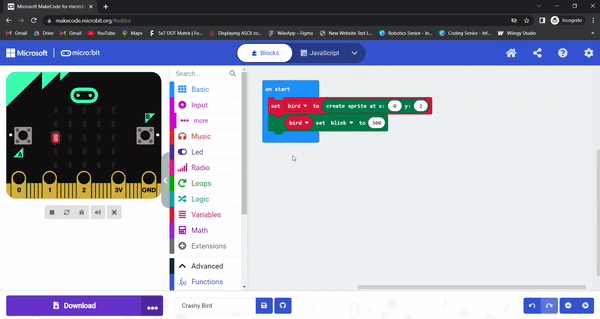
Step 1: Add the Bird to the Game
The first step in making the flappy bird game on Micro:bit is to create the sprite for the game, i.e., a bird and make it blink.
- First, we are going to add a sprite for the bird from the Game menu and make it blink.
- Create a variable “bird” and drop the “set bird to” block as shown below.
- Click on the “Game” and drop the “create sprite at x y”, and set the x to 0 and y to 2.
- From the game drop the “sprite set x to” block and change the sprite to bird and blink value 300.
Step 2: Make the Bird fly
Now, in the second step we will focus on giving some movements to the bird. Here, we will add codes that will control the bird’s movement by pressing the A and B button on the Micro:bit.
- Before creating the code for the game actions, let’s first add some controls so that we can move around the sprite. We’ll control the bird by pressing the A button to go up or the B button to go down.
- From the “Input” drop the “on button A pressed” and from the “game” drop the “sprite change y by” block.
- Change the sprite to bird and change the x to y, then set the value with a negative number -1 [to move upwards] as shown below.
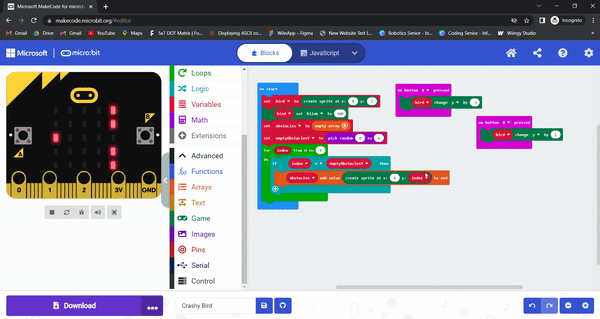
Step 3: Generating obstacles
Now, in this step we need to create obstacles with a single hole for the bird to fly through. The detailed process is given below:
- This is where things will start to get interesting. We’re going to randomly generate obstacles. We’ll keep all obstacles inside the array. All obstacles will have a single hole for the bird to fly through.
- First, create an array of obstacles that will hold all of the obstacle sprites.
- Create a variable with the name “obstacles”
- Click on the “Array” and drop the empty array.
- Now generate vertical obstacles consisting of 4 sprites and 1 random hole. Create a new variable called empty Obstacle Y.
- Using pick randomly, generate a random number from 0 to 4 and store it inside emptyObstacleY.
- Drag & drop the “set empty Obstacle Y to” and “pick random” blocks as shown below.
- Using for loop, iterate from 0 to 4. For every coordinate not equal to emptyObstacleY create and add obstacle sprites to the end of the obstacles array.
- Drop the “for index from 0 to 4” block as shown below.
- From the “logic” drop the “if-then” and not equal to blocks and make the conditional statement as shown below.
- From the “array” drop the “list add value to end” block and change the list with obstacles and value with the “create sprite at x y” block as shown below.
- Drop the index variable to the y position as shown below.
- Now with every micro:bit restart you should see different autogenerated vertical obstacles.
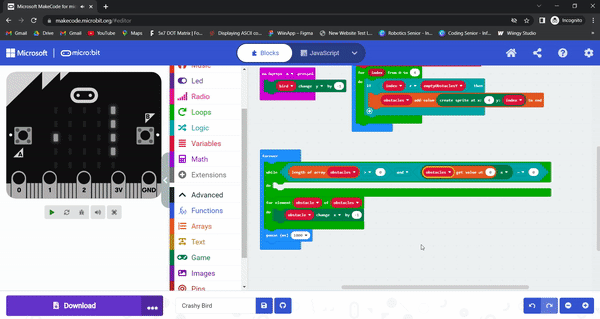
Step 4: Make obstacles move
Now, we need to make the obstacles move in the left direction every second.
- Access each obstacle using a for-element loop (iterate over the obstacles array) and decrease the obstacle X coordinate by 1.
- Right-click on the value block and rename it to obstacle; then drag that obstacle block on top of the sprite in the change x block.
- Obstacles should move towards the left every second.
- Make the coding blocks as shown below.
Step 5: Make obstacles disappear
In this step, we need to make the obstacles disappear after reaching the left-most corner of the screen. We can do the by making a conditional statement using coding blocks as show below;
- Make obstacles disappear after reaching the left-most corner. Iterate over all obstacles, delete the obstacle sprites where the X coordinate equals 0, and remove them from the obstacles array.
- Drop the “while do” block as shown below.
- Make the conditional statement using coding (arrays, variable and logic) blocks as shown below.
- From the “game” coding section drop the “delete sprite” block as shown below.
- From the “arrays” coding section drop the “list get and remove value at” block as shown below.
- Change the list to obstacles and drop it to “list get and remove value at” block as shown below.
Step 6: Generate more obstacles
In this previous step we added an obstacle for the bird to fly through now in this step we need to add more obstacles. A detailed step is given below:
- At the moment, our code generates just one vertical obstacle. We need to put obstacle generation code into the forever loop so that it keeps generating more and more obstacles.
- From “on start”, drop the obstacles creating coding blocks (that are already made) as shown below.
- Now our screen is full of moving obstacles. Create some spaces between generated obstacles. Let’s introduce the ticks variable to count how many iterations the forever loop has done and execute obstacle creation only if ticks are divisible by 3.
- Drop the “if-then” and equal to blocks as shown below.
- Create a variable with the name ticks.
- Drag & drop “remainder of” and “ticks” blocks as shown below.
Step 7: Game Over
Now, in this final step we need to add a condition that if the bird touches the obstacles then it is game over.
- Right now nothing happens when the bird is hit by an obstacle. Fix this by iterating over the obstacles array and checking if any obstacle sprite coordinate equals the bird coordinate.
- Drop the “for element value of list” and “if-then” blocks as shown below.
- From the “logic” category drop the “and”, “equal to” blocks as shown below.
- From the “game” category drop the “sprite x” blocks to the “equal to” blocks.
- Change the sprite with an obstacle and bird as shown below.
- Change the x to y as shown below.
- From the “game” coding category drop the “game over” block as shown below.
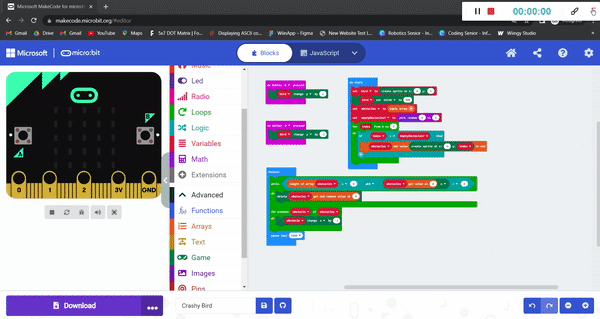
Congratulations, you have created your own flappy bird game on Micro:Bit!
If you have a micro:bit connected, click “Download” to transfer your code and watch the flappy bird game on your device!
More micro:bit Projects
- Coin Game
- Apple Catching Game
- Space Invaders Game
- Name Badge Project
- Flashing Heart Project
- Beating Heart Project
- Snap the Dot Game
- Emoji Project
- Animated Animals Project
Looking to learn Robotics? Explore Wiingy’s Online Micro:bit Classes For Kids to learn from top micro:bit experts.
FAQs
How to make a flappy bird game on micro:bit?
The steps involved in making a flappy bird game in micro:bit is given below:
- Add the bird sprite to the game
- Next, Make the bird fly
- Generate some obstacles
- Now, make the obstacles move
- Then make obstacles disappear
- Generate more obstacles
- Add a game-over feature
Can I get the game code for flappy bird on micro:bit?
Yes, the code for the flappy bird is given in the above blog.
How to download micro:bit games?
You can download micro:bit games to your computer. Simply connect your micro:bit to your computer and it will appear in your computer as a USB stick named MICROBIT. Now, download the game from game editor as a HEX file.
What are Microsoft MakeCode projects?
MakeCode is a programming language. In micro:bit, one can create projects using the MakeCode coding language. It is a simple block-based programming language that uses a drag-and-drop interface. The projects created on micro:bit using Microsoft MakeCode language are called Microsoft MakeCode projects.
What are Scratch micro:bit projects?
Scratch is a blocked-based programming language. You can use the language to create projects in micro:bit. You just have to connect micro:bit to your computer and open the Scratch editor in your web browser and add micro:bit from the extension block.
We hope that the above guide has helped you with creating your own flappy bird game on micro:bit. If you have any questions related to this post, ping us through the comment box below and we will get back to you as soon as possible.