
In this article
 What is Solidworks?
- Understanding SolidWorks Basics
- Navigating the SolidWorks Interface
- Creating 2D Sketches
- Building 3D Models
- Assembly Design and Management
- Working with Drawings and Documentation
- Advanced Techniques and Time-Saving Tips
- Troubleshooting Common Issues
- Resources and Further Learning
- Conclusion
- FAQs
- References
In this comprehensive guide, we’ll embark on a journey together to explore the depths of SolidWorks and discover essential tips and tricks that will propel your skills to new heights.
We’ll cover everything you need to know, from the basics of navigating the software to advanced techniques for modeling complex parts and assemblies.
Struggling with 3D Modelling? Try a free lesson of our Online Solidworks Tutoring and Learn from Architects and Designers proficient in CAD Softwares.
What is Solidworks?
Solidworks is an incredible computer-aided design (CAD) software that has revolutionized the design and engineering field. It’s like a magic wand that empowers designers and engineers to bring their ideas to life with unparalleled precision and efficiency. With its vast array of powerful tools and intuitive interface, Solidworks unleashes boundless creativity and innovation, allowing users to design intricate 3D models and visualize them in stunning detail.
Solidworks is more than just a software it’s a game-changer that has transformed the way design and engineering are approached. Its impact in the industry cannot be overstated.
Imagine having the ability to simulate and test your designs before investing in physical prototypes. Solidworks provides an extensive range of simulation tools that allow engineers to analyze factors like stress, motion, and fluid flow. This means less guesswork and more confidence in the performance and reliability of your designs.
The purpose of this blog is to provide beginners with valuable tips and tricks to help them master Solidworks. Starting with the basics, the blog aims to guide readers through the essential features and functionalities of Solidworks, step by step.
Understanding SolidWorks Basics
SolidWorks is a cutting-edge computer-aided design (CAD) software that revolutionizes the way designers and engineers bring their ideas to life. With its user-friendly interface and powerful capabilities, SolidWorks enables users to create 3D models, simulate real-world conditions, and generate detailed engineering drawings.
SolidWorks offers a plethora of features that make it an indispensable tool for design and engineering professionals. Some key features include:
- 3D Modeling: Create complex 3D models with ease using SolidWorks’ intuitive modeling tools. From simple shapes to intricate assemblies, SolidWorks provides a comprehensive set of tools to bring your designs to life.
- Simulation and Analysis: Test the performance and behavior of your designs in virtual environments. SolidWorks allows you to simulate real-world conditions such as stress, strain, and fluid flow, enabling you to optimize your designs for optimal performance and reliability.
- Collaboration and Documentation: SolidWorks facilitates seamless collaboration among team members through its integrated data management system. It also enables the creation of detailed engineering drawings and documentation, ensuring accurate communication and manufacturing.
- Parametric Design: SolidWorks employs parametric modeling, allowing you to create designs that are easily modified and updated.
System requirements and installation process
Each computer running SOLIDWORKS Visualize or SOLIDWORKS Visualize Boost must meet these requirements:
- Windows® 10 (64-bit)
- Minimum: Dual core CPU. Recommendation: Quad core.
- Minimum: 8GB RAM. Recommendation: 16GB.
- Minimum: 2GB free disk space. Recommendation: 5GB.
- Minimum: 2GB or more GPU RAM. Recommendation: 4GB.
- HDR Light Studio connection: HDR Light Studio v5.3.3 or newer, except v5.4
- 4GB of video memory or more required for the Denoiser feature
To install SolidWorks, follow these general steps:
SOLIDWORKS software is available to SOLIDWORKS Subscription Service customers and can be downloaded from the SOLIDWORKS website.
- Go to https://www.solidworks.com/sw/support/downloads.htm
- If you are visiting the downloads page for the first time you will need to pick log in
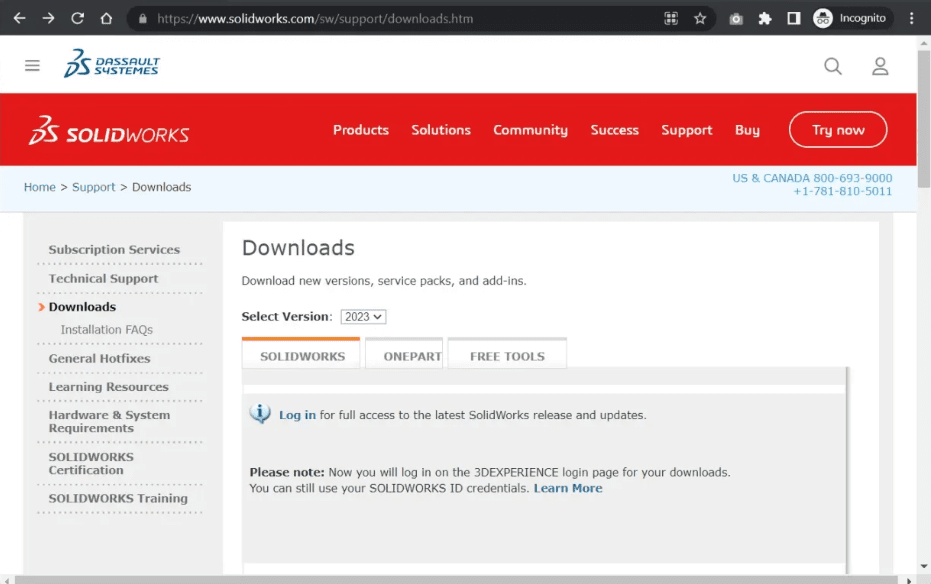
Figure 1: Official Website
- On the 3DEXPERIENCE ID login page (DSXClient) enter your email address and password and pick the log in button. If you do not have a 3DEXPERIENCE ID pick the Create your 3DEXPERIENCE ID link and use your email address to create an account.
- When you have successfully logged into the DSXClient you will be returned to the downloads page on the SOLIDWORKS website.
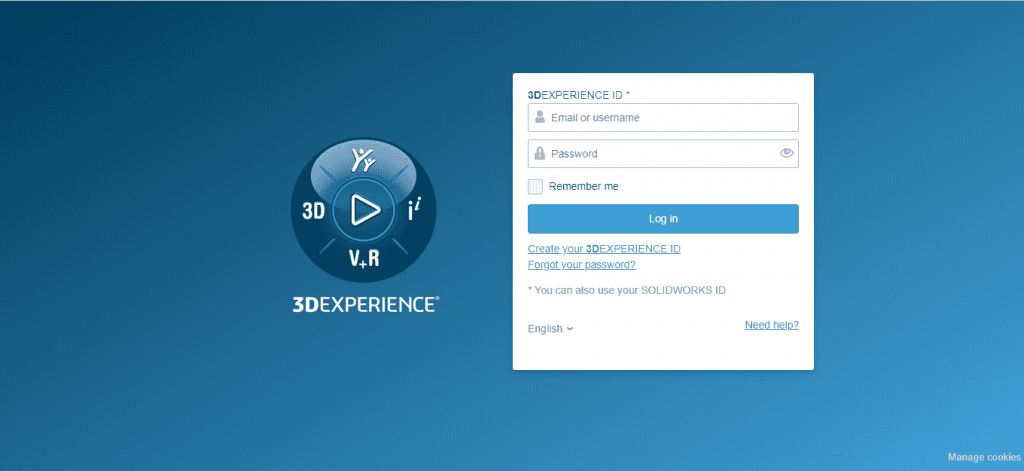
Figure 2: Official Website login access.
- In Downloads page select the version you require from the dropdown menu
- Pick the SOLIDWORKS Products link adjacent to the service pack you require (pick the highest number SP if you are a new customer):
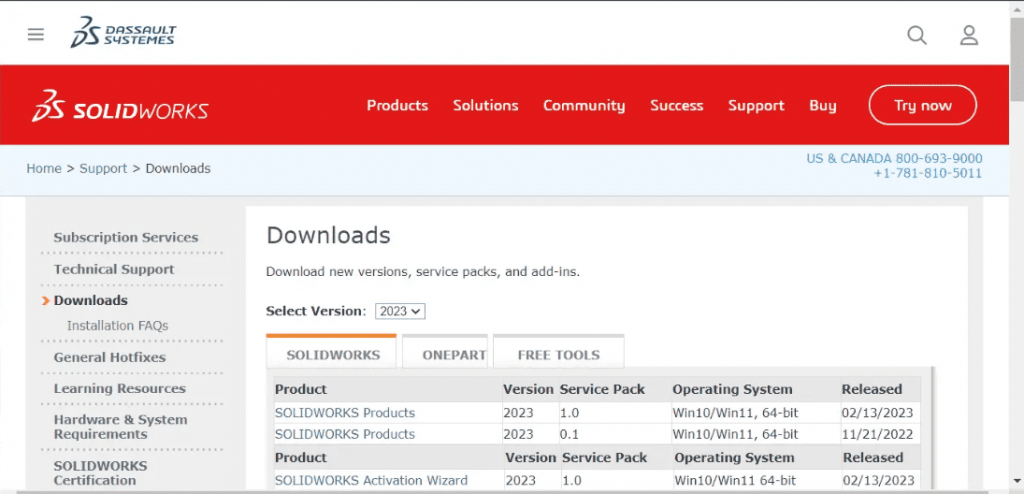
Figure 3: Download Versions.
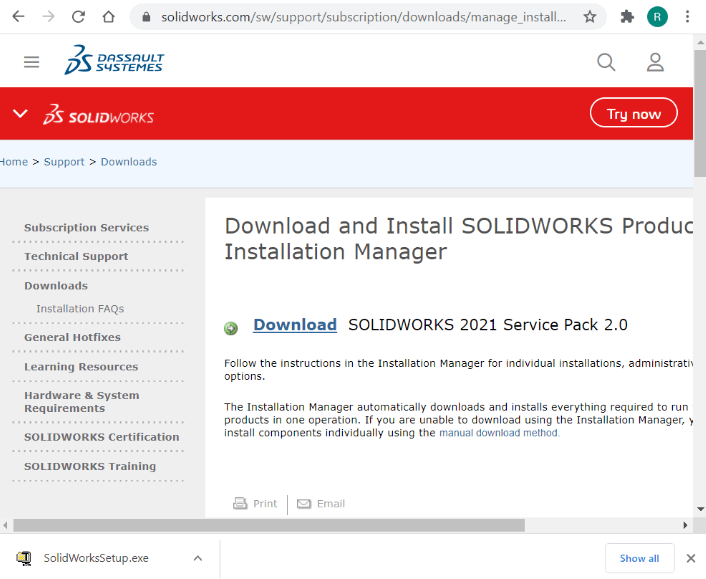
- Select the Download link in the page and a zip file will download from the SOLIDWORKS web site. This file is around 32MB and will manage the installation process for you without having to manually download files
- After the SolidWorksSeup.exe zip file has completed downloading run the SolidWorksSeup.exe file from your local machine
- After the files have extracted select OK and the SOLIDWORKS Installation Manager will start automatically

Figure 5: unzip Pack of SOLIDWORKS
- First step in the installation process is to select the type of install required from the four choices. In this example we will use the popular choice which is Install on this computer.
- With the Install on this computer selected pick Next
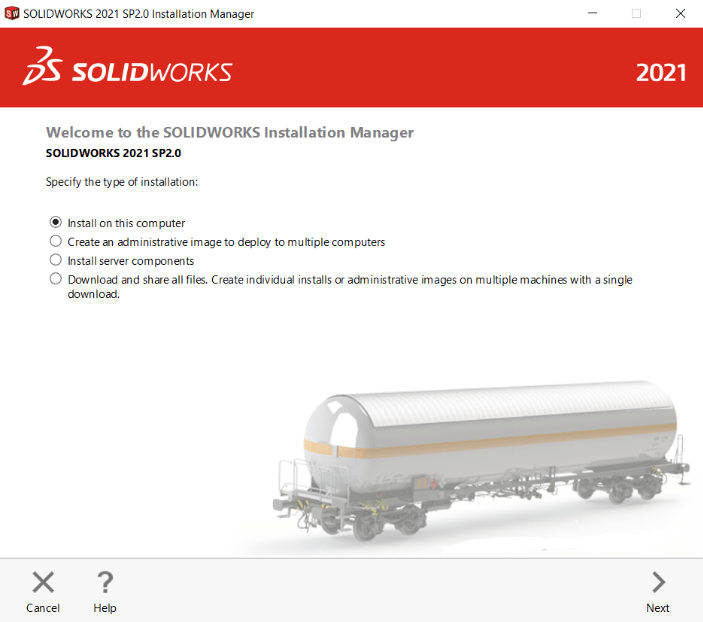
Figure 6: Step 1 installation Process
- The next step is to enter your SOLIDWORKS Serial number[s] for the purchased product[s], you don’t have to install all products at once, you can modify the installation later if required, Select Next to continue and SOLIDWORKS will connect to the online installation server and determine which products you have purchased based on the entered serial number.

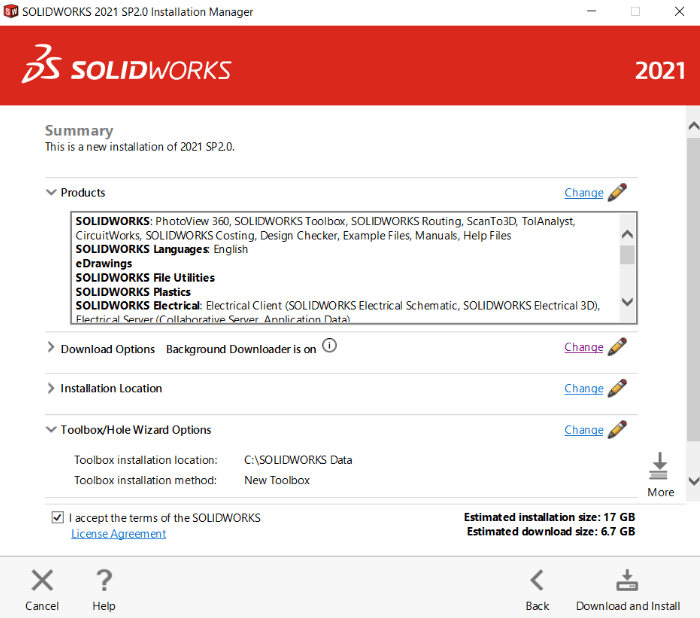
- Use the default options for the installation unless there is a specific application you don’t want to install
- Make sure you check the I accept the terms of the SOLIDWORKS license agreement option
- Select the Download and Install option to run the installation
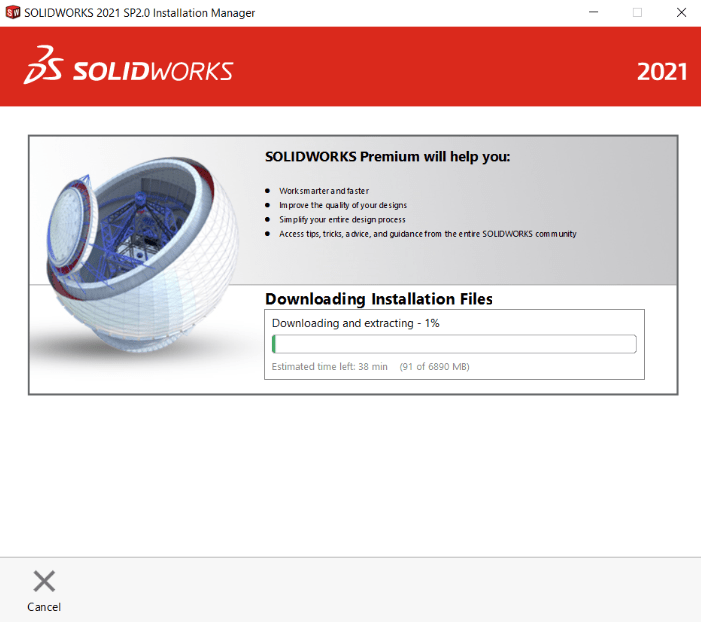
- The SOLIDWORKS Installation Manager will now download the files and then install SOLIDWORKS on your machine
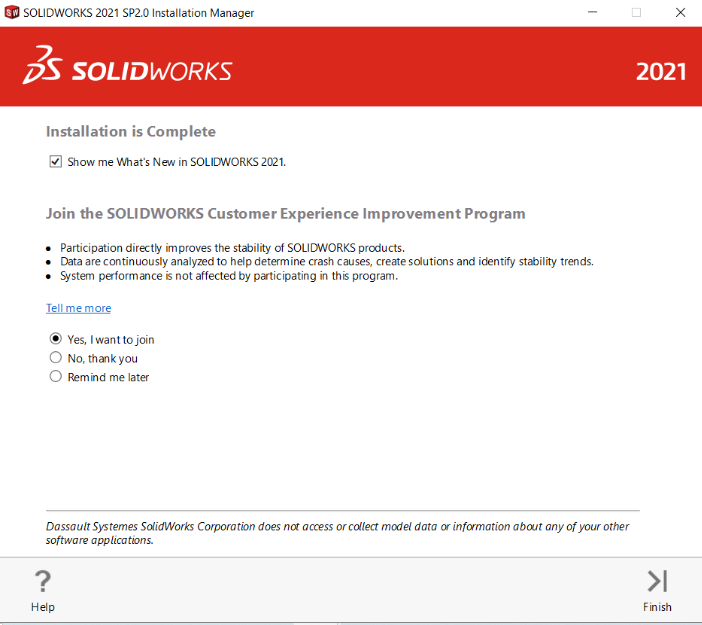
- When the installation is complete SOLIDWORKS has a few options you can choose for joining the SOLIDWORKS Customer Experience Improvement Program. Select the Yes, I want to join option as this will be very helpful for DS SolidWorks Corp.
- Then pick Finish and you’ll find the SOLIDWORKS application icons on your desktop and under the Start menu.
Navigating the SolidWorks Interface
The SolidWorks user interface is designed with efficiency and ease of use in mind, allowing you to focus on your designs without getting lost in complex menus or overwhelming options.
When you launch SolidWorks, you’ll be greeted with a sleek and intuitive interface. The main components of the user interface include:
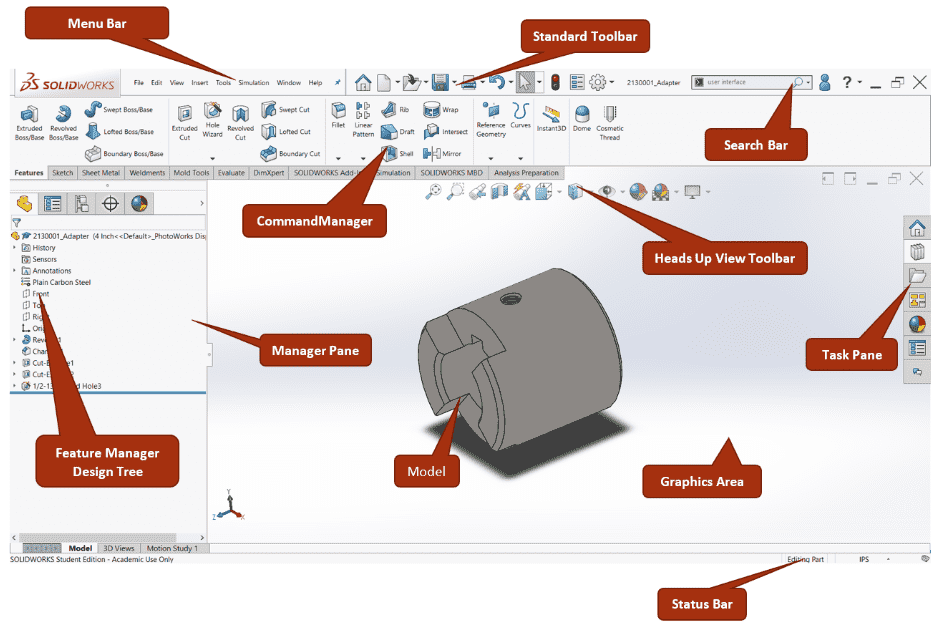
Figure 9: Main page of SOLIDWORKS
- Menu Bar: Located at the top of the screen, the menu bar houses a wide range of commands and options, organized into different menus. From here, you can access various features and functionalities of SolidWorks.
- Command Manager: Just below the menu bar, you’ll find the Command Manager, which provides a streamlined toolbar experience. It offers context-sensitive tabs with commonly used tools and functions, making it easy to navigate and find the tools you need for your current task.
- FeatureManager Design Tree: On the left side of the screen, you’ll see the FeatureManager Design Tree. This tree structure displays the hierarchy of features and components in your model, allowing you to manage and edit them easily. You can expand and collapse branches, reorder features, and navigate through your design history.
- Graphics Area: The central part of the interface is the Graphics Area, where your 3D model is displayed. Here, you can rotate, zoom, and pan to view your design from different angles. The Graphics Area provides a realistic representation of your model, helping you visualize and refine your designs with precision.
- PropertyManager: The PropertyManager is a contextual pane that appears on the left side of the screen, next to the FeatureManager Design Tree. It displays specific options and settings for the selected feature or tool, allowing you to make adjustments and customize your design parameters.
SolidWorks understands that every designer has unique preferences and workflows. That’s why it offers extensive customization options, empowering you to personalize the interface and optimize your productivity.
You can customize the interface in several ways:
- Customizing Toolbars: SolidWorks provides a wide range of toolbars that you can dock, undock, or rearrange according to your needs. You can access the toolbar customization options by right-clicking on any toolbar or by going to the “Tools” menu and selecting “Customize.”
- Keyboard Shortcuts: SolidWorks allows you to assign custom keyboard shortcuts to frequently used commands. This feature saves time and enhances your workflow. You can set up keyboard shortcuts by going to “Tools” > “Customize” > “Keyboard.”
- Mouse Gestures: With mouse gestures, you can perform common actions by simply moving your mouse in specific patterns. You can configure mouse gestures through the “Tools” > “Customize” > “Mouse Gestures” menu.
By customizing the interface to align with your preferences and work habits, you can create a workspace that enhances your efficiency and enables you to work with ease.
SolidWorks offers a rich set of tools and functions that cater to a wide range of design needs. Some of the key tools you’ll find in the toolbar include:
- Sketch Tools: These tools enable you to create 2D sketches as the foundation of your 3D models.
- Features Tools: The feature tools allow you to add, modify, and remove features from your model.
- Assembly Tools: When working with assemblies, you’ll find tools for inserting components, creating mates to define relationships between parts, and managing the assembly structure.
- Drawing Tools: SolidWorks provides tools for creating detailed 2D drawings of your 3D models. You can generate views, add dimensions, annotations, and other detailing elements to communicate your design intent.
These are just a few examples of the essential tools available in the SolidWorks toolbar.
Creating 2D Sketches
Creating 2D sketches in SolidWorks is a blast! This essential skill allows you to design anything from simple shapes to complex parts.
When you enter the sketching environment in SolidWorks, you’ll notice a variety of tools and options at your disposal. Here’s an overview of the key elements you’ll encounter:
Sketch Plane: A sketch plane is a flat surface on which you create your sketches.
Sketch Tools: SolidWorks provides a range of sketch tools that allow you to create basic shapes and lines. These tools include lines, arcs, circles, rectangles, polygons, and splines. You can access these tools from the Sketch toolbar or the Command Manager.
Constraints: Constraints are used to define relationships between sketch entities and control their behavior. SolidWorks offers various types of constraints, such as coincident, parallel, perpendicular, tangent, and concentric. Applying constraints ensures that your sketch remains stable and fully defined.
Dimensions: Dimensions provide precise measurements and control over the size and position of sketch entities. You can add dimensions to define lengths, angles, radii, and other properties. SolidWorks allows you to add dimensions manually or automatically using the Smart Dimension tool.
In SolidWorks, creating basic shapes and lines is a breeze. You can use the sketch tools to draw various entities based on your design requirements. Here are some commonly used sketch tools:
- Line
- Arc
- Circle
- Rectangle
- Polygon
- Spline
To ensure that your sketches are fully defined and maintain their desired shape, it’s important to apply constraints and dimensions. Constraints help establish geometric relationships between sketch entities, while dimensions provide precise measurements.
Building 3D Models
In SolidWorks, the real magic happens when you transform your 2D sketches into stunning 3D models. This is done through a process called extrusion and revolution. Here’s how it works:
Extrusion: Extrusion is the process of extending a 2D sketch in a specified direction to create a 3D object.

Figure 10: Extrusion Process
Revolution: Revolution is the process of rotating a 2D sketch around an axis to create a 3D object. With the Revolve command, you can select a sketch and define an axis of rotation. SolidWorks then revolves the sketch around the axis to form a 3D model. This is especially useful for creating objects with rotational symmetry, such as cups, bottles, or even complex geometries like turbine blades.

Figure 11: Revolution Process
Once you’ve created a 3D model, SolidWorks provides a range of powerful tools to modify and manipulate it according to your design needs. Here are some essential techniques for modifying 3D models:
- Edit Features: SolidWorks allows you to go back and edit the features used to create your 3D model.
- Move, Rotate, and Scale: SolidWorks provides tools for translating, rotating, and scaling 3D models.
- Split and Combine: Sometimes, you may need to split a 3D model into multiple parts or combine separate components into a single object. SolidWorks offers features like Split, Combine, and Combine/Subtract to achieve this.
To add further detail and refinement to your 3D models, SolidWorks provides a range of features that enhance the appearance and functionality of your designs.

Figure 12: 3D Model example
Here are a few notable features:
- Fillets and Chamfers: Fillets and chamfers are used to create smooth edges or beveled corners on 3D models.
- Patterns: Patterns allow you to replicate features or components in a specified manner. SolidWorks offers a variety of pattern options, including linear, circular, and sketch-driven patterns.
By leveraging these features, you can take your 3D models to the next level, adding complexity, aesthetics, and functionality to your designs.
Assembly Design and Management
Follow these cheerful tips to become an assembly design champion:
- Start with a layout. Map out how parts will fit together before building anything. This roadmap will guide you to success!
- Build parts with assembly in mind. Design parts that connect logically and allow for smooth movement. Think about access to fasteners and how parts will mesh.
- Use assembly joints and mates. These handy tools constrain parts together in an energetic fashion. Ball, slider, and hinge joints give you flexibility. Lock, tangent, and concentric mates keep parts precisely positioned.
- Test and check for interference. Move and rotate parts to ensure proper clearances. No one likes parts that collide! Make adjustments as needed for a flawless design.
- Consider appearance and rendering. Apply materials and appearances for a realistic look. Spin your assembly around and admire your cheerful creation! Render it to share with others.
- Save time with subassemblies. Group parts together, then save as a subassembly to use in other designs. This efficient reusing of components will have you mastering assembly in no time!
Working with Drawings and Documentation
SOLIDWORKS makes it a breeze to generate detailed 2D drawings from your 3D parts and assemblies.
- Creating technical drawings from 3D models: Transform your 3D models into precise and detailed technical drawings. Whether it’s orthographic views, isometric views, or any other view you need, SolidWorks has got you covered. Capture every detail of your design with accuracy and professionalism.
- Adding dimensions, annotations, and symbols to drawings: Take your drawings to the next level by adding dimensions, annotations, and symbols. SolidWorks empowers you to communicate your design intent clearly and effectively.
- Generating bills of materials and other documentation: SolidWorks simplifies the process by automatically generating bills of materials (BOMs) and other essential documentation.
Advanced Techniques and Time-Saving Tips
Take your design flexibility to the next level with SolidWorks configurations. Learn how to create multiple variations of a design within a single file.
Applying advanced features like lofts, sweeps, and shells: Dive into the world of advanced features in SolidWorks and unlock new design possibilities. Discover how to create complex shapes using lofted and swept features. Learn the art of thin-walled designs with the shell feature.
Learn those keyboard shortcuts! Pressing Ctrl+S to save, Ctrl+C to copy, and Ctrl+V to paste may seem basic, but using them fluently will make you a SolidWorks speed demon.
Turn on auto-dimension to instantly add dimensions as you sketch. Just click the auto-dimension icon, sketch your geometry. This little trick alone can cut your sketching time in half!
If you have multiple instances of the same part in your assembly, use assembly features like patterns to quickly generate them. Circular, linear, and mirror patterns can create copies of parts with just a few clicks. This beats making each part individually and inserting into the assembly. Your assembly tree will be neat and organized, too.
Use advanced mates like width, tangent, and cam followers. These multifunctional mates reduce the total number of mates required, keeping your assembly mates list short and sweet. Fewer mates means faster rebuild times and better performance.
Troubleshooting Common Issues
An outdated graphics card driver is a frequent culprit behind SolidWorks crashes and errors. Head to your graphics card manufacturer’s website, enter your specific card model, and download the latest driver. Install it, restart your computer, and SolidWorks should be running smoothly again.
SolidWorks performance is crucial for a smooth and efficient design experience. Discover valuable tips and techniques to optimize the performance and stability of your SolidWorks software. From adjusting graphics settings to managing file sizes and using lightweight components, we’ll share insights to help you enhance your workflow and minimize lag or crashes. Unlock the full potential of SolidWorks by ensuring a stable and high-performing environment.
If SolidWorks is running slowly or acting sluggish, your visual settings may need tweaking. Go to Tools > Options > System Options > Performance and try reducing the texture memory size, turning off “Use graphics hardware acceleration” or “Enable multi-threading”, or lowering the model detail level. Even small changes can provide a big performance boost.
Resources and Further Learning
Here are some ways to continue advancing your SolidWorks skills:
- Take additional video tutorials on the SolidWorks website or YouTube. Following along with an experienced user is one of the best ways to pick up new techniques.
- Explore the SolidWorks forums to find answers to any questions you may have. Chances are, someone else has asked the same question before! The forums are also a great place to connect with other users.
- Check out the SolidWorks Blog for the latest updates, tips, and news about the software.
- Consider becoming a Certified SolidWorks Associate (CSWA) or Certified SolidWorks Professional (CSWP). Earning certification is a great way to prove your proficiency to employers and push yourself to improve your skills.
Conclusion
Throughout this blog, we have covered a wide range of essential tips and tricks that will help you master SolidWorks. From understanding the basics of the software to advanced techniques and troubleshooting, you now have a solid foundation to build upon. Take a moment to recap the key takeaways and ensure you have a clear understanding of the fundamental concepts and features of SolidWorks.
As a beginner, it’s important to embrace a mindset of continuous learning and practice. Don’t be afraid to explore and experiment with different tools and features. The more you use SolidWorks, the more confident and proficient you will become. Remember, every design you create is an opportunity to learn and improve your skills.
SolidWorks is widely used in various industries, and becoming proficient in this software can have a significant impact on your personal and professional growth. It equips you with the skills to turn your innovative ideas into reality and opens doors to exciting career opportunities. By mastering SolidWorks, you can enhance your design capabilities, increase productivity, and contribute to the success of projects and organizations.
Struggling with 3D Modelling? Try a free lesson of our Online Solidworks Tutoring and Learn from Architects and Designers proficient in CAD Softwares.
FAQs
Is SolidWorks suitable for beginners?
Yes, SolidWorks is suitable for beginners. While it is a comprehensive and powerful software, it also offers a user-friendly interface and a range of resources to help beginners get started. With the right guidance and practice, beginners can quickly become proficient in using SolidWorks.
Can I customize the SolidWorks interface to suit my preferences?
Yes, SolidWorks provides options for customizing the interface to suit your preferences. You can rearrange toolbars, customize shortcut keys, and personalize the appearance of the interface. This allows you to create a workspace that is tailored to your workflow and enhances your productivity.
Are there online resources available for SolidWorks support?
Yes, there are numerous online resources available for SolidWorks support. The official SolidWorks website provides comprehensive documentation, tutorials, and forums where users can find answers to their questions. Additionally, there are many online communities and user groups dedicated to SolidWorks where users can seek assistance and share their knowledge.
Can SolidWorks be used for 3D printing?
Yes, SolidWorks is commonly used for 3D printing. It allows you to design and create 3D models that can be exported in various file formats compatible with 3D printing technology. SolidWorks provides tools for optimizing designs for 3D printing, ensuring accuracy and compatibility with the chosen printing method.
Can SolidWorks be used for 3D printing?
To improve performance and stability in SolidWorks, you can follow a few tips:
Ensure your computer meets the recommended system requirements for running SolidWorks.
Keep your software up to date with the latest updates and service packs.
Optimize your SolidWorks settings by adjusting graphics options and performance settings.
Regularly clean up and organize your files to prevent clutter and improve loading times.
Consider utilizing hardware upgrades such as a faster processor or additional RAM if you frequently work with complex models.
References
SOLIDWORKS: Analyzing Kinematics With 2D Sketch Layout Tools. (2022, March 16). Computer Aided Technology. Retrieved June 8, 2023, from https://www.cati.com/blog/solidworks-analyzing-kinematics-with-2d-sketch-layout-tools/
2D Drafting Overview – 2020 – SOLIDWORKS Help. (n.d.). SolidWorks Web Help. Retrieved June 8, 2023, from https://help.solidworks.com/2020/English/SolidWorks/sldworks/c_2d_drafting_overview.htm
Jan 29, 2025
Was this helpful?


