10 Amazing BBC micro:bit Projects Ideas For Students and Beginners
- Pallabi Mohanty |
- July 3, 2024
Updated By
Reviewed By

micro:bit projects are beginner-friendly and many interesting and creative projects can be made on micro:bit, especially by children who are interested in learning about coding. micro:bit is a pocket-sized computer that introduces kids to how software and hardware work together. You can make many fun and interesting projects using different programming languages like Microsoft MakeCode, Python, etc. In this blog, we will learn about 10 cool projects one can make in micro:bit.
Looking to learn Robotics? Explore Wiingy’s Online Micro:bit Classes For Kids to learn from top micro:bit experts.
10 Cool micro:bit Project Ideas For Students and Beginners
Quick easy projects for you to create on micro:bit using MakeCode, Python, and Scratch to help you learn coding, learn the best features of micro:bit, and of course to have fun!
- Flashing Heart Project
- Beating Heart Project
- Name Badge Project
- Emoji Project
- Animated Animals Project
- Flappy Bird Game
- Coin Game
- Apple Catching Game
- Snap the Dot Game
- Space Invaders Game
micro:bit projects are beginner-friendly so you don’t need to have years of experience in coding to start creating projects in micro:bit. micro:bit is designed especially for children for learning coding and game development. In the UK micro:bit is taught as a part of the school curriculum. If you are new to BBC micro:bit projects, don’t worry, there are many cool and easy micro:bit projects you can create by learning only the basics. micro:bit supports three types of programming languages:
- Microsoft MakeCode-
- JavaScript
- Python
For micro:bit project for a beginner, there aren’t many requirements either. You can make a micro:bit project with either the micro:bit device or on the simulator of the official website. Some generic requirements are
- micro:bit
- MakeCode simulator (optional. If you don’t have the micro:bit device you can use this)
- USB cable (optional. If using a computer)
- battery pack (optional)
Now let’s see the top 10 simple and easy projects for micro:bit:
1. Flashing Heart Project
Light up your micro:bit with the sign of love. It is a very easy and simple project that you can try making. The objective of this game is to learn how to use LEDs and make a flashing heart. You can see a few selected LEDs turning on and off on the micro:bit display and these sets of LEDs form a heart image.
Requirements for making the Flashing Heart project on micro:bit:
- micro:bit or MakeCode simulator
- MakeCode or Python Editor
Steps to make the Flashing Heart project on micro:bit:
- Step 1: First, open the MakeCode micro:bit website to create a new project
- Step 2: Now, you have to drag and drop the blocks and strategically arrange them for the heart to flash. The blocks used will be the “forever” block, and the “show LEDs” block.
- Step 3: Click on the “Start Simulator” button and your heart will start blinking.
2. Beating Heart Project
After flashing your heart, you can make it beat on your device with a few simple steps. The objective of this game is to line up different images in a sequence to create the illusion of movement—a heart getting larger and smaller. You will create a gif-like picture by using two built-in pictures, a large and a small heart, on the micro:bit’s LED display.
Requirements for making the Beating Heart project on micro:bit:
- micro:bit or MakeCode micro:bit Simulator
- Python or MakeCode Editor
Steps to make the Beating Heart project on micro:bit:
- Step 1: Open MakeCode micro:bit website to create a new project.
- Step 2: Now, you have to drag and drop the blocks and strategically arrange them for the heart to beat. The blocks used will be the “forever” block and the “show icons” block.
- Step 3: Now the next step is to pause the program for 200 milliseconds to create the beating illusion. Hence, make changes in the millisecond section to 200 and place it under the show icons block.
- Step 4: After showing each image, the program should pause for 200 milliseconds before showing the next image. Hence, add a “pause block” again under the “show block” and enter 200 milliseconds.
- Step 5: Click on the “restart” of the simulator and you will see the beating heart on the micro:bit simulator.
3. Name Badge Project
You can also make a name tag in micro:bit. The micro:bit’s LED display output can show words and numbers as well as pictures. The objective of this project is to learn how to scroll text across the screen to let people know your name and show a picture. All you have to do is code your name and transfer it to the micro:bit device.
Requirements for making the Name Badge project on micro:bit:
- micro:bit or MakeCode micro:bit Simulator
- Python or MakeCode Editor
Steps to make the Name Badge project on micro:bit:
- Step 1: Open MakeCode micro:bit website to create a new project.
- Step 2: Now, you have to drag and drop the blocks and strategically arrange them for the name to flash on the micro:bit. The blocks used will be the “forever” block and the “show string block” block.
- Step 3: In the show string block, type the name of your choice that you want to be displayed on micro:bit.
- Step 4: Click on the “Basic” and choose the “show icon” block. From the “show icon” block, select an icon block of your choice.
- Step 5: Add the “pause block” below the “show icon block” with a time limit of 2 seconds.
4. Emoji Project
You can design emojis on micro:bit. You can make happy, sad, confused, angry, and many more fun emojis and it in a forever loop so that it can run forever. This is the first and easy project that involves the use of buttons on the micro:bit so it’s a good starting point to progress towards exploring more features of micro:bit through coding.
Requirements for making the Emoji project on micro:bit:
- micro:bit or MakeCode micro:bit Simulator
- Python or MakeCode Editor
Steps to make the Emoji project on micro:bit:
- Step 1: Open MakeCode micro:bit website to create a new project.
- Step 2: Now, you have to drag and drop the blocks and strategically arrange them for the name to create emojis on the micro:bit. The blocks used will be the “forever” block and the “show icon” block.
- Step 3: Select the emoji you want to display from the drop-down menu.
- Step 4: For every new emoji drag and drop the “show icon” block and select the emoji that you want to be displayed.
- Step 5: Now, add the “pause block” under the show block and add a pause between emojis for 1000 milliseconds to add a gap between emojis.
- Step 6: Now click on the “Start Simulator” button and you will see emoji flashing on micro:bit.
5. Animated Animals Project
Animate the drawings of animals and display them on your micro:bit. The objective of this project is to make animated animals on the micro:bit LED display, which means giving the animals some kind of movement, like going left to right across the LED display or moving up and down. This will give an illusion that the animal is moving on the micro:bit LED display.
Requirements for making the Animated Animals project on micro:bit:
- micro:bit or MakeCode micro:bit Simulator
- Python or MakeCode Editor
Steps to make the Animated Animals project on micro:bit:
- Step 1: Open MakeCode micro:bit website to create a new project.
- Step 2: Now, you have to drag and drop the blocks and strategically arrange them for the name to make animated animals on the micro:bit. The blocks used will be the “forever” block and the “show icon” block.
- Step 3: From the drop-down menu choose an animal you want to be displayed.
- Step 4: Drag and drop a “pause” block between different animal icons.
- Step 5: Now click on the “Restart” icon and you will see the simulator running on the screen displaying the animations.
6. Flappy Bird Game
You can create fun and creative games with different features on micro:bit. For example, you can create an interesting game called the Flappy Bird Game. The objective of this game is to direct the flying bird between a set of obstacles, all the while trying to avoid touching the obstacles. The obstacles are single-hole objects through which the bird has to fly. If the bird touches the obstacles, then it is game over. The purpose of this tutorial is to teach the basics of game sprites, arrays, and loops.
Requirements for making the Flappy Bird game on micro:bit:
- micro:bit or MakeCode micro:bit Simulator
- Python or MakeCode Editor
Steps to make the Flappy Bird game on micro:bit:
- Step 1: Open MakeCode micro:bit website to create a new project.
- Step 2: Add the bird to the game.
- Step 3: Make the bird fly so that it can fly through obstacles
- Step 4: Generate obstacles so that the bird can fly through it
- Step 5: Now, make the obstacles move
- Step 6: Now, in this final step you need to add a condition that if the bird touches the obstacles then it is game over.
7. Coin Game
In a coin game on micro:bit, there will be two LED sprites; the coin and the catcher. The objective of the game is to catch as many coins as possible in order to gain points. The coin sprite needs to appear randomly in order to make the game more interesting. The catcher sprite is controlled by the accelerometer in a left-right and up-down manner.
Requirements to make a Coin Game on micro:bit:
- micro:bit or MakeCode micro:bit Simulator
- Python or MakeCode Editor
Steps to make the Coin game on micro:bit:
- Step 1: Create a LED sprite [coin] at a random position
- Step 2: Create a LED sprite [catcher] in the centre of the display.
- Step 3: Determine the left, right, up, and down tilt of Microbit.
- Step 4: Add a game-over function.
8. Apple Catching Game
Many simple yet interesting games can be created on the micro:bit. In the apple-catching game, the objective is to create a game where the objects fall from the sky and the users are supposed to catch them. Every time a user catches the objects, they will be rewarded with 1 point. The game is controlled by the A and B buttons on the micro:bit.
Requirements to make an Apple Catching game on micro:bit:
- micro:bit or MakeCode micro:bit Simulator
- Python or MakeCode Editor
Steps to make an Apple Catching game on micro:bit:
- Step 1: Open MakeCode micro:bit website to create a new project.
- Step 2: Create a “basket” LED sprite to collect the “apple” LED sprite.
- Step 3: Move the LED basket sprite
- Step 4: Create the apple LED sprite
- Step 5: Now, make the apples from the top
- Step 6: Catch the apple with the basket
- Step 7: Add a scoreboard, sound, and countdown.
9. Snap the Dot Game
The Snap the Dot game on micro:bit is about creating a simple game where you have to press the button [B] exactly when the LED dot sprite reaches the Micro:bit screen’s centre [2, 2]. The LED sprite in the centre row of the micro:bit display will move from right to left, and if you press button [B] exactly when it reaches the centre [2, 2], the correct symbol will be displayed, and your score will increase by one; otherwise, you will lose a life.
Requirements to make the Snap the Dot game on micro:bit:
- micro:bit or MakeCode micro:bit Simulator
- Python or MakeCode Editor
Steps to make the Snap the Dot game on micro:bit:
- Step 1: Open MakeCode micro:bit website to create a new project.
- Step 2: Create a LED sprite [dot]
- Step 3: Now, make the LED sprite [dot] move
- Step 4: Now, test if the sprite is in the center or not by pressing button B.
- Step 5: Now, you need to add game life and a game-over condition.
- Step 6: Increase the game complexity
10. Space Invaders Game
In this space invaders game, the invader (enemy) will come from the top of the screen, and you can control the ship using micro:bit buttons A and B. Using the buttons “A+B”, you can shoot bullets from the ship and kill the enemy. And on every successful shot (bullet sprite touches enemy sprite), the score will increase by one. If the enemy touches the ship, the game is over and the score will be displayed on the screen.
Requirements to make the Space Invaders game on micro:bit:
- micro:bit or MakeCode micro:bit Simulator
- Python or MakeCode Editor
Steps to make the Space Invaders game on micro:bit:
- Step 1: Open MakeCode micro:bit website to create a new project.
- Step 2: Create the ship sprite
- Step 3: Now, make the ship sprite move
- Step 4: Create an enemy sprite at a random position
- Step 5: Now, move the enemy sprite
- Step 6: In this step, create bullet space sprites for buttons A and B.
- Step 7: Now, move the bullet sprite down
- Step 8: Lastly, add a score down and a game over code
About micro:bit Projects
micro:bit projects are fun and a simple way to get started with creating your own games. It also teaches children the basics of coding and also with the micro:bit device children can give a physical outlet to their games. There are many micro:bit project ideas to explore. There are projects which are beginner-friendly but also there are also many micro:bit advanced projects too for an advanced-level user to explore.
For a beginner, there aren’t many devices that you will need to make a project; just your basic USB cable to connect your micro:bit device with your computer, batteries, etc., and you can make many interesting projects with micro:bit.
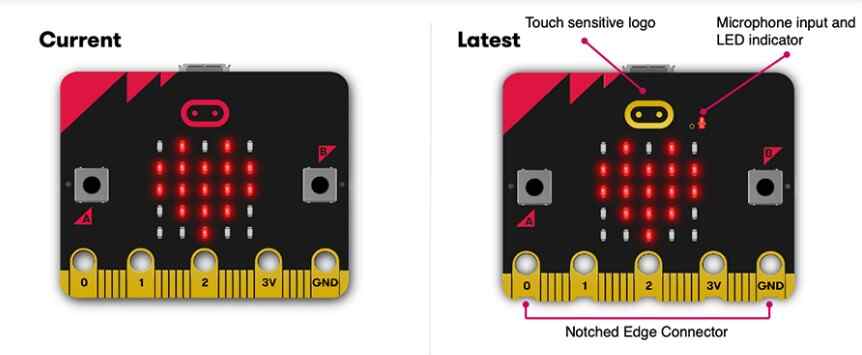
Click here to get an overview of all the projects you can create with micro:bit. micro:bit projects can either be made on micro:bit v1 or v2. micro:bit v2 is the latest micro:bit with more advanced features than micro:bit v1. The stark differences between v1 and v2 are more memory in v2, advanced processor, interface and many more.
Looking to learn Robotics? Explore Wiingy’s Online Micro:bit Classes For Kids to learn from top micro:bit experts.
FAQs on micro:bit Projects
What are micro:bit projects for students?
There are many beginner-level micro:bit projects that can be made by students to understand its features and learn more about coding. Some of the popular micro-bit projects include – Beating Heart, Flapping Bird and Apple Catcher Game.
What are some micro:bit project ideas?
You can make fun and interesting projects on Micro:bit. You can make animations, cool designs, or games on the Micro:bit. Some interesting ideas are the Flappy Bird game, name tags, and emojis. Read the above blog for more detailed information.
What are some easy micro:bit projects for beginners?
There are many beginner-friendly projects that can be made on micro:bit. For example, flashing hearts or name tags that are easy to learn and write. Read the above blog for more detailed information.
Can I make micro:bit projects in offline mode?
Yes, you can make micro:bit project in offline mode. Just download the micro:bit MakeCode offline application by Microsoft and get started.
Are there any tutorials for micro:bit projects?
Yes, micro:bit official has guides and tutorials on many micro:bit projects, ranging from beginner to advanced level. If that’s overwhelming we have curated top 10 projects that you can make to get started with micro:bit.
micro:bit projects are a great way to start learning about multiple programming languages because they are fun and interesting, and when you see the physical evidence of coding, it feels exciting. micro:bit has many interesting features, and one of them is that it uses many programming languages, like MakeCode, Python, and Scratch, which attracts people of all age groups, from children to pro coders. There are many interesting projects that can be made using micro:bit, like flashing hearts, rocks, paper and scissors, and many more!