How to Make a Coin Game on micro:bit? – micro:bit Makecode Tutorial
- Sachin Upadhayay |
- August 20, 2024
Updated By
Reviewed By

In this tutorial, we will learn how to create a coin game on micro:bit. In this game, we will be using two LED sprites – Coin and Catcher. The coin sprite is set to appear in random positions. With the help of the catch LED sprite, we will have to catch the coins to score the points. The catcher sprite in this game will be controlled by the accelerometer in a left-right and up-down manner.
Looking to learn Robotics? Explore Wiingy’s Online Micro:bit Classes For Kids to learn from top micro:bit experts.
Coin Game on micro:bit
In the following figure, you can see a LED sprite [coin] appearing at a random position and another LED sprite [catcher] is catching it. And after each successful catch, the score is increased by 1.
![you can see a LED sprite [coin]](https://cdn.wiingy.com/blog/wp-content/uploads/2022/08/image3-2.gif)
Now let us understand the steps involved in making the coin game on micro:bit.
How Do You Make a Coin Flipper Game in micro:bit?
The steps involved in making the simple micro:bit project, coin flipper, or coin catch game are explained below:
- Create a LED sprite [coin] at a random position
- Create a LED sprite [catcher] in the centre of the display.
- Determine the left, right, up and down tilt of Microbit.
- Keep score
- Add game over
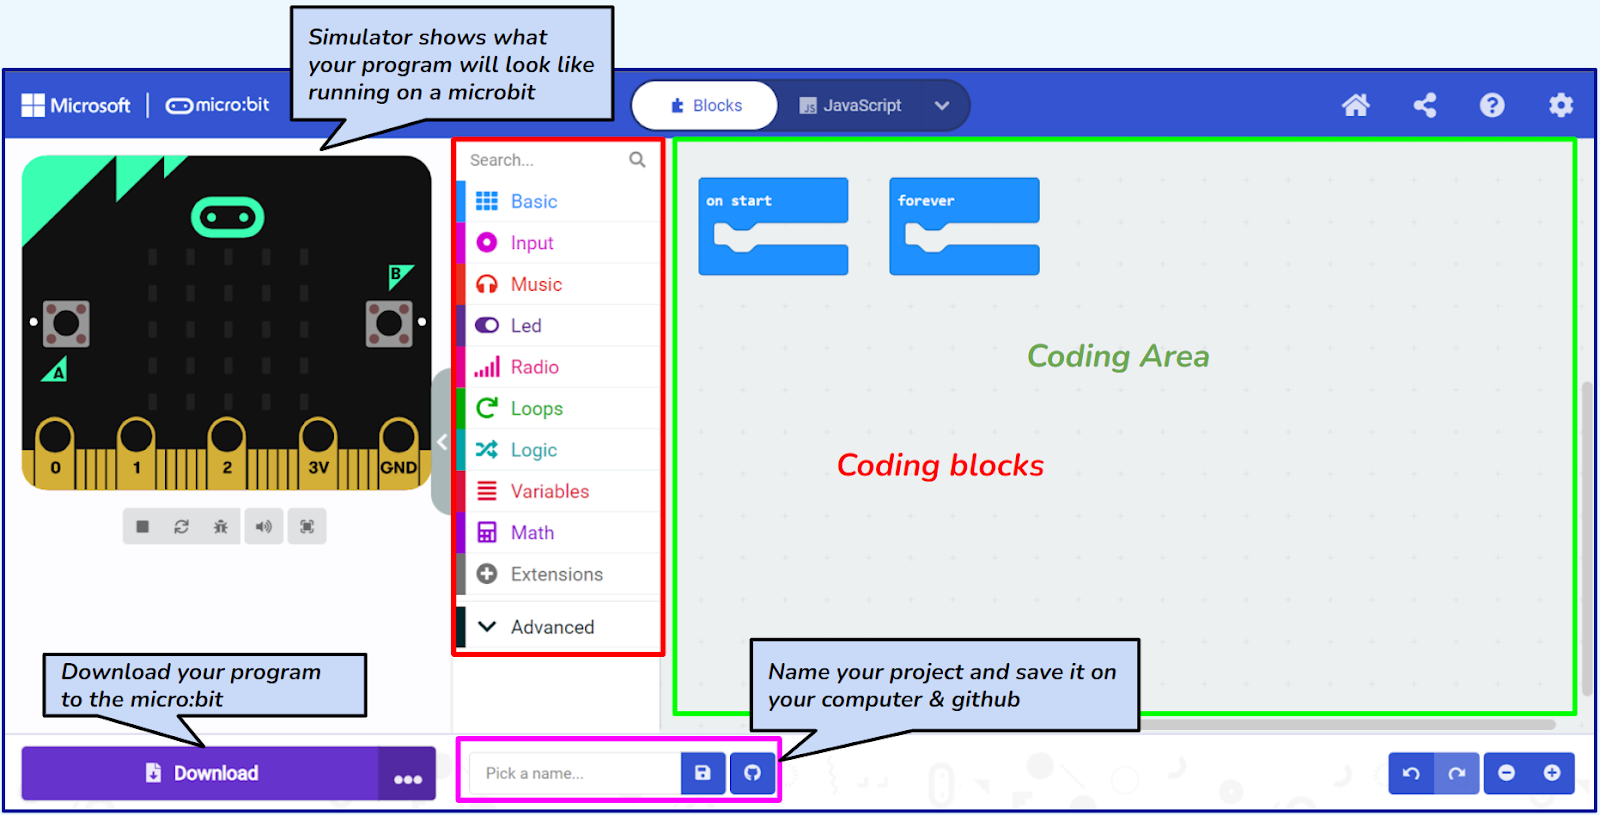
Microsoft MakeCode for micro:bit Login
The first step towards creating the micro:bit coin game is to login to the account. The detailed steps on how to login to micro:bit is explained below:
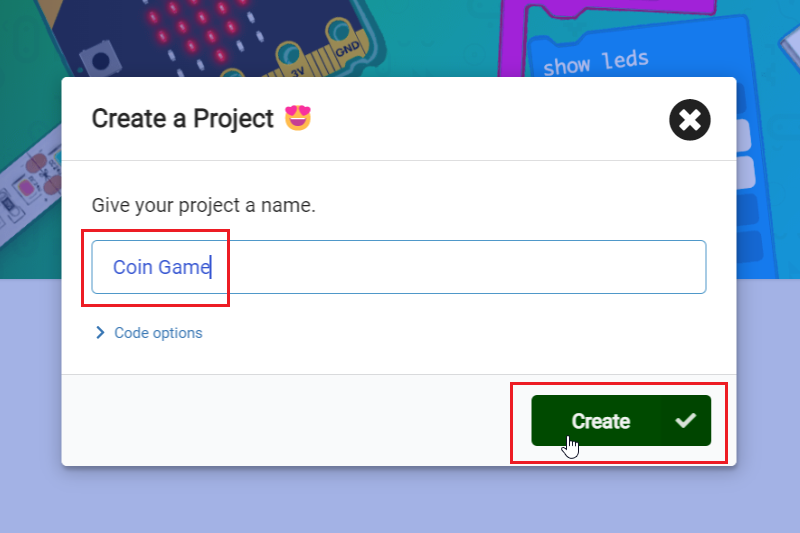
- Step 1: Visit the official website of Microsoft MakeCode for micro:bit – makecode.microbit.org
- Step 2: Click on the “New Project”.
- Step 3: Name your project and click on “Create”.
- Step 4: Now open the MakeCode UI as shown in the image given below.
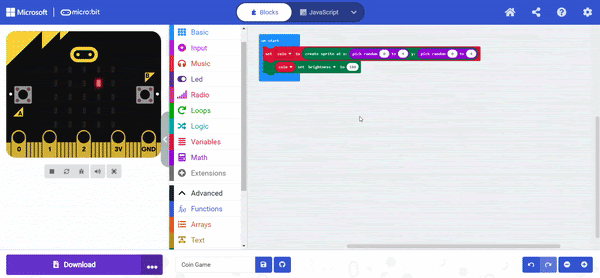
Step 1: Creating a LED Sprite [Coin] at a Random Position
In this step, we are creating a coin LED sprite which will move randomly over the micro:bit display. The detailed steps on how to do this on micro:bit is explained below:
- Click on the “Variables”, and then click on “Make a Variable”.
- Name your variable “coin”.
- Drag and drop the “set coin to” block.
- And drag & drop the “create sprite at x y” block to the “set coin to” block.
- Drag and drop the “pick random” block from math blocks and set its value from 0 to 4.
- Set the brightness of the coin LED sprite. Drag & drop the “sprite set x to” block as shown below.
- Click on the dropdown and select sprite to coin, x to brightness, and its value of 180.
- Click on the “restart the simulator” button and you will see an LED sprite created at a random position.
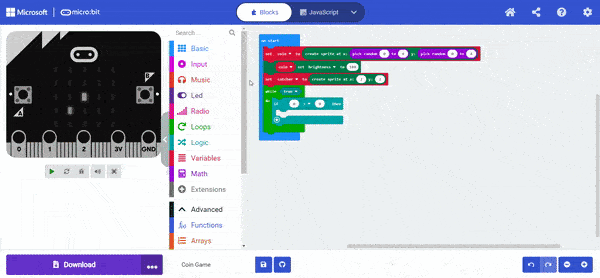
Step 2: Create a LED Sprite [Catcher] to the Centre of the Display
As the next step, we are creating a LED sprite Catcher. The purpose of creating the LED sprite catcher is to display it to the centre. The detailed steps on how to do this are given below:
- Click on the “Variables”, and then click on “Make a Variable”.
- Name your variable “catcher.”
- Drag and drop the “set catcher to” block and drag and drop the “create sprite at x & y” block to the “set catcher to” block.
- Make the x and y values two and two so that the catcher sprite will be created at the centre of the micro:bit display.
- Click on the “restart the simulator” button and you can see a catch LED sprite being created at the centre of the display.
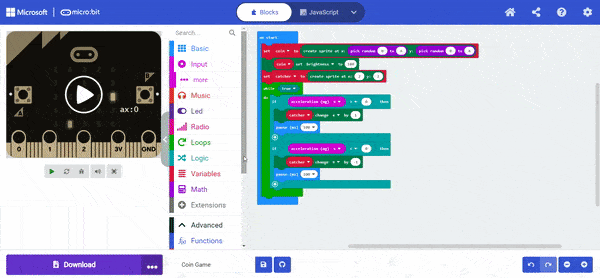
- Write a conditional statement to detect micro:bit tilt.
- First, add a forever loop to check this condition every time.
- Click on the “loops” and drag and drop the “while do” loop, then click on the dropdown and make it true.
- Form the “Logic” drag and drop “if-then” block as shown below.
- Drag & drop the “greater than” block to the “if-then” block as shown below.
Step 3: Determine the Left, Right, Up and Down Tilt of micro:bit
In this step, we will have to determine the left, right, up and down tilt of micro:bit. The detailed steps on how to do this are explained below:
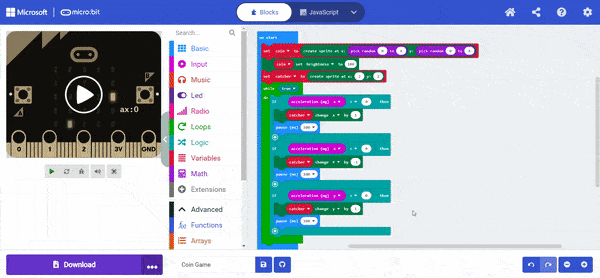
- Click on the “Input” and drag & drop the “acceleration (mg) x” block as shown below.
- Make “acceleration (mg) x” greater than zero to determine the right tilt of Minecraft.
- If the micro:bit is tilted in the right direction, then move the catcher in the right direction.
- Drag & drop the “sprite change x by” block and set its value to one.
- Add a pause block as shown below.
- Similarly, add a coding block to detect the left tilt and move the catcher left.
- Make “acceleration (mg) x” less than zero to determine the left tilt of the Minecraft.
- Change the catch ‘x’ value by a negative one.
- Click on the “Input” and drag & drop the “acceleration (mg) x” block. Click on the dropdown and select y as shown below.
- Make “acceleration (mg) y” greater than zero to determine the down tilt of Microbit.
- If the micro:bit is tilted in the down direction, then move the catcher in the down direction.
- Drag & drop the “sprite change x by” block, then click on the dropdown and select y, and set its value to one.
- Add a pause block as shown below.
- Similarly, add coding blocks to detect up-tilt and move the catcher up.
- Make “acceleration (mg) y” less than zero to determine the up tilt of Microbit.
- Change the catch ‘y’ value to a negative value.
Step 4: Adding Score to micro:bit Catch Game
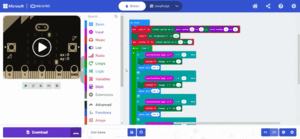
Here we will be determining the collision between coin and the catcher sprite. Using a conditional statement we will determine whether the coin touched the catcher sprite or not. The detailed steps on how to add score to the micro:bit catch game is explained below.
- Drag and drop the “if-then” block, and drag and drop the “is sprite touching” block, then click on the sprite and select “catcher” to the “if-then” block as shown below.
- Click on the variables and drag and drop the catcher sprite to the “is sprite touching” block.
- If the condition is true, drag and drop the “change score by” block.
- Move the coin sprite to a random position. Drag & drop the “sprite set x to” block and set its value to random (from 0 to 4).
- Drag & drop the “sprite set x to” block and click on the dropdown menu and select y.
- Set its value at random (from 0 to 4).
Step 5: Adding Game Over
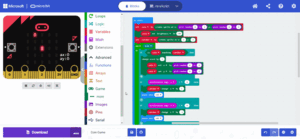
- Add game over to do this and add the count down.
- Drag & drop the “start countdown (ms)” block at the game’s start and set its value to 15,000.
- Click on the “restart the simulator” button and tilt your micro:bit left-right, up-down to catch the coin.
Congratulations, You have completed the Coin game on micro:bit.
Code for Coin Game in micro:bit
More micro:bit Projects
- Name Badge Project
- Apple Catching Game
- Space Invaders Game
- Flappy Bird Game
- Flashing Heart Project
- Beating Heart Project
- Snap the Dot Game
- Emoji Project
- Animated Animals Project
Looking to learn Robotics? Explore Wiingy’s Online Micro:bit Classes For Kids to learn from top micro:bit experts.
FAQs
How to make a coin game in micro:bit?
The following steps are involved in making a coin game in micro:bit:
- First, create a LED sprite [Coin] at a random position
- Create another LED sprite [Catcher] and place it in the center of the display
- Now determine the left, right, up, and down tilt of the micro:bit
- Add score to the game
- Lastly, add a game-over feature
What is Microsoft MakeCode?
Microsoft MakeCode is a simple visual coding language. It has a drag-and-drop interface, which means the codes are in the shape of blocks and can be dragged and dropped onto the editor in order to create and run a script.
What are some of the easy micro:bit projects I can make?
You can make many easy and simple and easy micro:bit projects like flashing heart, beating heart, apple catching game, coin game, flappy bird game, snap the dot game, space invaders game, and many more.
Is Coin game in micro:bit project beginner-friendly?
Yes, the Coin game is a beginner-friendly project that one can create on micro:bit as this project doesn’t involve many complex steps.
What are Microsoft MakeCode projects?
MakeCode is a programming language. In micro:bit, one can create projects using the MakeCode coding language. It is a simple block-based programming language that uses a drag-and-drop interface. The projects created on micro:bit using Microsoft MakeCode language are called Microsoft MakeCode projects.
We hope that the above blog has helped you in creating an exciting project like Coin game. If you have any doubts or want tutorials on other micro:bit projects, then ping us in the comment section below and we will get back to you as soon as possible.