Using Scratch, children will be able to create many things, ranging from games, stories, animations, music, videos, and much more. These projects then can be shared with the Scratch online community to increase collaboration and the sense of community among the users.
The process to save and share a project on Scratch is simple and easy like all of the other Scratch features. With this blog, we will guide you on how to save and share your projects in Scratch in a few simple steps.
Looking to learn Scratch coding? Explore Wiingy’s Online Scratch Coding Classes For Kids to learn from top Scratch coding experts.
This is Chapter 5.4 in the
Scratch Tutorial for Beginners
How to save and share a project on Scratch?
Saving and sharing projects on Scratch is an easy and uncomplicated process, like all the other features of Scratch!
- To save a project on Scratch, simply click on the “save to your computer” option under the “File” option in your navigation bar.
- To share your Scratch project, click on the “Share” option on your project page.
Read the detailed steps given below on how to save and share your Scratch projects.
How to save a project on Scratch?
Saving the projects on Scratch is easy and pretty straightforward, much like the language itself. Follow the below steps to save a project on Scratch:
- Step 1: First, head to the top left corner of the Scratch Desktop and pull down the dialog box “File”. Here, I would like to stress how simple it is to navigate the functions of the Scratch Desktop.
- Step 2: After clicking on “File” the drop-down box shows us the option to save as “Save to your computer”. Click on it.
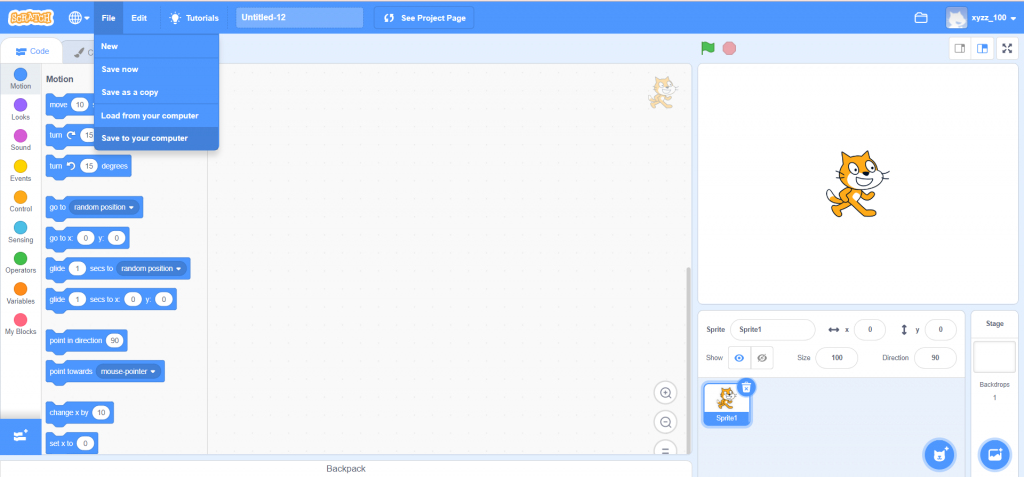
- Step 3: Clicking on “Save to your computer” directly takes us from the Scratch Desktop to the file explorer on our computer, where we can save the project like we would save any normal file. However, one must remember that the required file extension for saving a Scratch project of any kind on the computer is “.sb”. Failing to use this extension may result in your project not being saved successfully.
How to share your Scratch project?
Having saved your Scratch project, you may wish to share it with your friends and others. This language and its desktop allow you to do that as well. Follow the below steps to share your Scratch projects:
- Step 1: To share a project, first go to the icon on the Scratch Desktop. Click on the drop-down arrow, found on the icon, to access all the projects you have created on the Scratch Desktop under the option “My Stuff“.
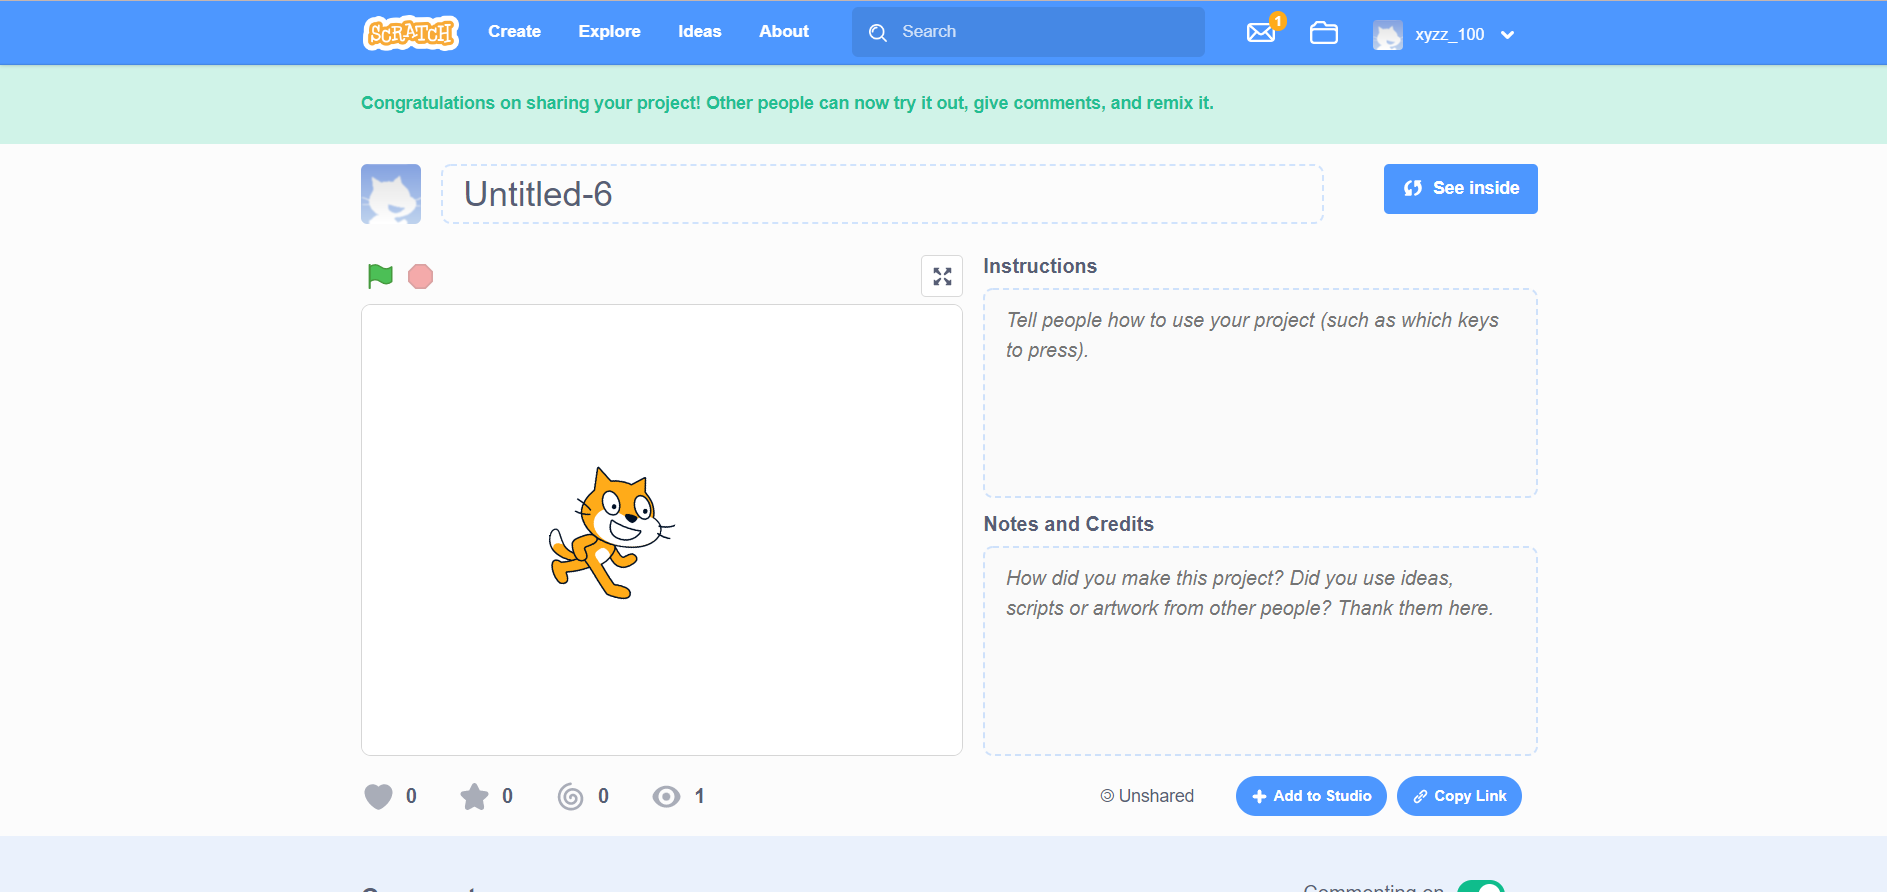
- Step 2: Once you have clicked “My Stuff,” you will be redirected to a page that has a list of all your saved projects. To share a certain project, go to that project’s page and click on “See Inside“. This action opens up a certain project.
- Step 3: On the Scratch Desktop, the option “Share” will be visible in bright orange, right next to your project title. Clicking on this option will bring you to another window where you can share your projects. You can tweak the instructions, notes, credits, and titles to customize them. You can also share your project on Scratch or copy the project link and paste it on whatever platform you want to share it on.
Conclusion
Scratch is a simple language to navigate. It has an easy-to-use desktop with very clear and direct instructions for actions like saving and sharing. Compared to an interpreted language like Python, Scratch is a lot easier and definitely an option for children who wish to dip their toes into coding and such computer languages.
In today’s world where computer technology is advancing by leaps and bounds, such easy-to-use and accessible languages are extremely helpful and a good starting point for children to introduce themselves to interpreted languages.
Looking to learn Scratch coding? Explore Wiingy’s Online Scratch Coding Classes For Kids to learn from top Scratch coding experts.
FAQs on how to save and share a project on Scratch?
How save and share a project on Scratch 3.0?
Simply click on the “file” icon on the top left corner of the Scratch editor. Select the “save to your computer” option from the drop-down menu. This will save your file to your computer. To share your projects, go to “my stuff” on Scratch, select the project you want to share, and then click on the “Share” option. Read the above guide for detailed information.
How to save and share a project on Scratch programming?
Simply click on the “file” icon on the top left corner of the Scratch editor. Select the “save to your computer” option from the drop-down menu. This will save your file to your computer. To share your projects, go to “my stuff” on Scratch, select the project you want to share, and then click on the “Share” option. Read the above guide for detailed information.
How to save the Scratch project to Google drive?
Simply, go to your Google drive and click on the “new” option to upload a file. Click on “file upload” to upload the Scratch project file saved on your computer.
How to share a Scratch project?
To share your projects, go to “my stuff” on Scratch, select the project you want to share, and then click on the “Share” option.
We hope this blog helped you in understanding the process of saving and sharing your Scratch projects. If you want to continue your Scratch learning journey with us and want to learn about some other interesting features of Scratch, then read our blog on remixing Scratch projects!
Other Useful Reads
Confirm and Verify your Scratch Account