
Scratch is a visual programming language that allows kids to create their own interactive stories, games, and animations. Scratch also helps kids in learning to code effortlessly and in less time.
The Scratch interface consists of four panels: The Stage, Scripts Area, Costume Pane, and Sound Pane. The Stage is where your projects will be displayed while Scripts Area is where you will write your code blocks. Costume Pane is used for storing costumes (i.e., character designs) for your sprites while Sound Pane is used for storing sound effects for your projects.
This blog will be a fun Scratch tutorial for kids to easily understand and learn how to use and get started with Scratch because building an actual Scratch project is much easier than you think. So, in the blog, the Scratch tutorial will be explained by making a fun project named “Making the cat fly !!”
Looking to learn Scratch coding? Explore Wiingy’s Online Scratch Coding Classes For Kids to learn from top Scratch coding experts.
Scratch tutorial for kids
Creating projects on Scratch is fun but can also be intimidating for a beginner. There are so many features of this platform that users can use to create projects but are mostly unaware of them. But don’t worry we are here to help!
If you are interested in creating a project in Scratch then just follow the following steps:
- Step 1: Go to the official website of Scratch and complete the sign-in process.
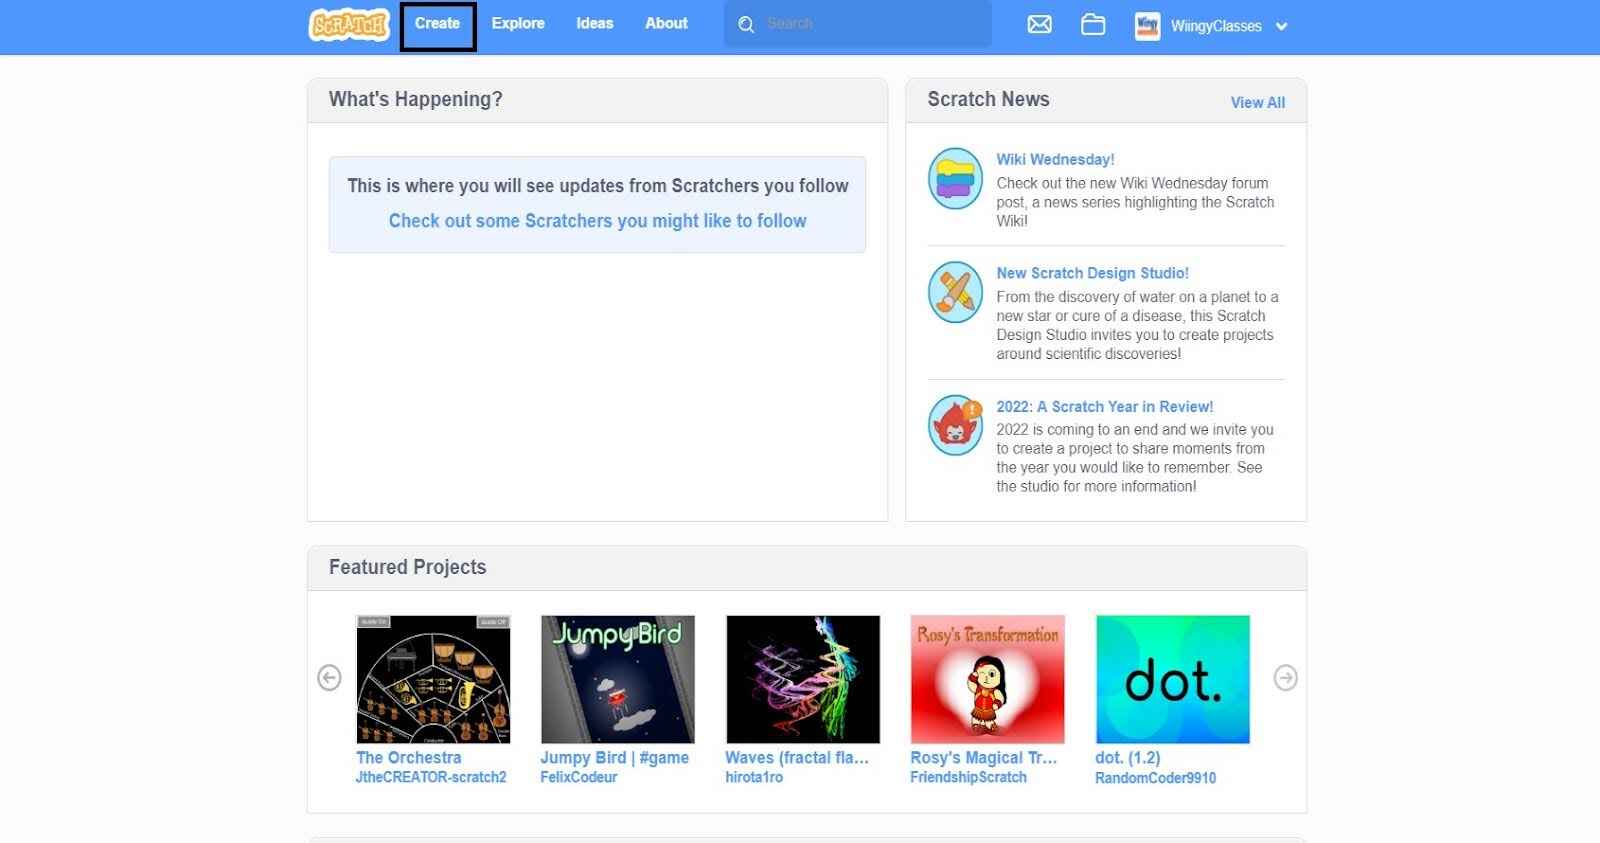
- Step 2: Once you are done with the sign-in process, click on the “Create” button in the top-left corner of the window.
- Step 3: First, delete the cat sprite from the project because we will be adding a new sprite as per the project. So, to delete the cat sprite, just select the sprite box in the ‘Sprite Pane’ and click on the trash symbol available at the top right corner of the box.
- Step 4: Now pick the background and the character as per your choice. To choose the background, click on the blue circle available at the extreme right corner of the Scratch editor and to choose the character, click on the blue circle with the cat icon, available just left of the background circle.
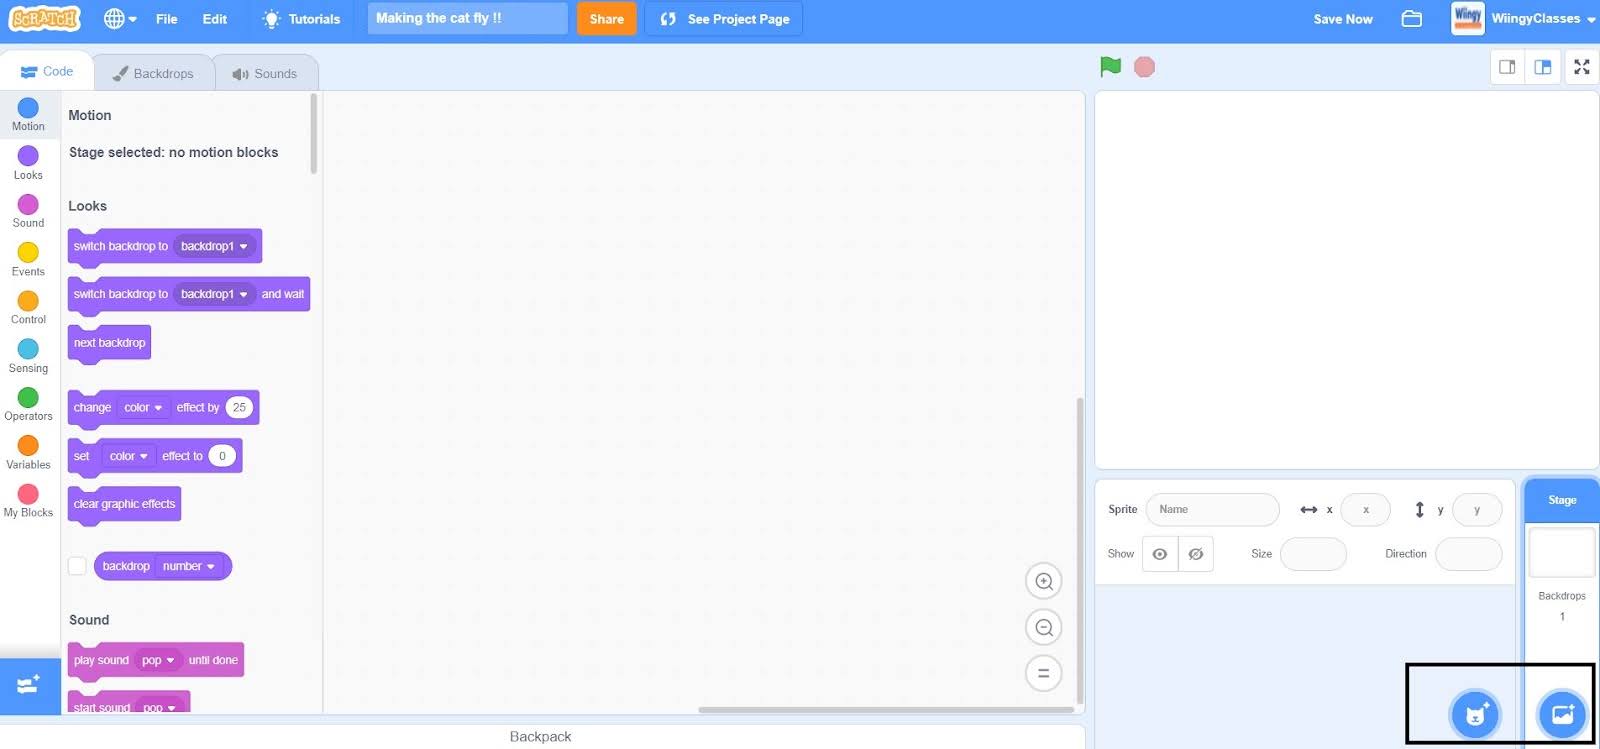
- Step 5: To select a particular background, click on the blue circle of the background and select the first option that says ‘Choose a Backdrop’.
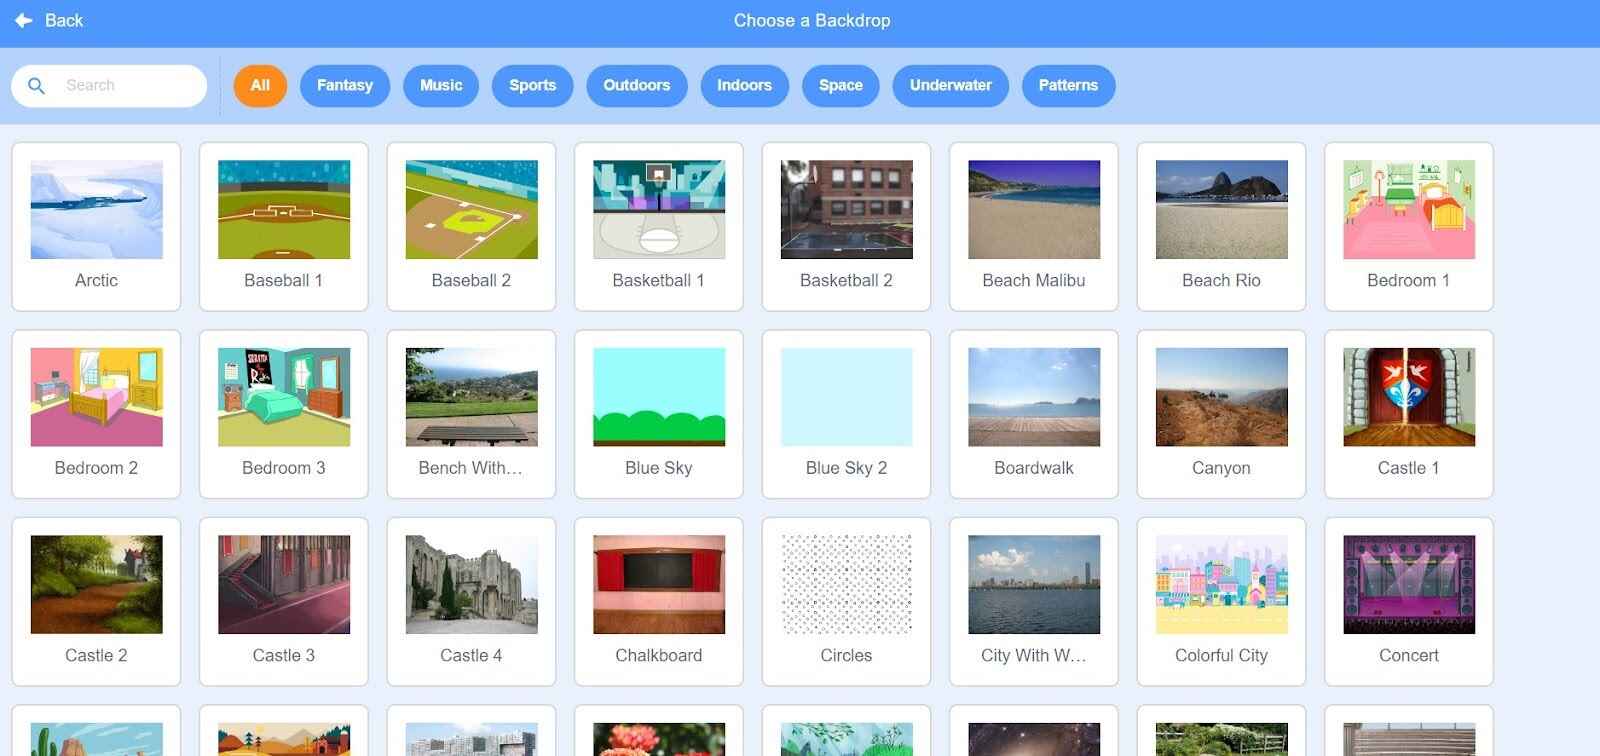
- Step 6: Once you click on the ‘Choose a Backdrop’ option, the following screen will appear. So, just search for ‘Blue Sky 2’ (we are choosing this background for this project) and select it.
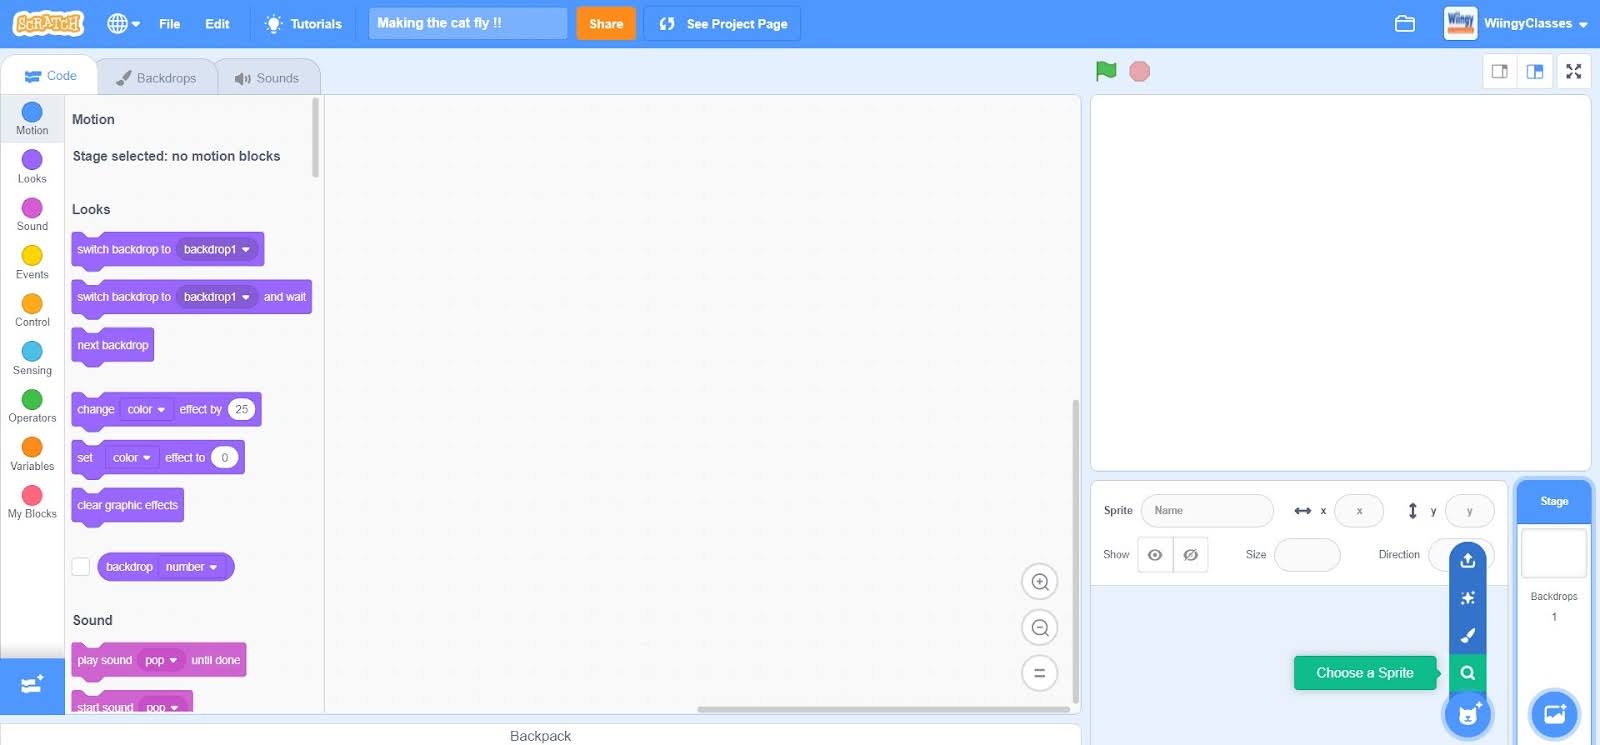
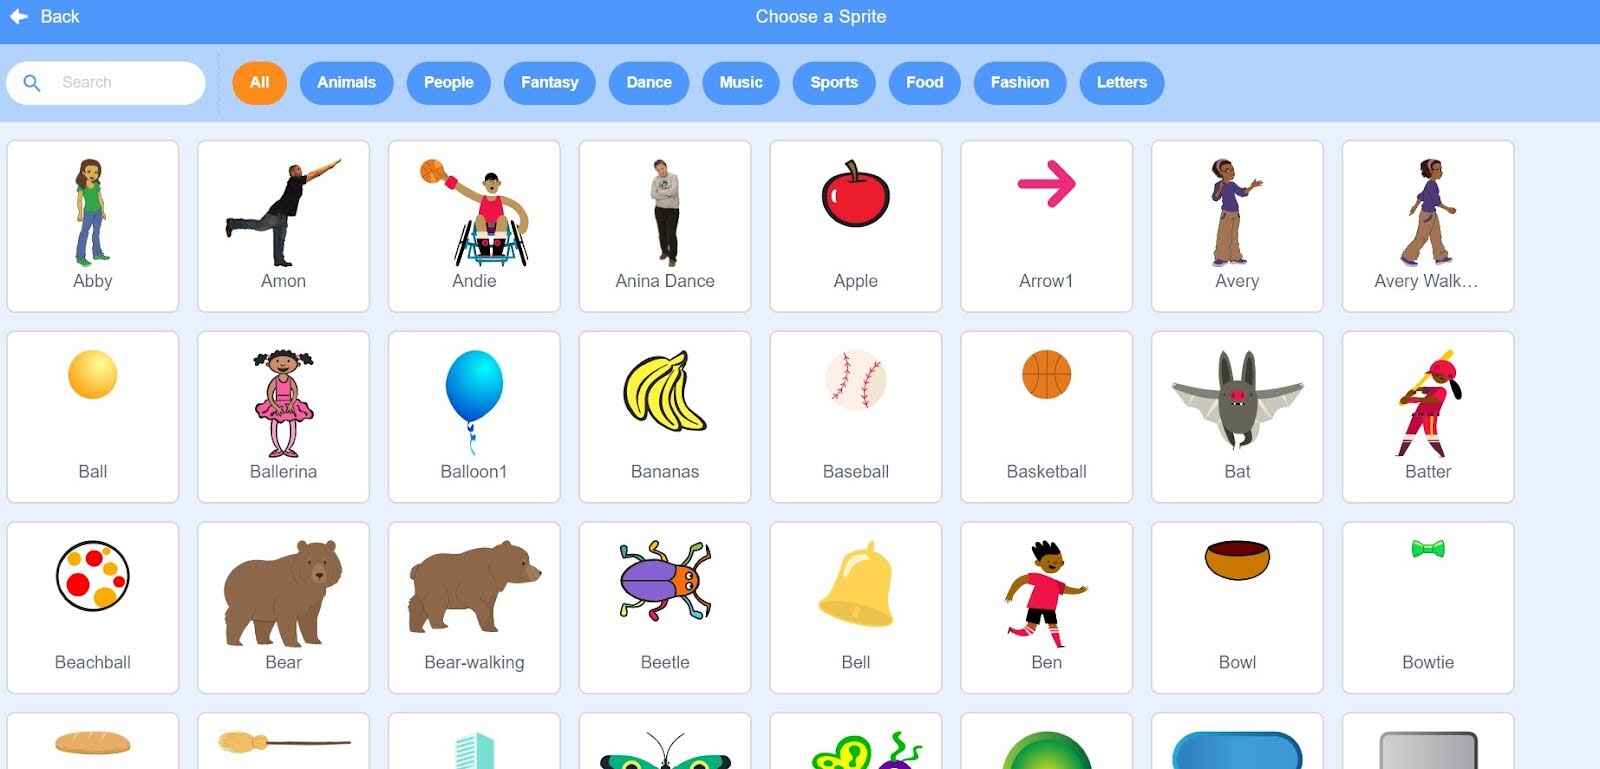
- Step 7: To select a particular character, click on the blue circle with the cat icon and select the first option that says ‘Choose a Sprite’.
- Step 8: Once you click on the ‘Choose a Sprite’ option, the following screen will appear. So, just search for ‘Cat Flying’ (we are choosing this sprite for this project) and select it.
- Step 9: Go to the “Events” block in the block palette, select the “when green flag clicked” block, and drag it to the coding area.
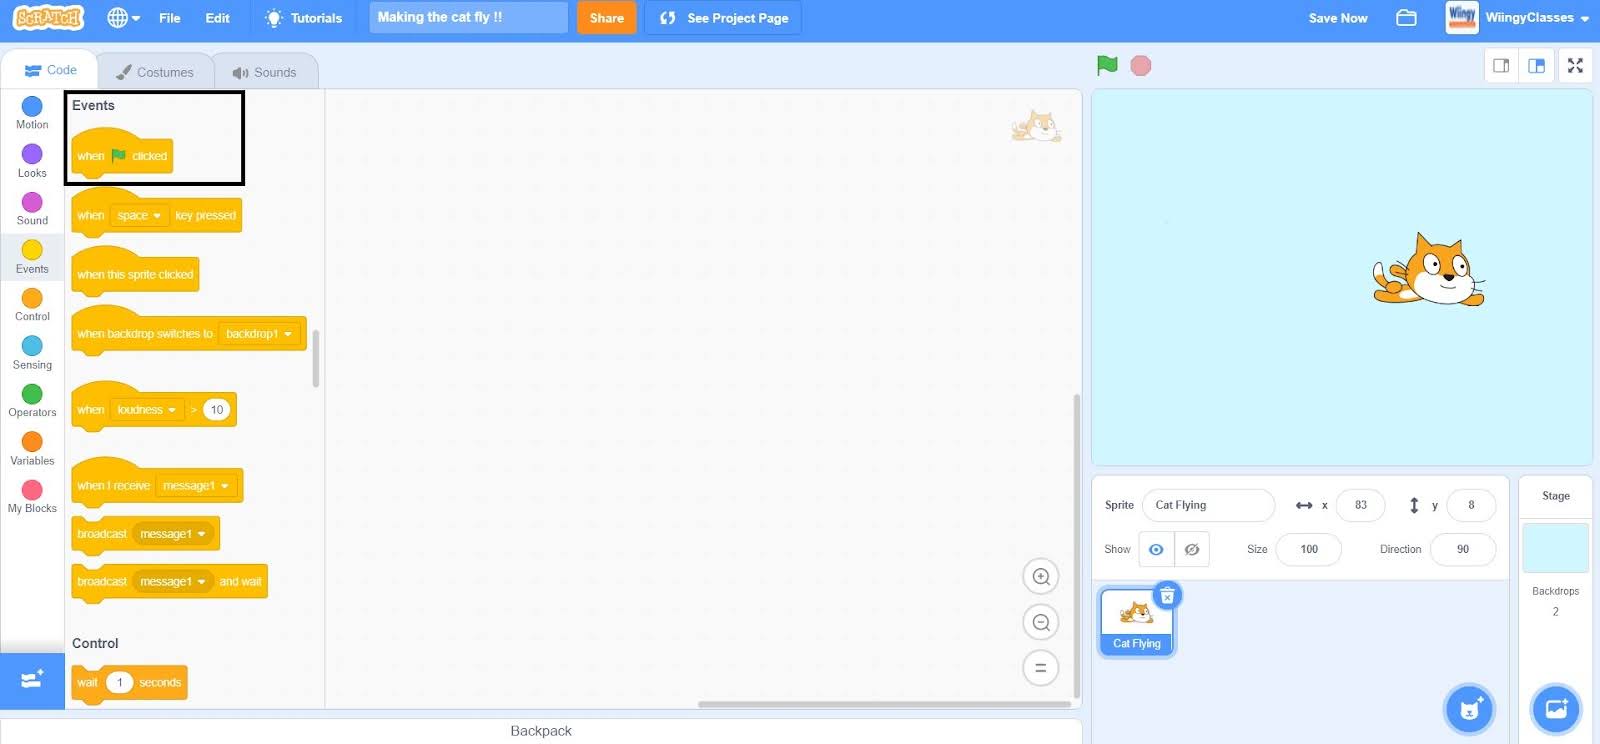
- Step 10: At the beginning of this project, let’s make the cat display a welcome message. So, go to the “Looks” block in the block palette, select the “say ( ) for ( ) seconds” block, drag it to the coding area, and place it under the “when green flag clicked” block.
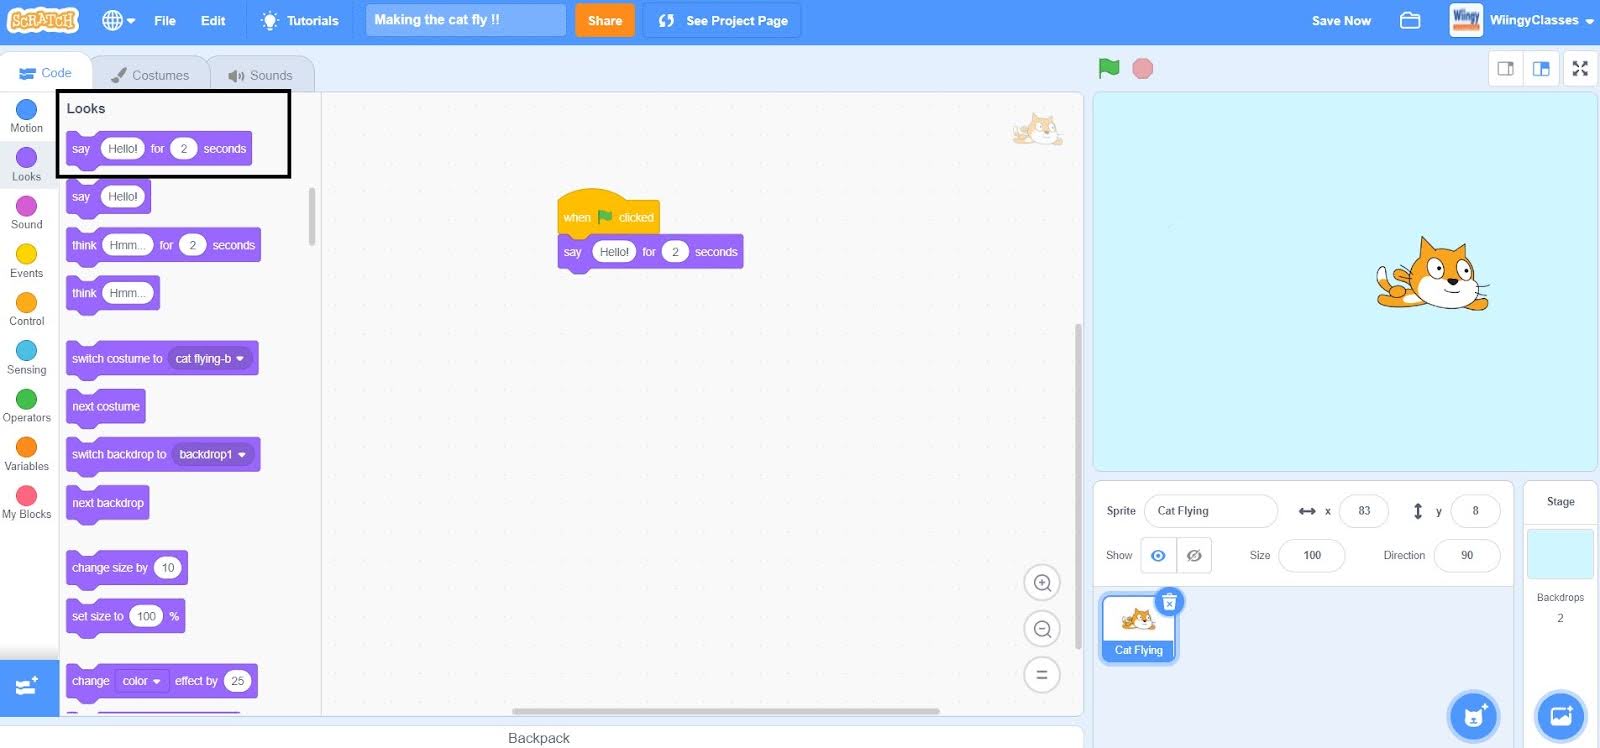
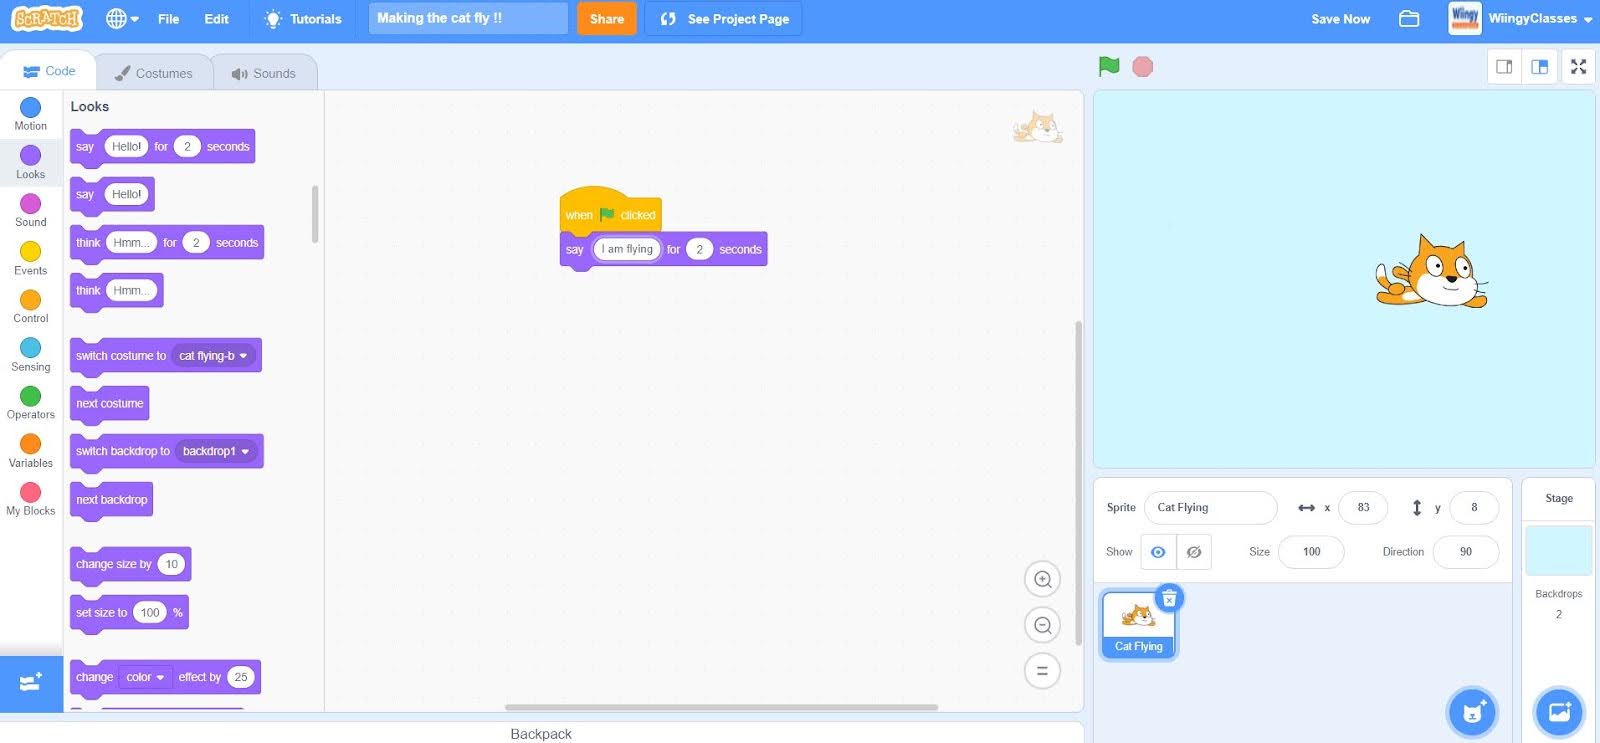
- Step 11: In the “say ( ) for ( ) seconds” block, put ‘I am flying’ in the first space and leave the 2 seconds as it is.
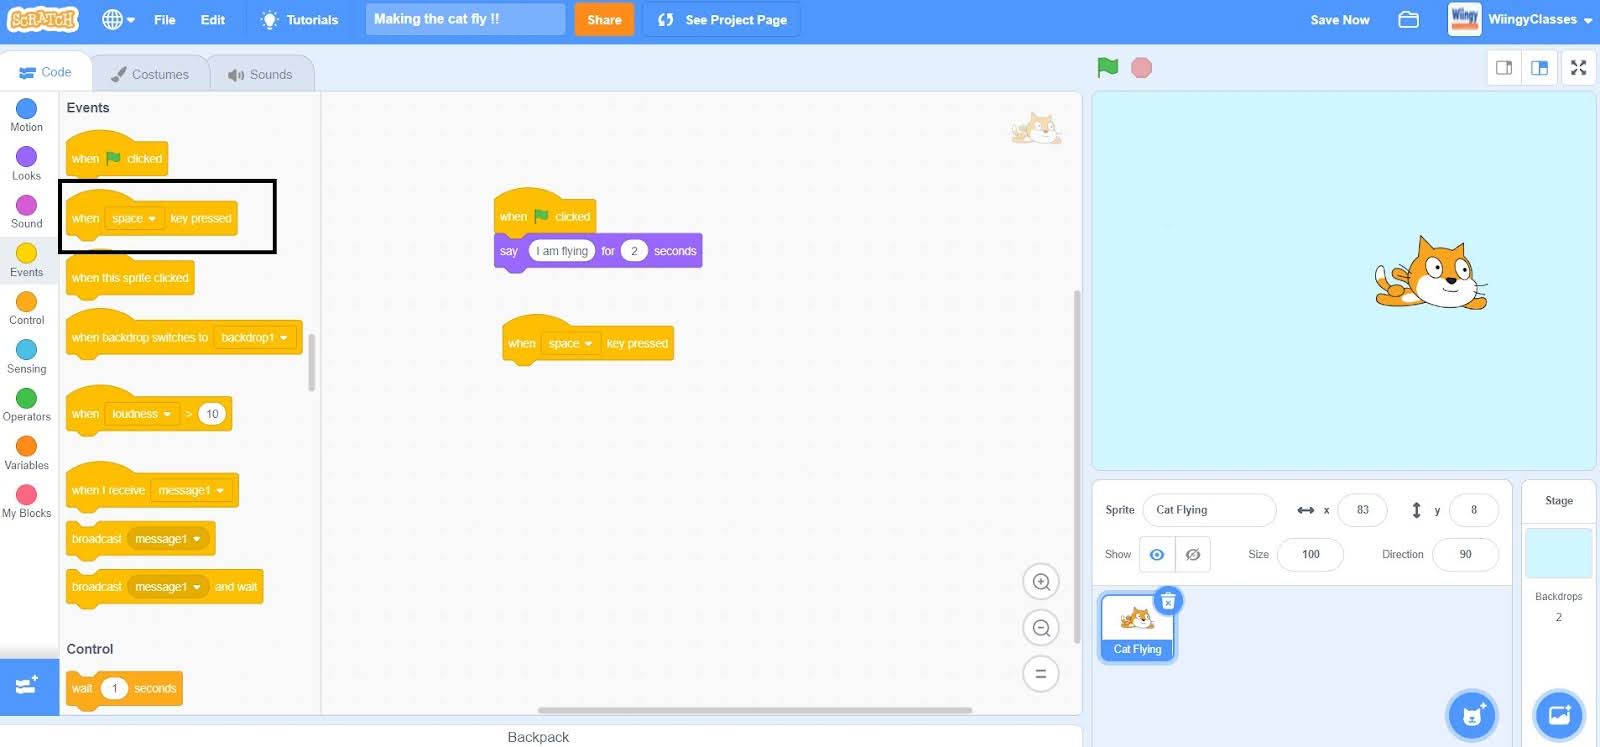
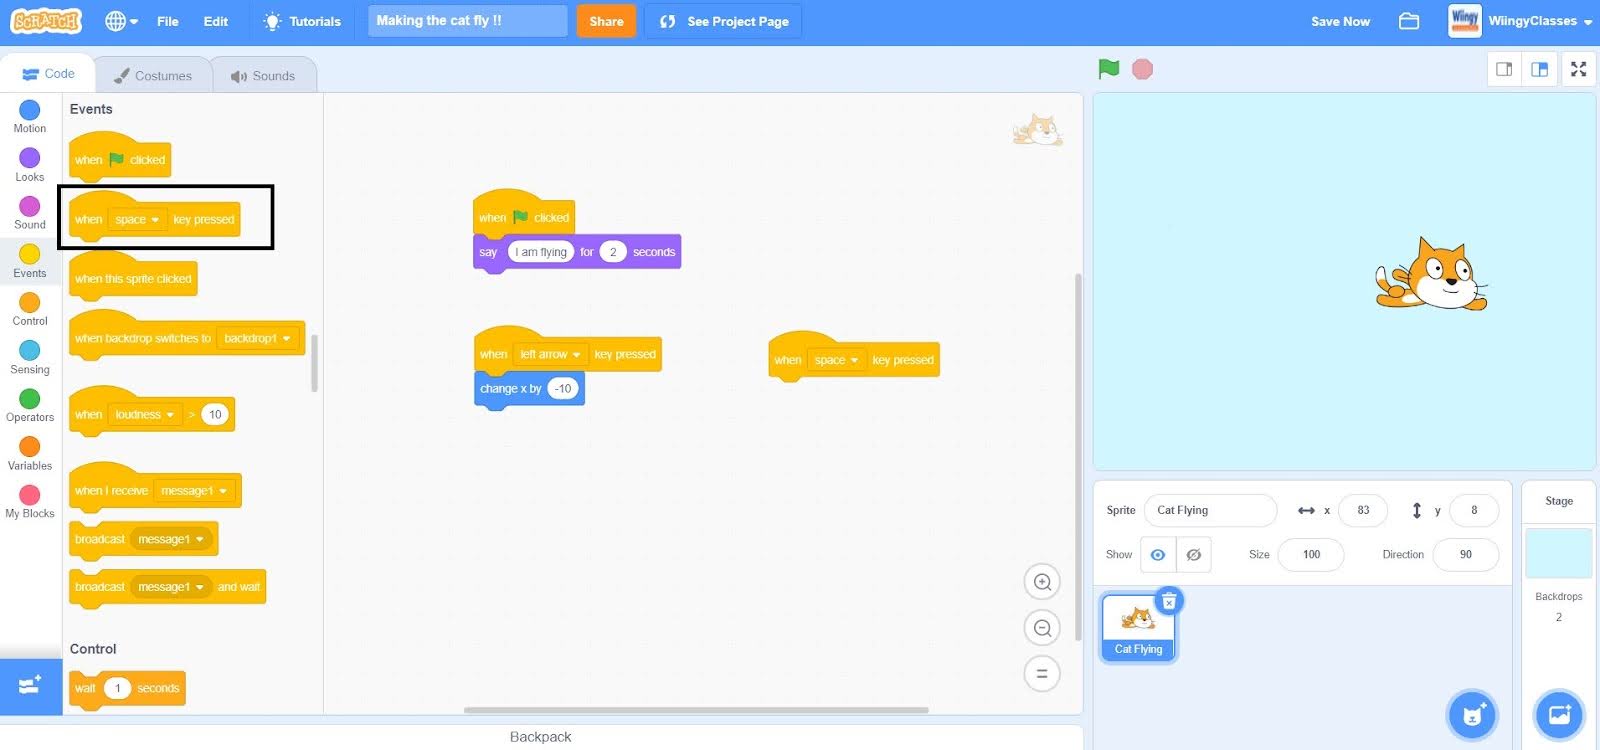
- Step 12: Go to the “Events” block in the block palette, select the “when ( ) key pressed” block, and drag it to the coding area.
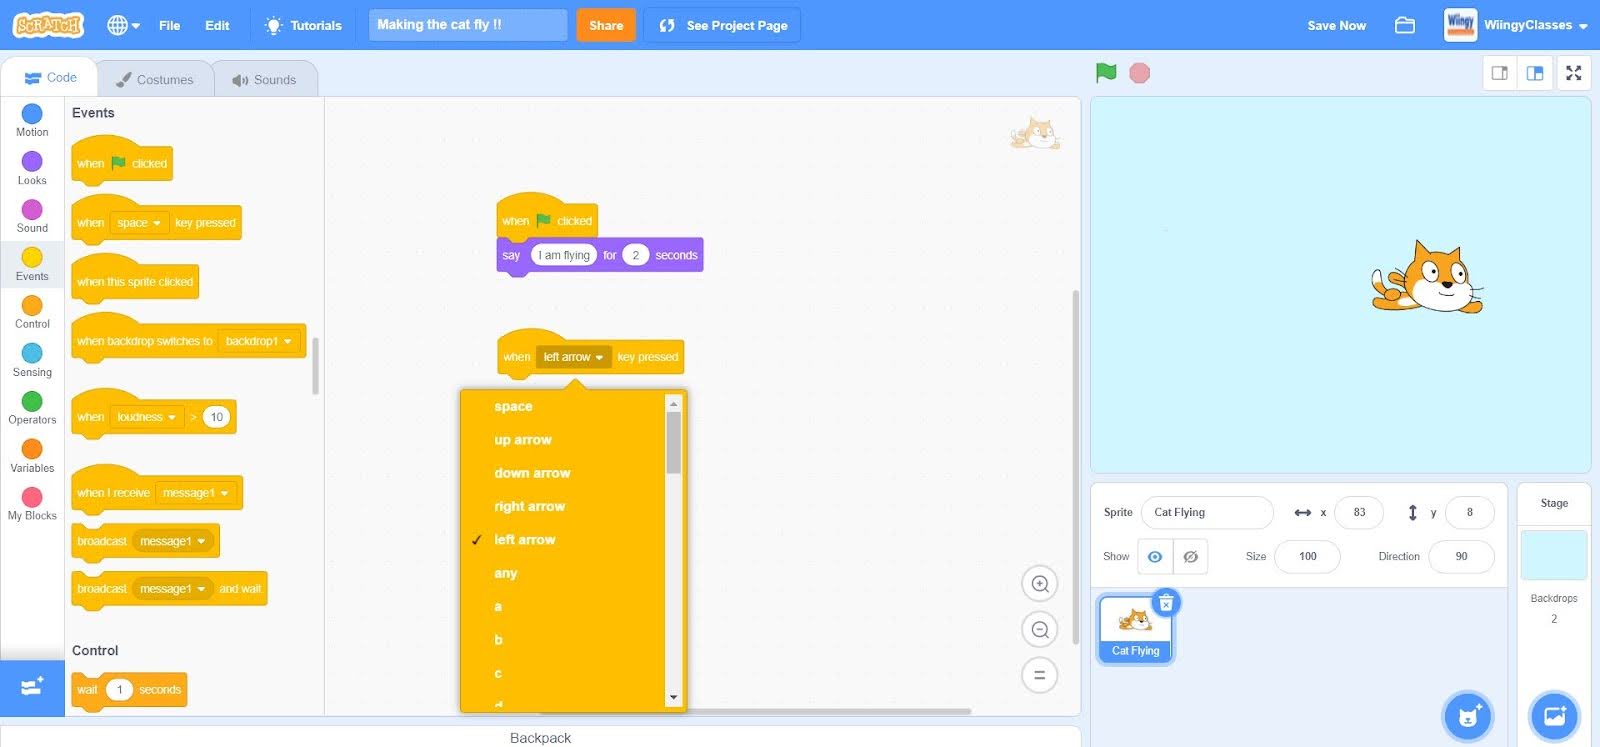
- Step 13: In the “when ( ) key pressed” block, change the value in the first space by clicking on the drop-down and selecting ‘left arrow’.
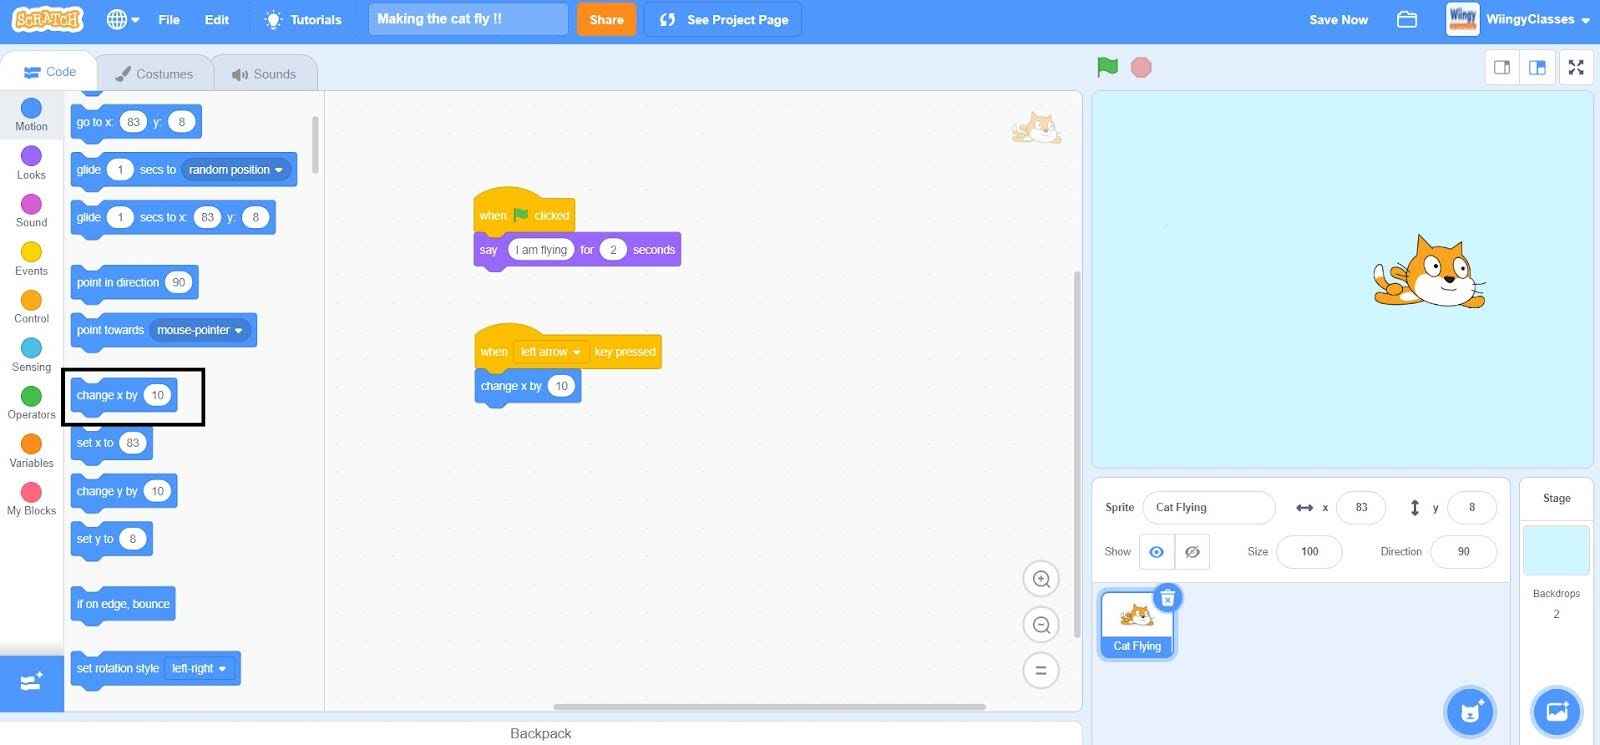
- Step 14: Go to the “Motion” block in the block palette, select the “change x by ( )” block, drag it to the coding area, and place it under the “when ( ) key pressed” block.
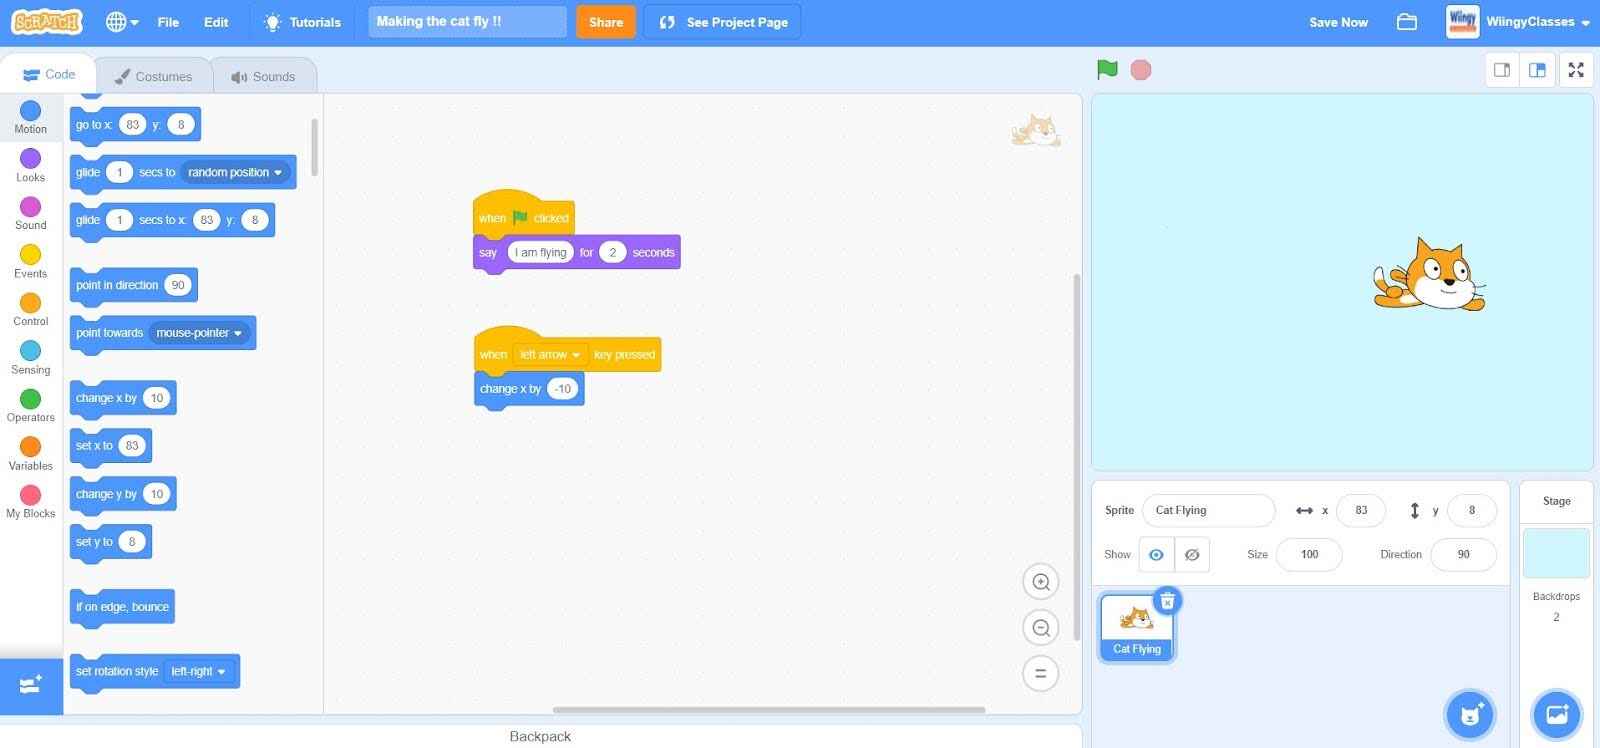
- Step 15: In the “change x by ( )” block, put the value as -10 to show the leftward movement.
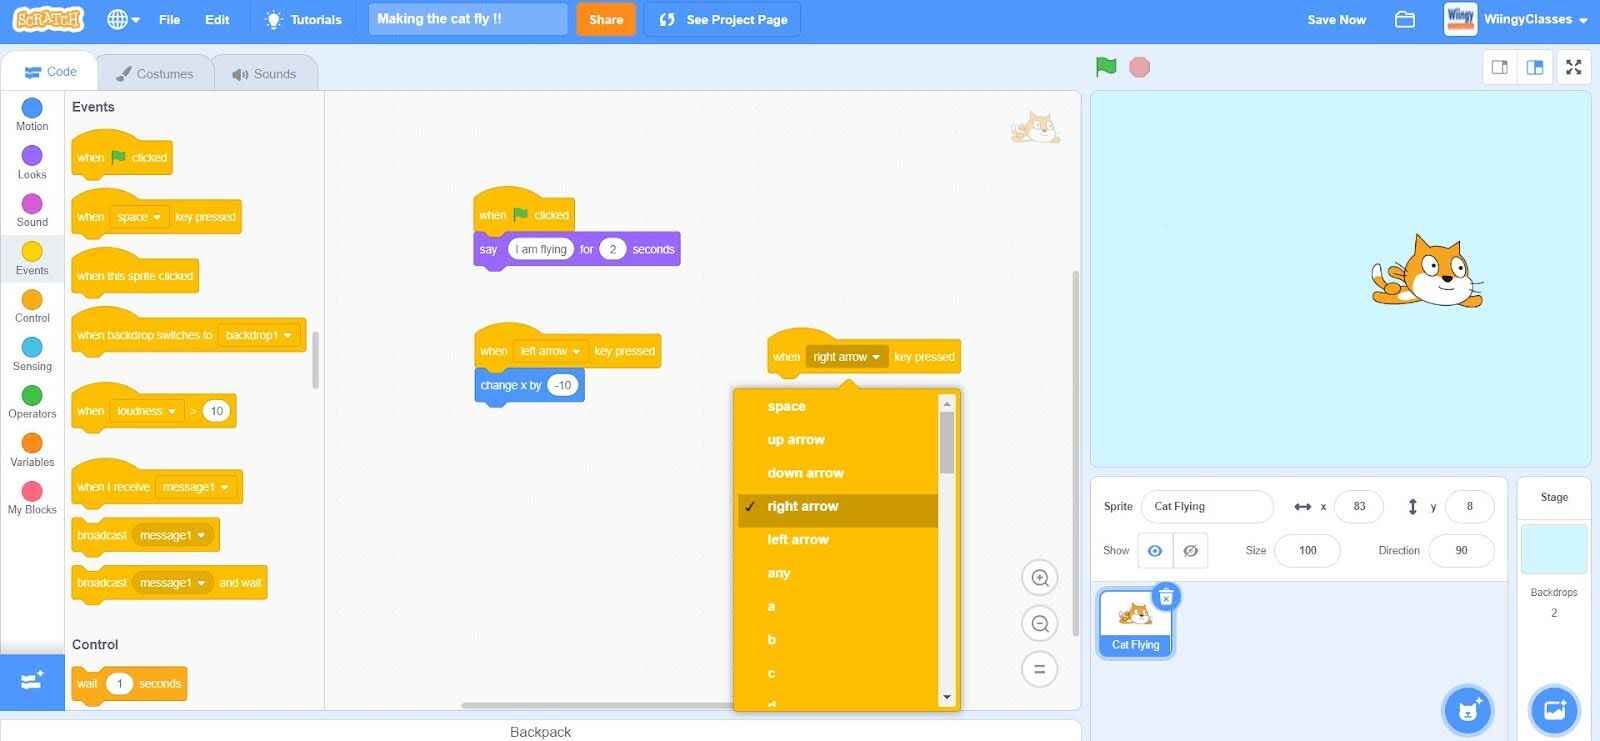
- Step 16: Again, go to the “Events” block in the block palette, select the “when ( ) key pressed” block, and drag it to the coding area.
- Step 17: In the “when ( ) key pressed” block, change the value in the first space by clicking on the drop-down and selecting ‘right arrow’.
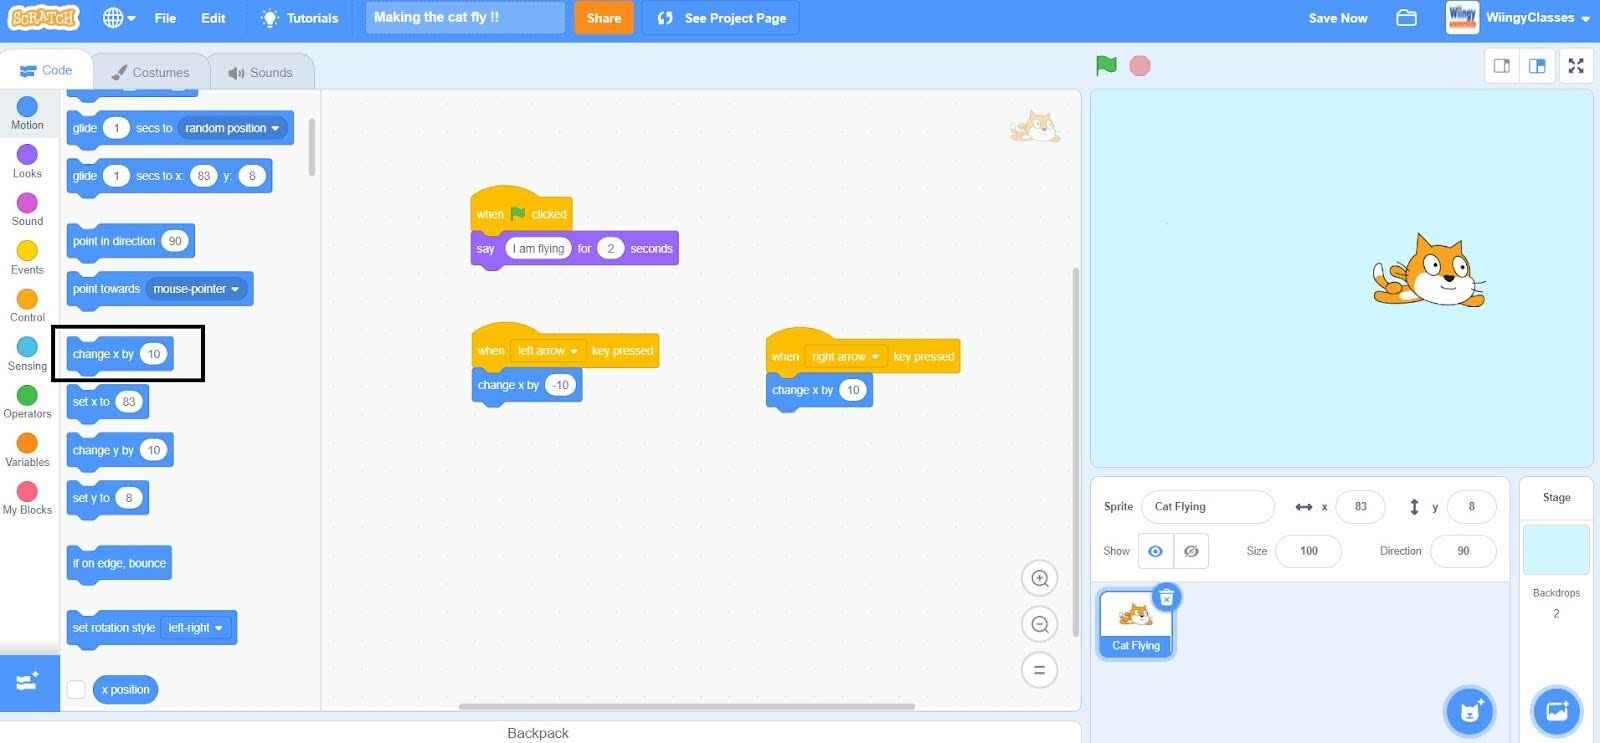
- Step 18: Again, go to the “Motion” block in the block palette, select the “change x by ( )” block, drag it to the coding area, place it under the “when ( ) key pressed” block, and leave the value as 10.
- Step 19: To take care of the vertical movement, go to the “Events” block in the block palette, select the “when ( ) key pressed” block, and drag it to the coding area.
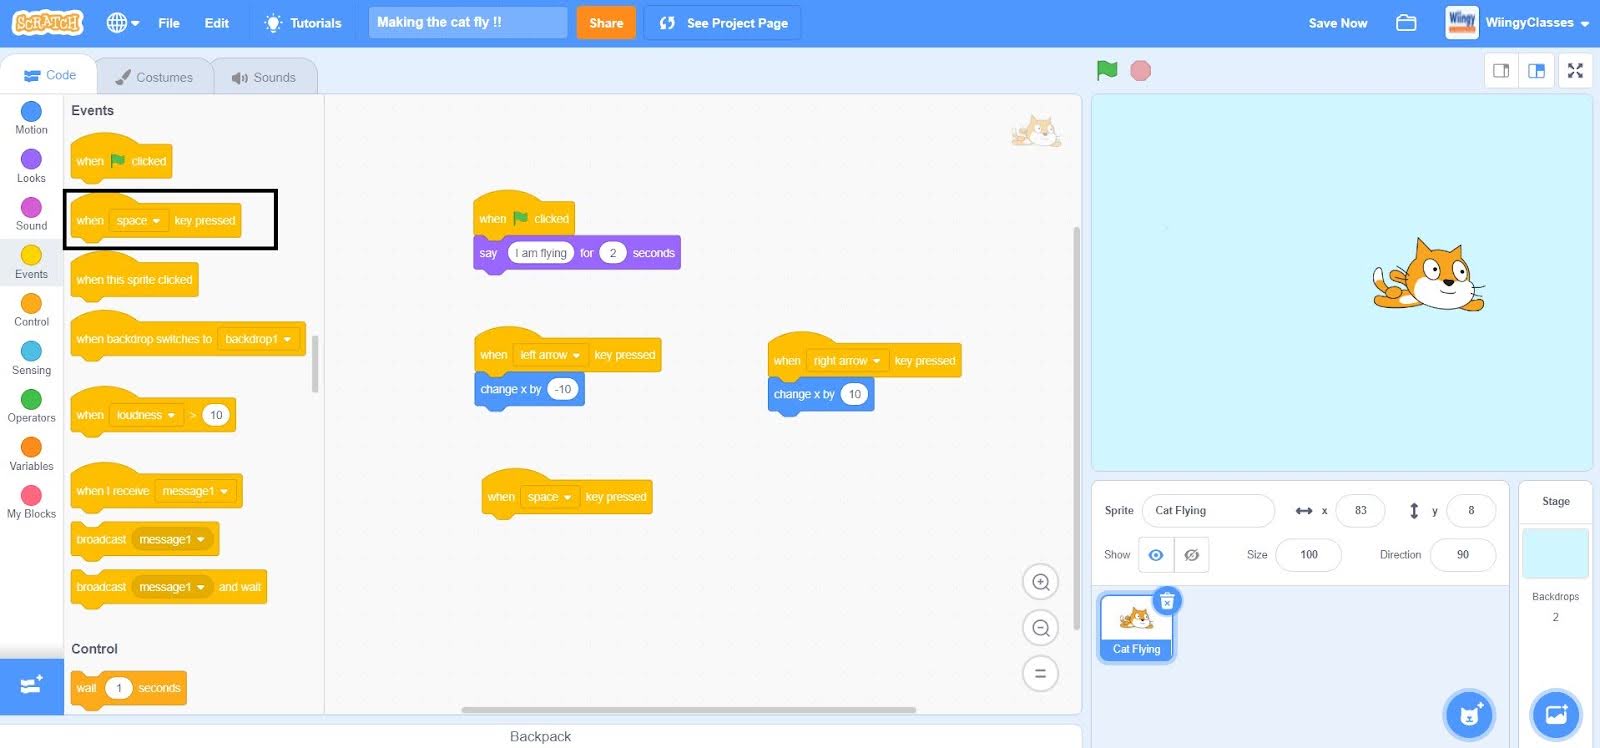
- Step 20: In the “when ( ) key pressed” block, change the value in the first space by clicking on the drop-down and selecting ‘left arrow’.
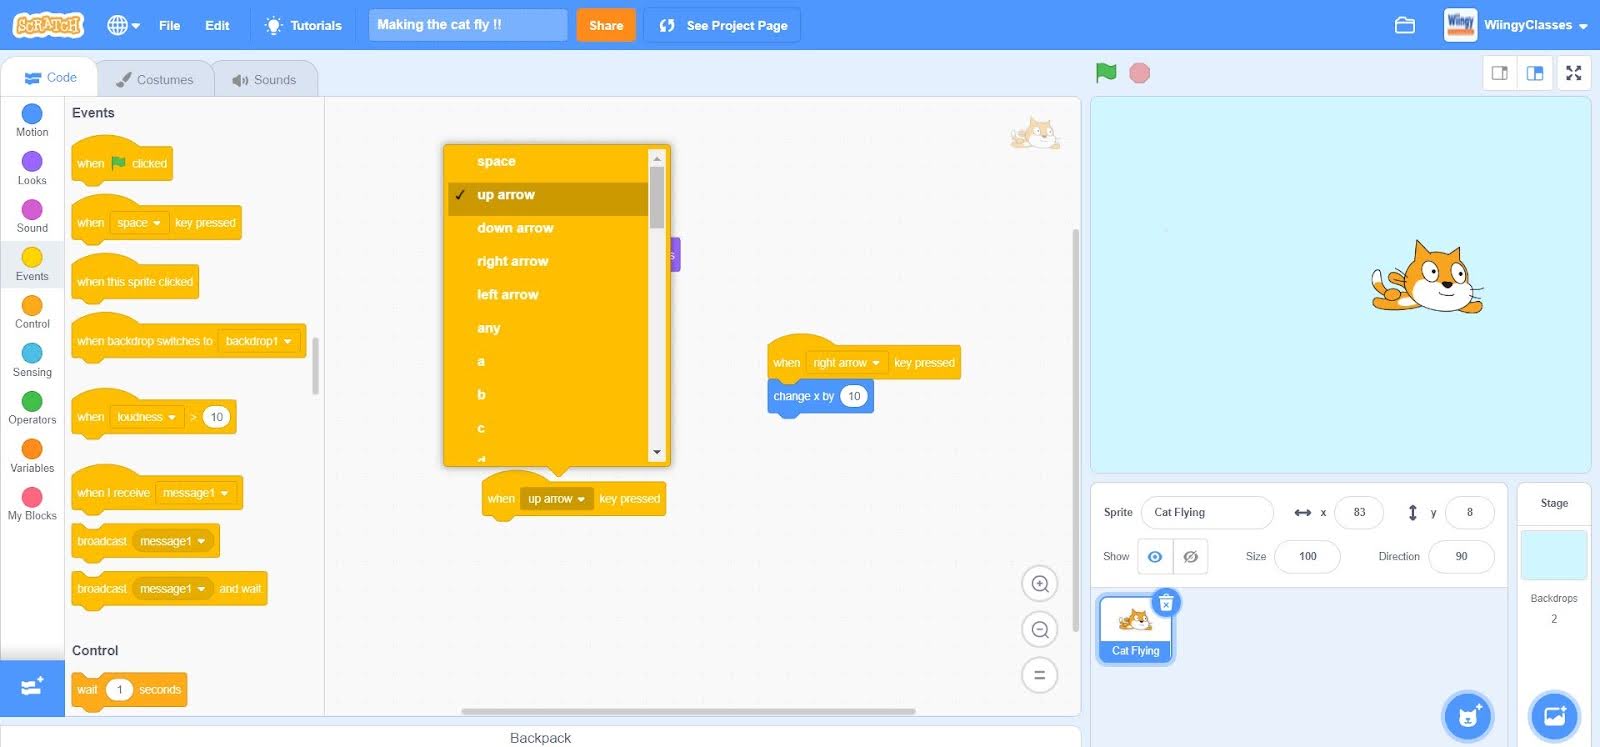
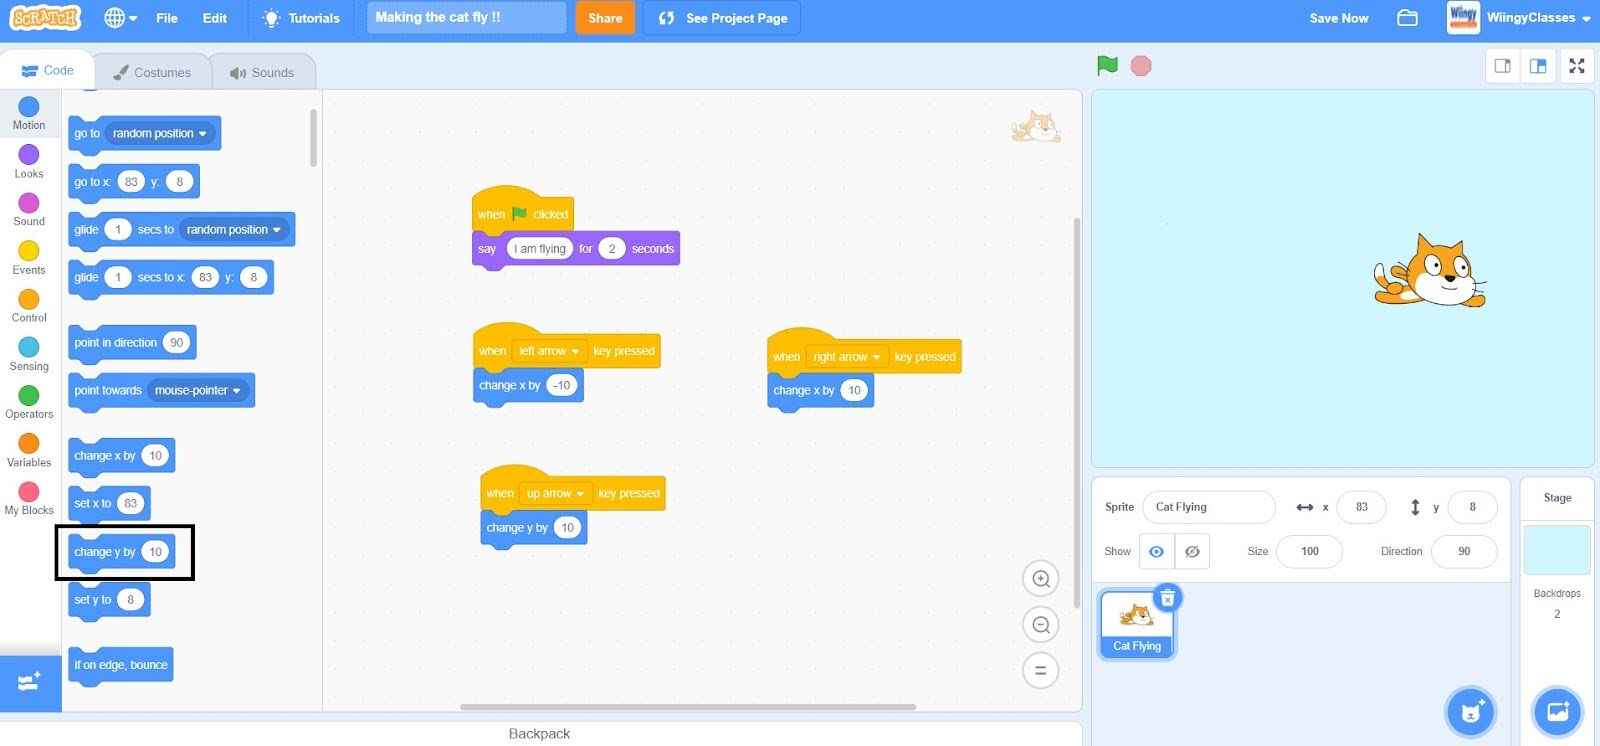
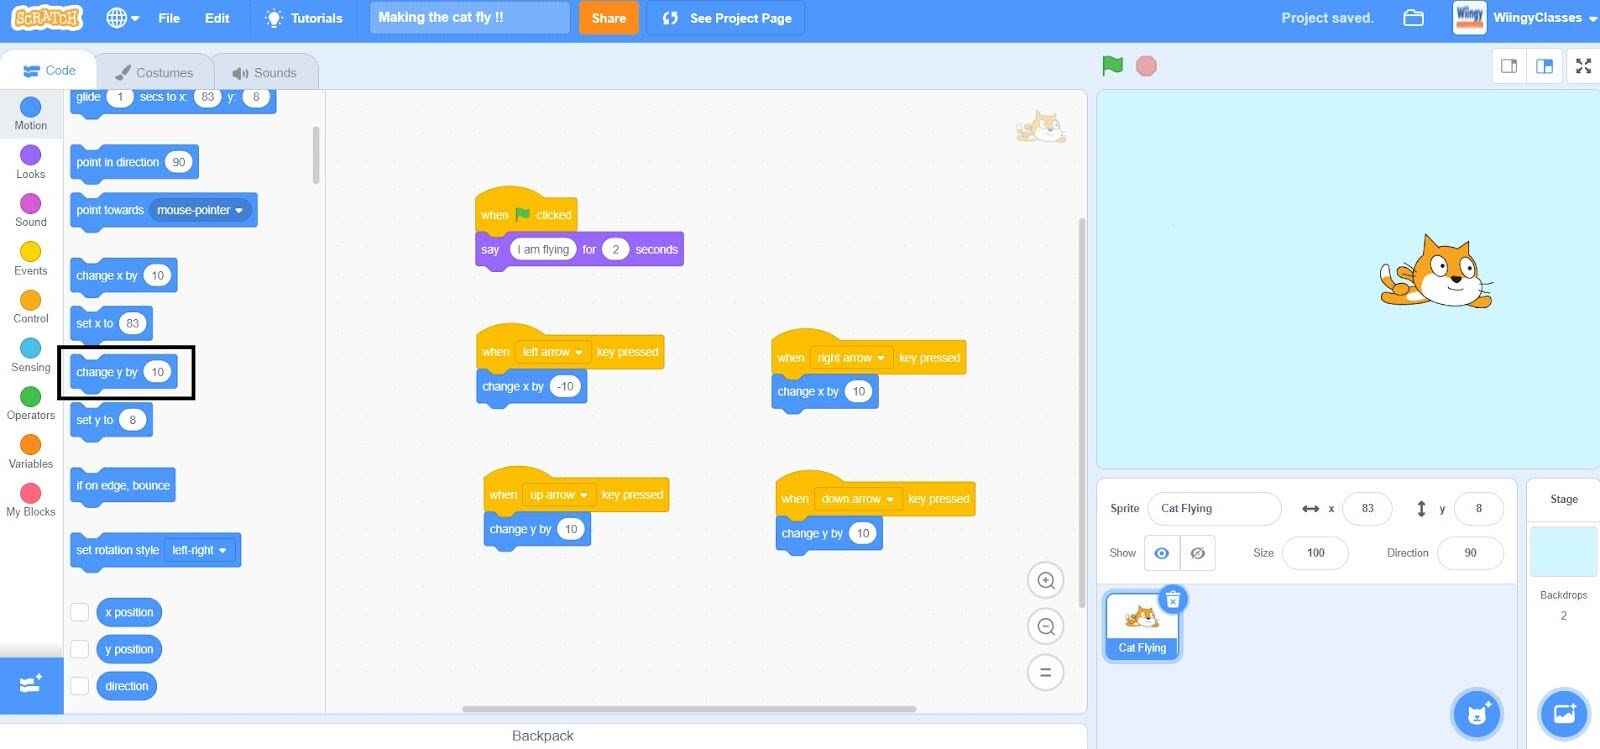
- Step 21: Go to the “Motion” block in the block palette, select the “change y by ( )” block, drag it to the coding area, place it under the “when ( ) key pressed” block, and leave the value as 10.
- Step 22: Again, go to the “Events” block in the block palette, select the “when ( ) key pressed” block, and drag it to the coding area.
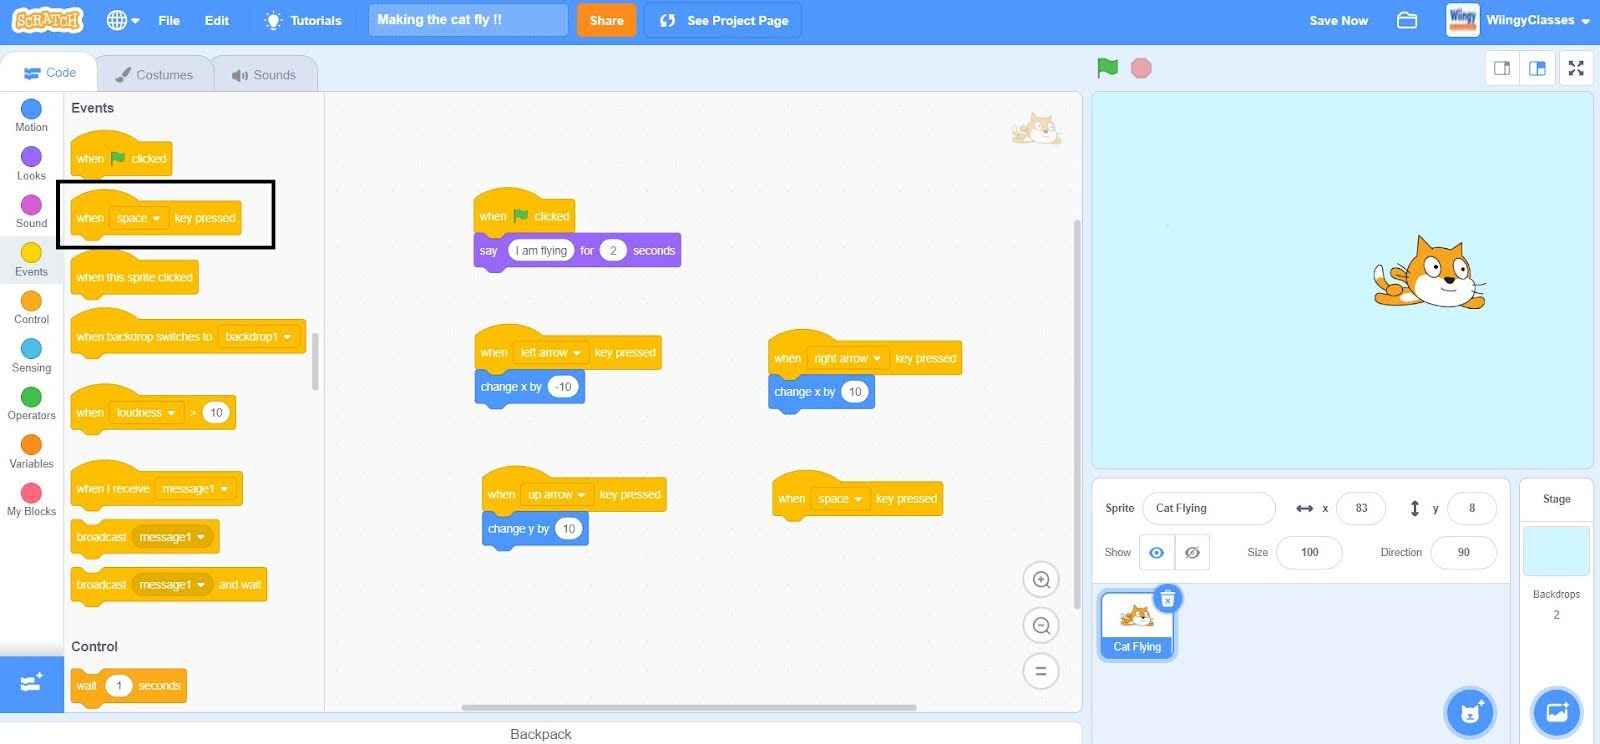
- Step 23: In the “when ( ) key pressed” block, change the value in the first space by clicking on the drop-down and selecting ‘down arrow’.
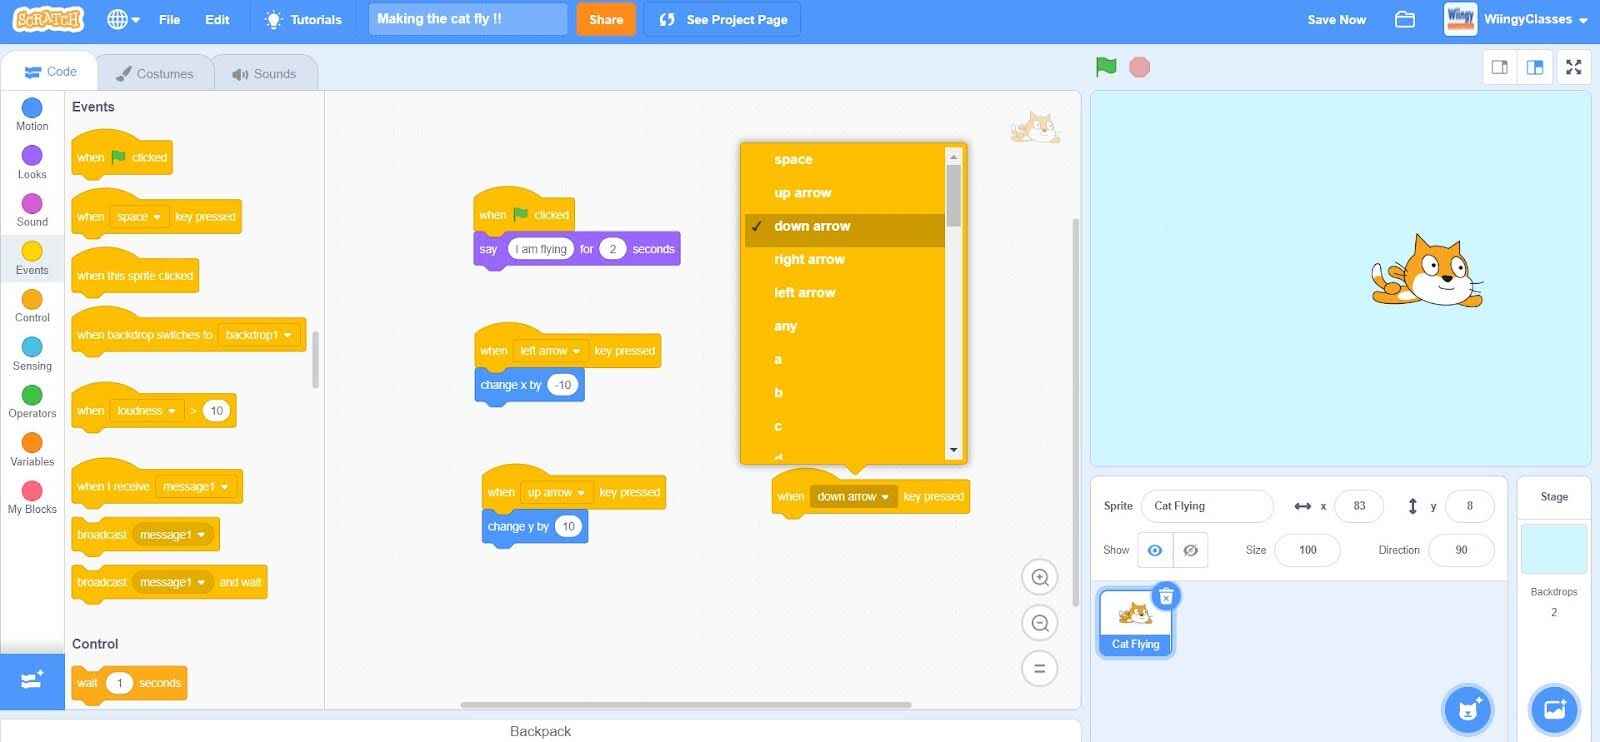
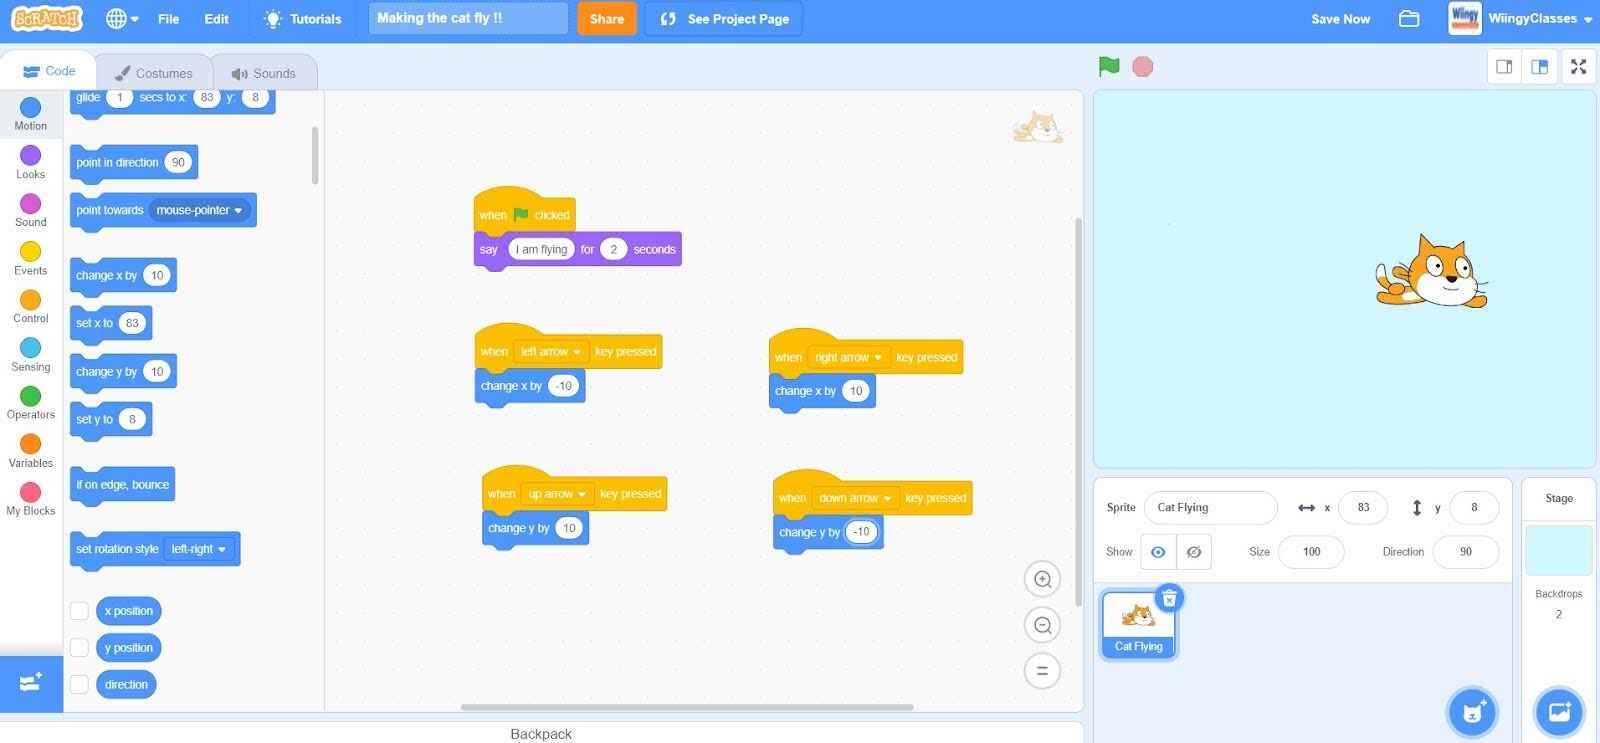
- Step 24: Go to the “Motion” block in the block palette, select the “change y by ( )” block, drag it to the coding area, and place it under the “when ( ) key pressed” block.
- Step 25: In the “change y by ( )” block, put the value as -10 to show the downward movement.
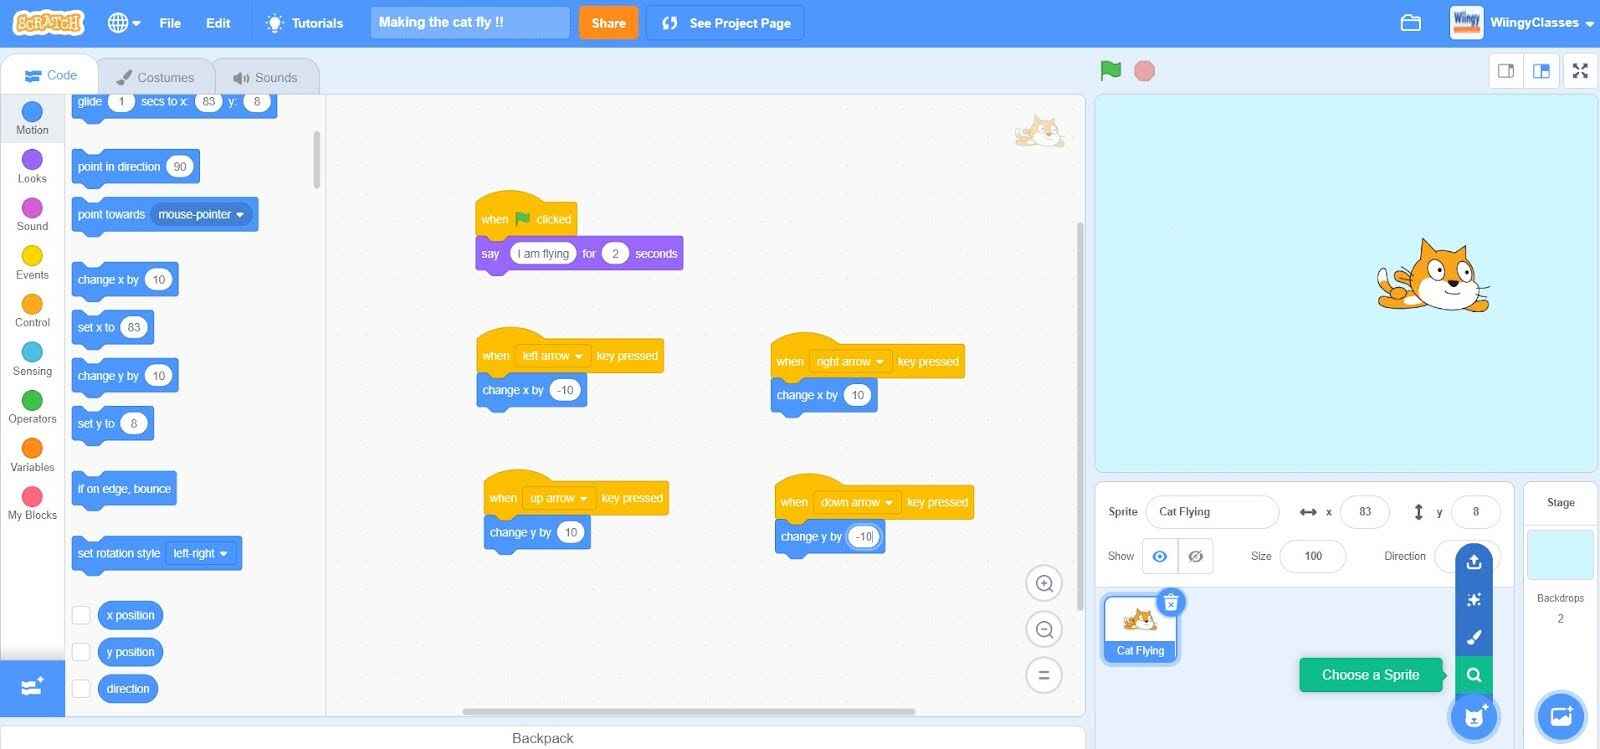
- Step 26: Now, we need to select another object that will be chased by the cat. So, again click on the blue circle with the cat icon that is available in the bottom left corner and select a ‘balloon’ as the new object.
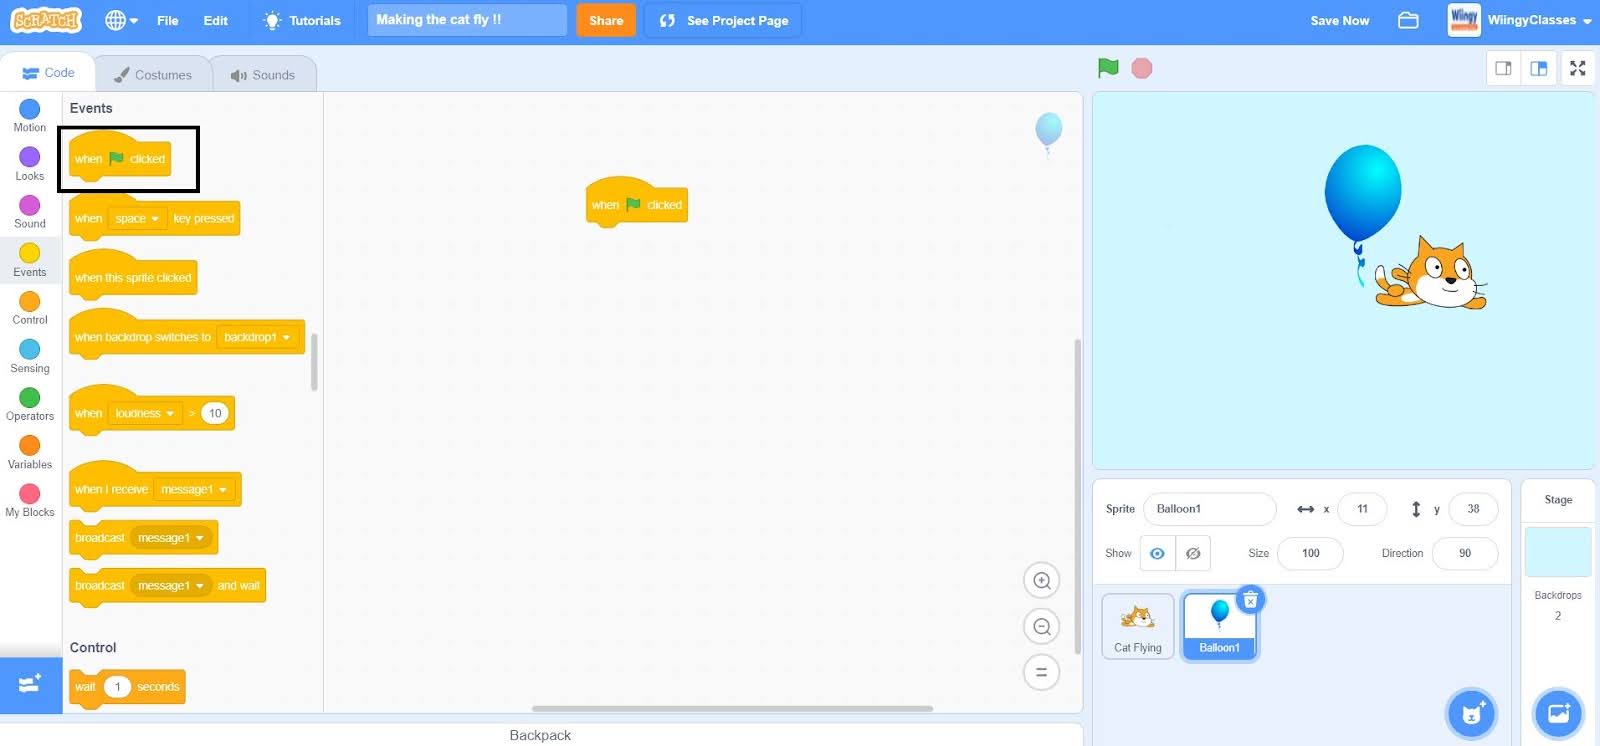
- Step 27: Make sure that the box of the balloon is selected in the Sprite Pane because now we have to code for the balloon.
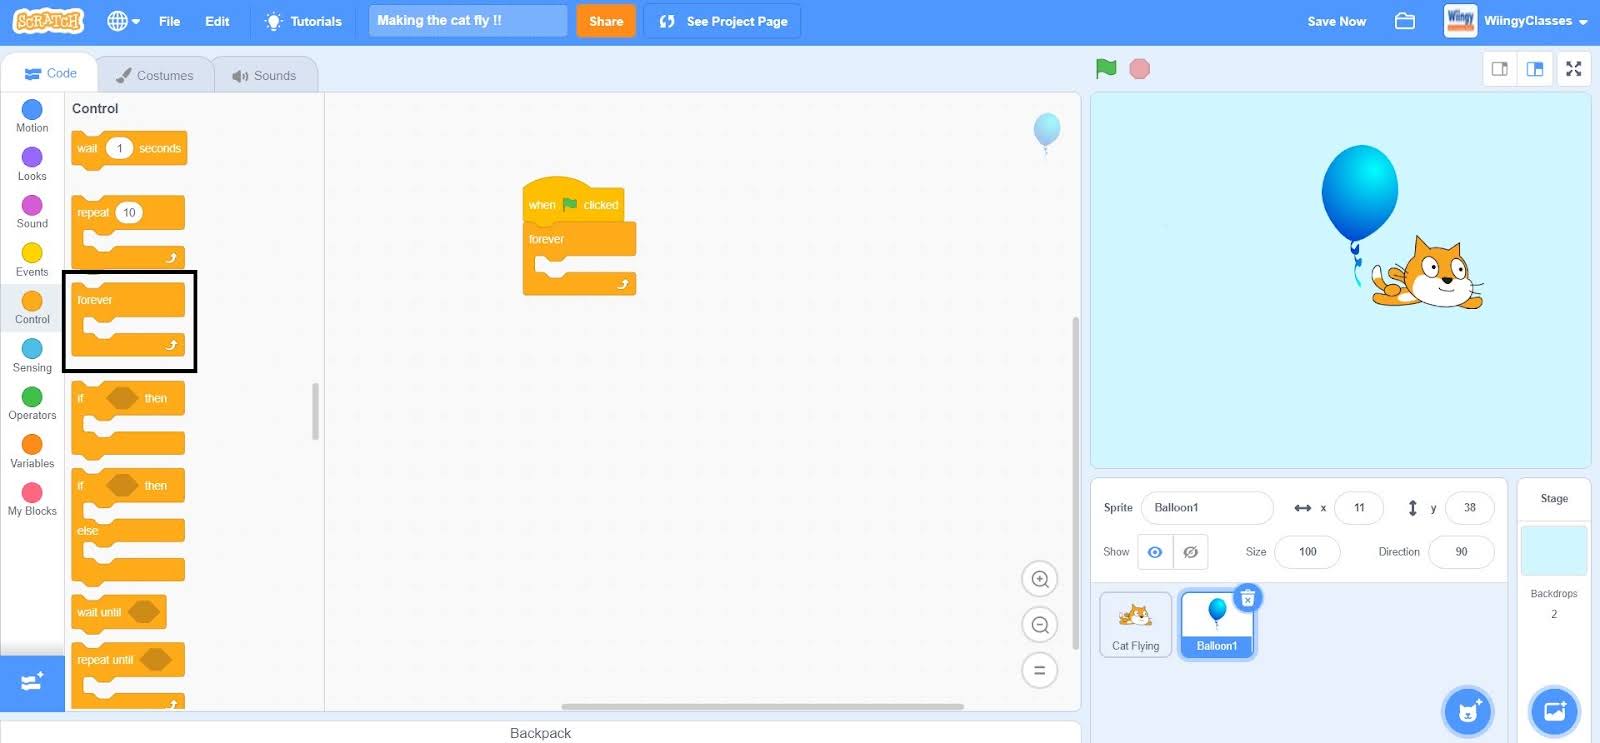
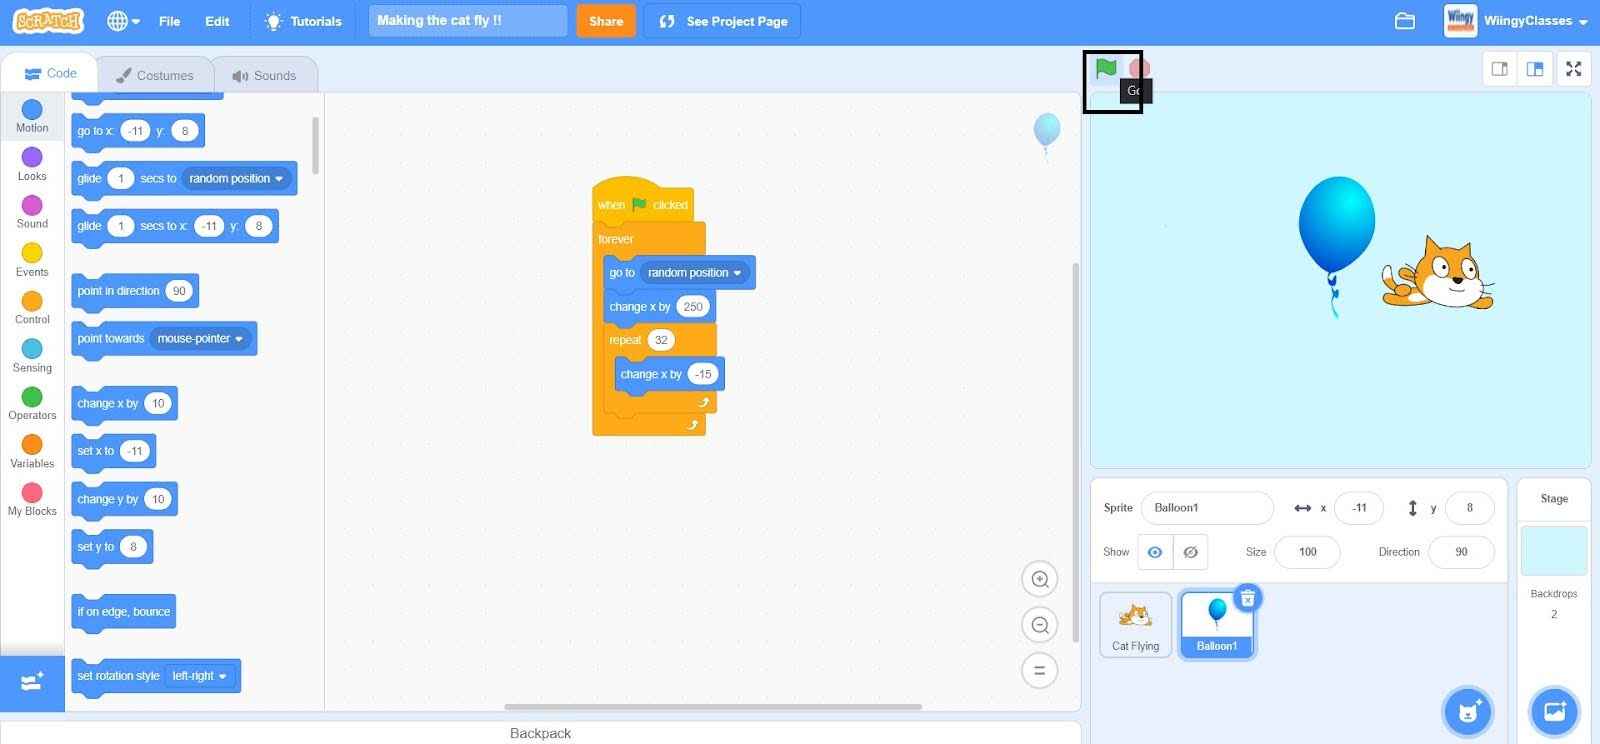
- Step 28: Go to the “Events” block in the block palette, select the “when green flag clicked” block, and drag it to the coding area.
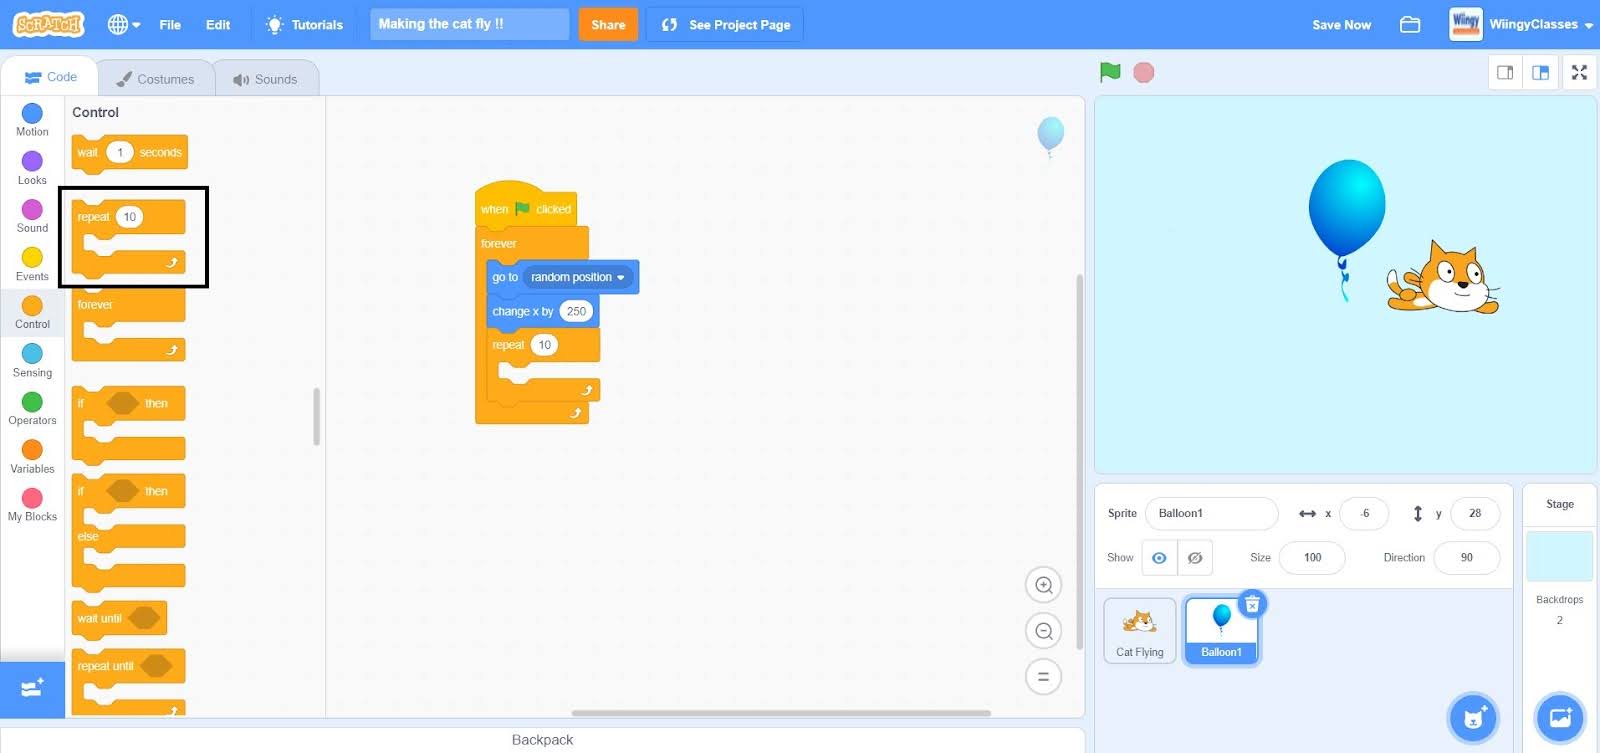
- Step 29: Go to the “Control” block in the block palette, select the “forever” block, drag it to the coding area, and place it under the “when green flag clicked” block.
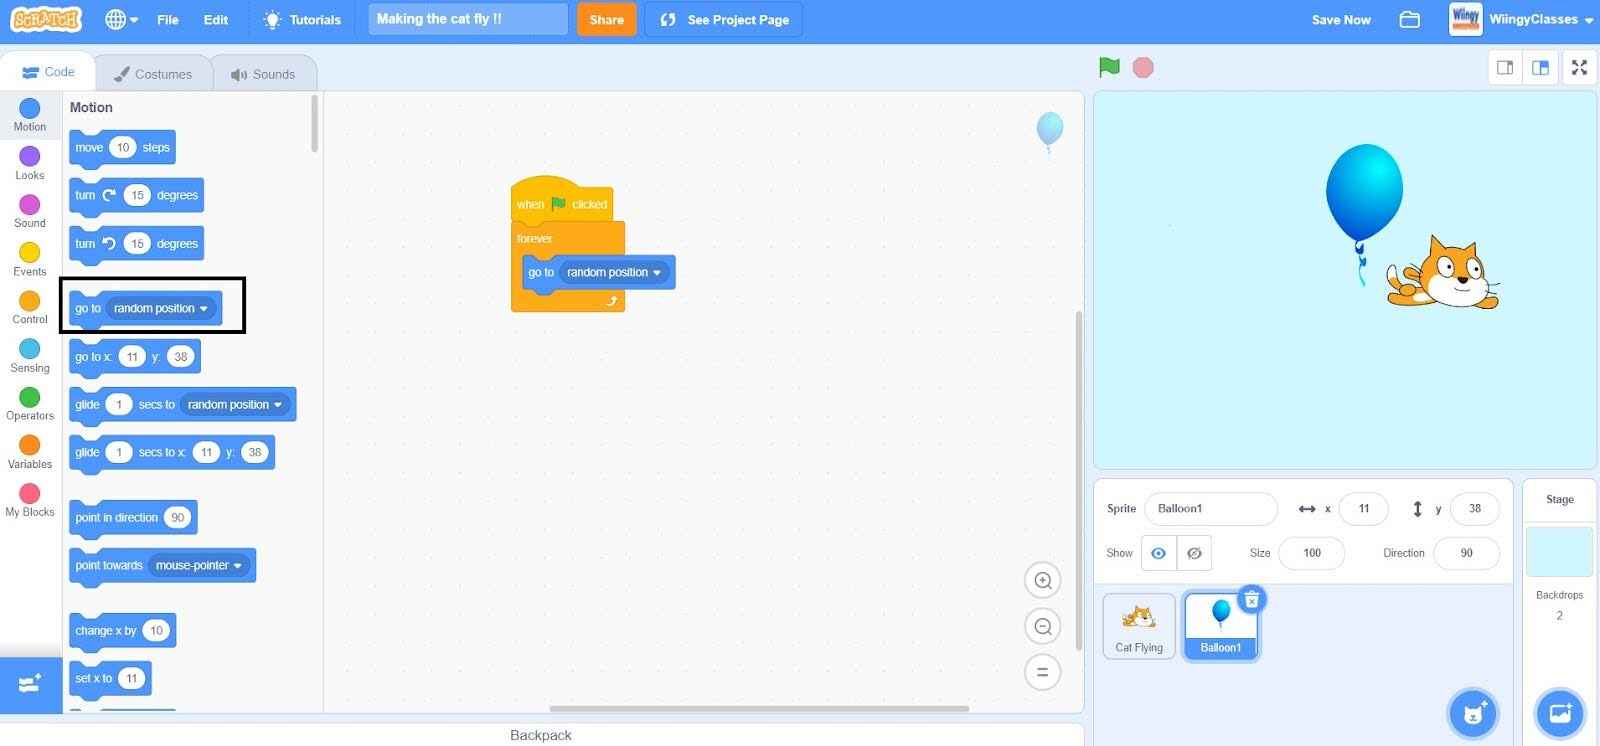
- Step 30: Go to the “Motion” block in the block palette, select the “go to random position” block, drag it to the coding area, and place it inside the “forever” block.
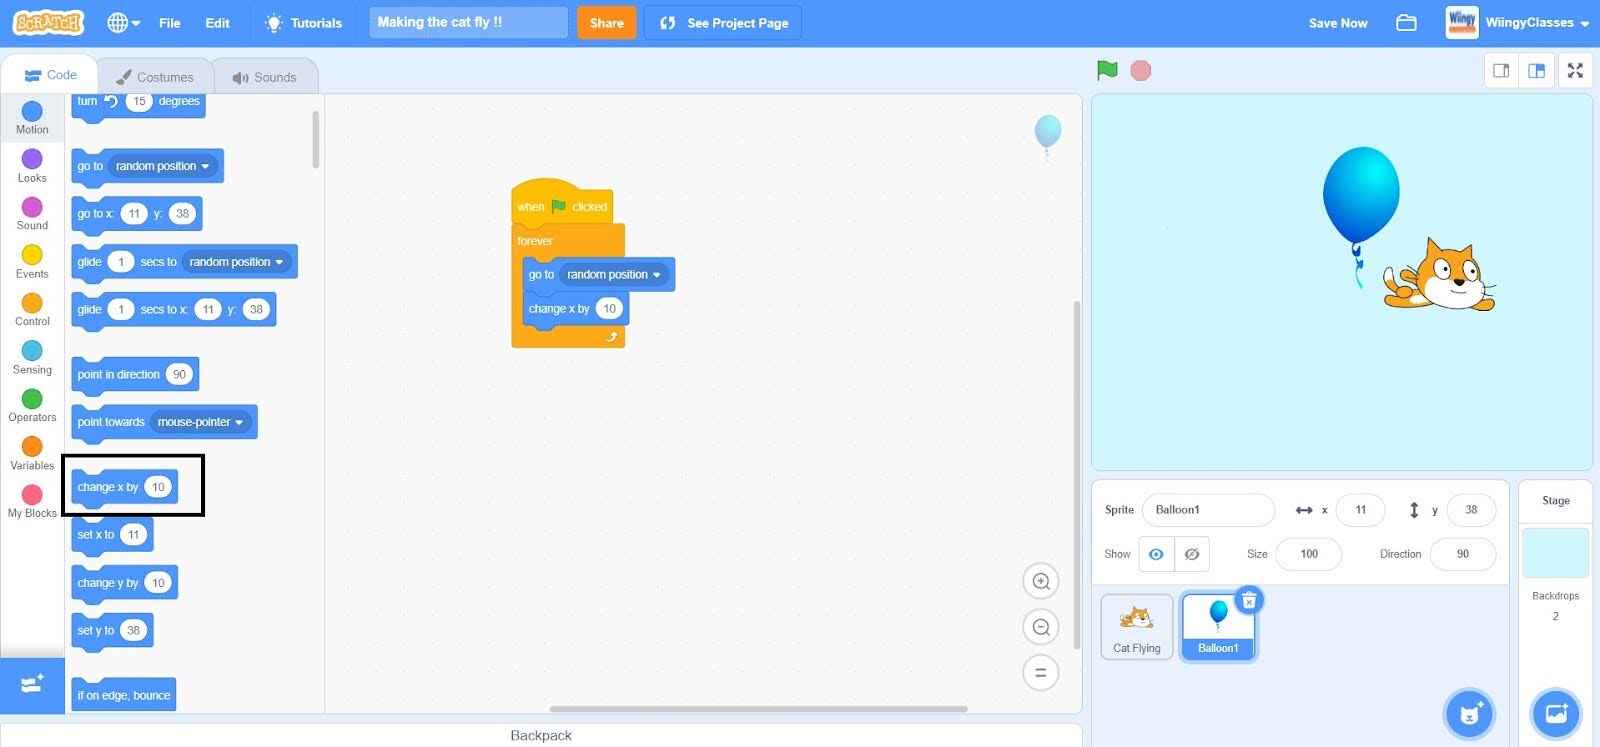
- Step 31: Again from the “Motion” block in the block palette, select the “change x by ( )” block, drag it to the coding area, and place it under the “go to random position” block inside the “forever” block.
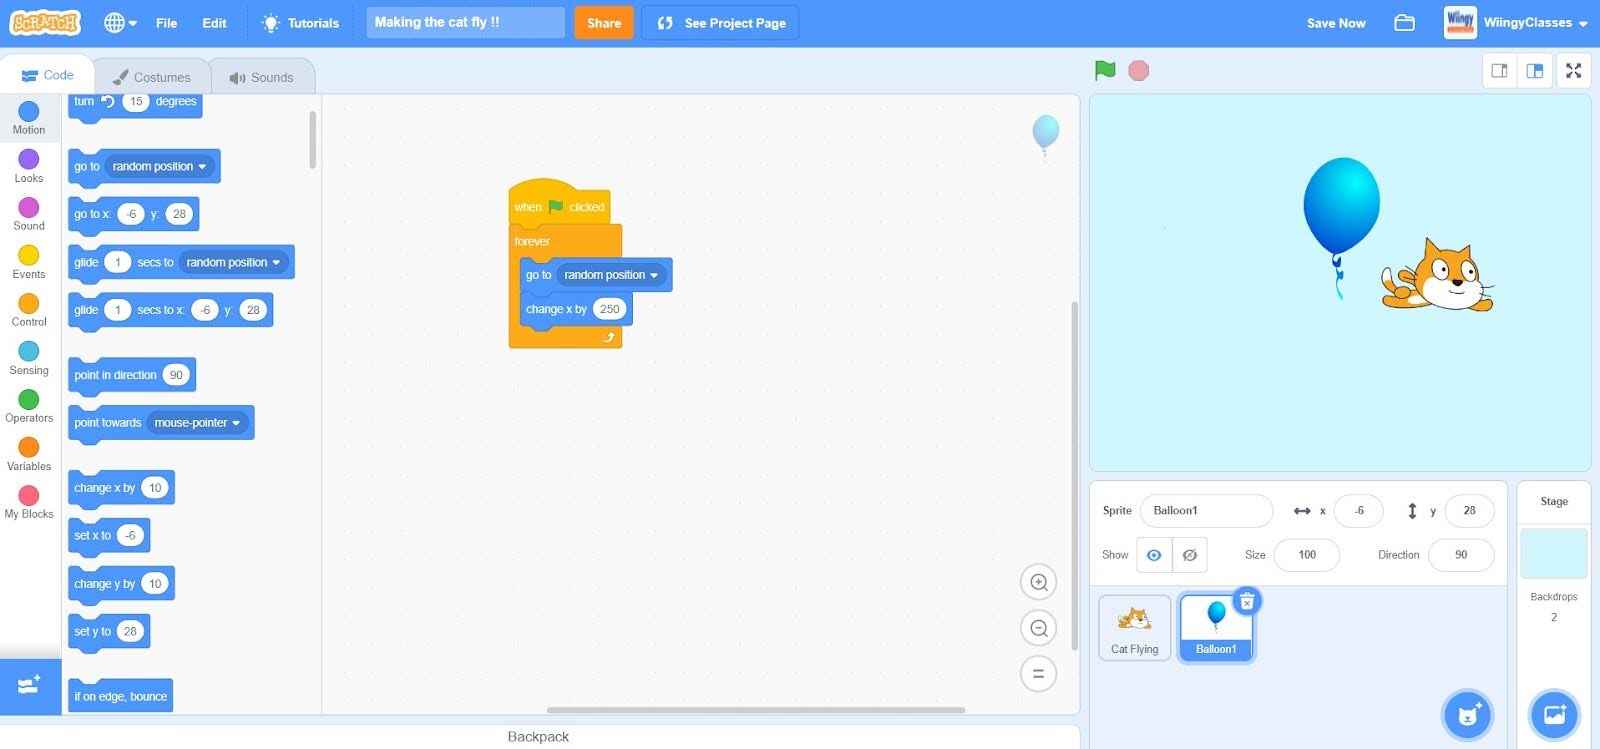
- Step 32: In the “change x by ( )” block, put the value as 250.
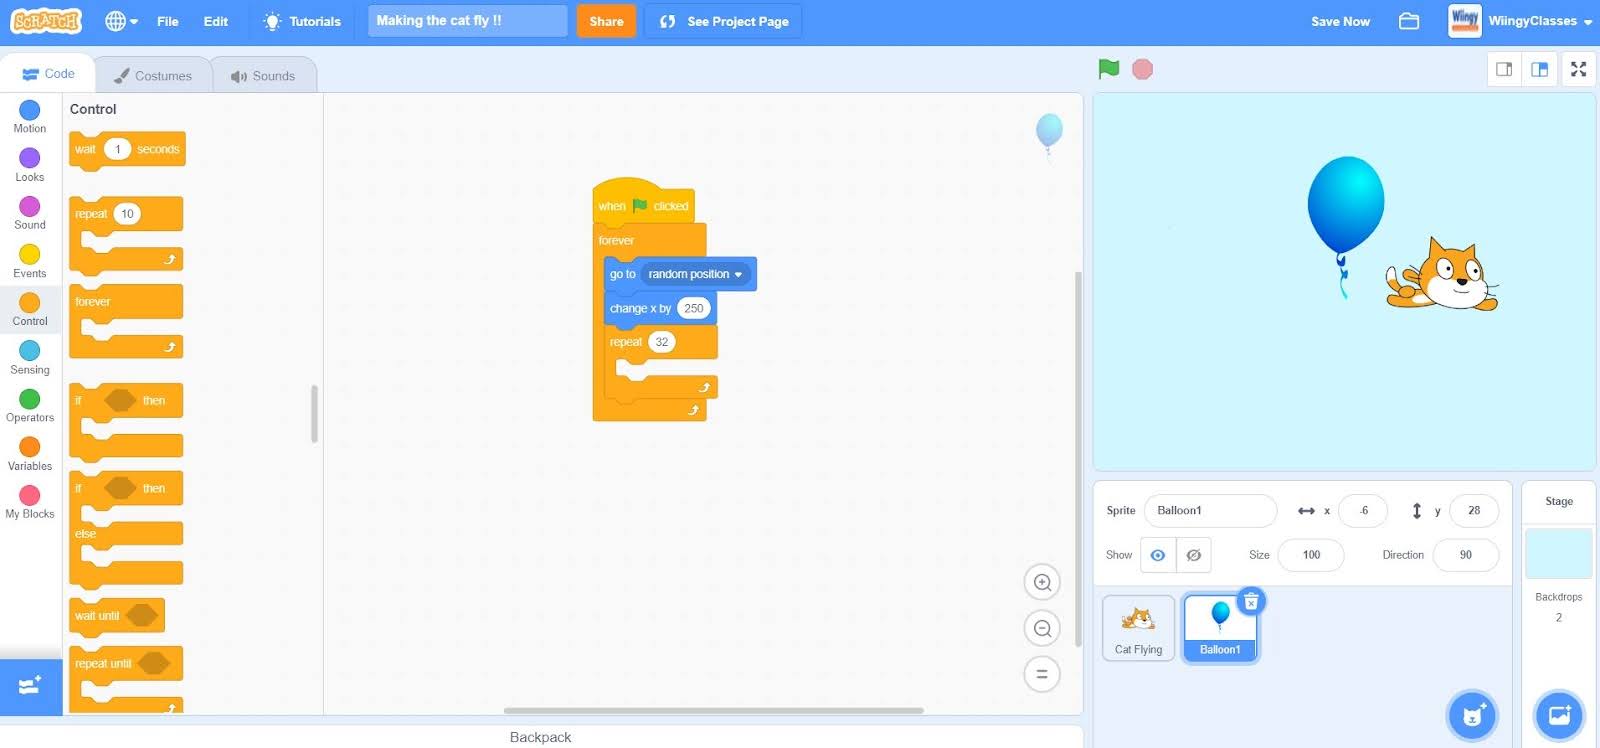
- Step 33: Go to the “Control” block in the block palette, select the “repeat ( )” block, drag it to the coding area, and place it under the “change x by ( )” block inside the “forever” block.
- Step 34: In the “repeat ( )” block, put the value as 32.
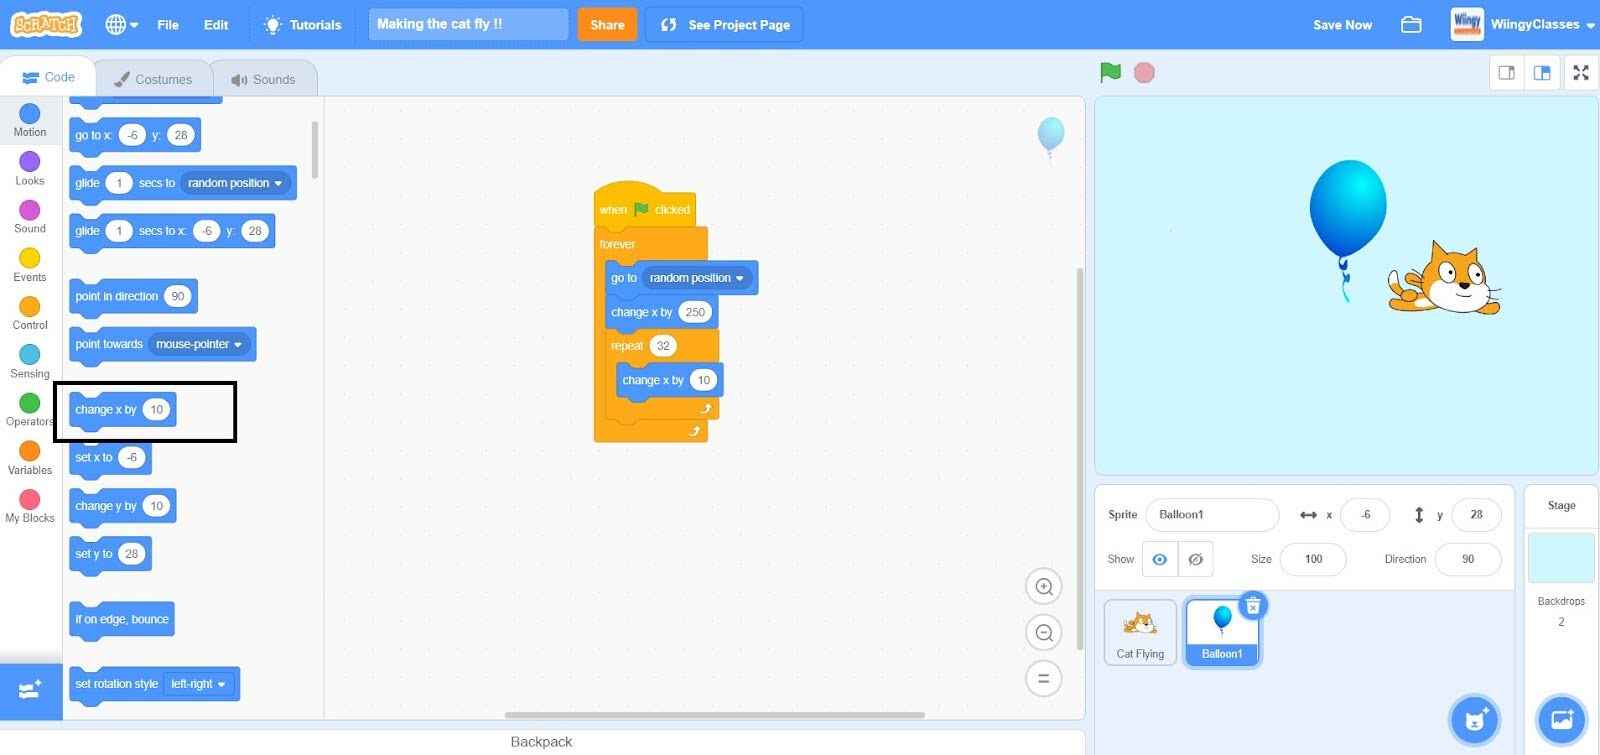
- Step 35: From the “Motion” block in the block palette, select the “change x by ( )” block, drag it to the coding area, and place it inside the “repeat ( )” block which is inside the “forever” block.
- Step 36: In the “change x by ( )” block, put the value as -15.
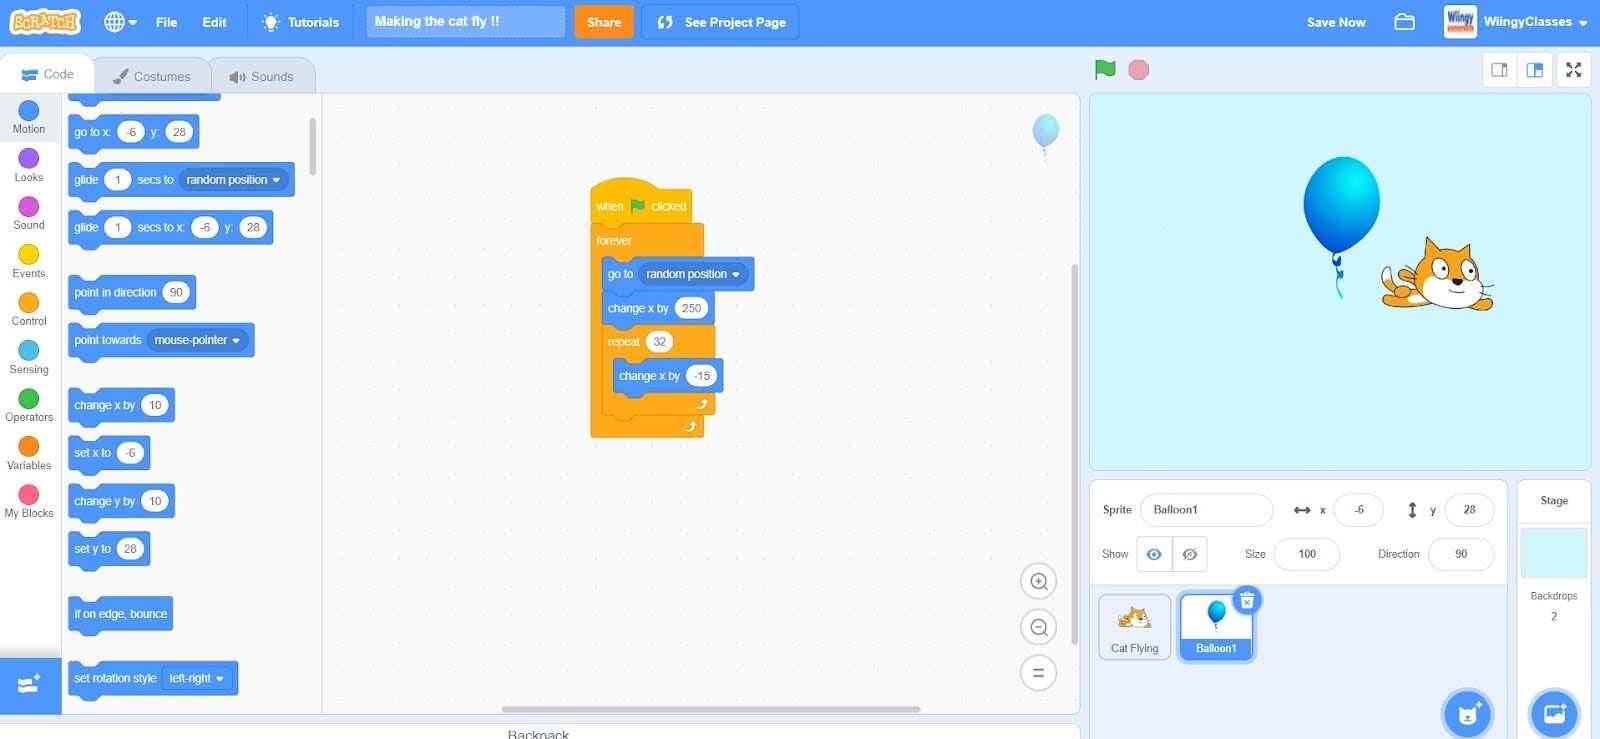
- Step 37: Finally, the project is ready. Now, when you click on the “Go” button, the project will successfully run.
Conclusion
Creating a project in Scratch is simple and fun and allows users, especially children to express themselves creatively and learn the basics of coding. There are different types pf projects one can create on Scratch which are both beginner and advanced levels. So, you can choose your level and start creating amazing projects with Scratch, all the while learning the basics of coding!
Looking to learn Scratch coding? Explore Wiingy’s Online Scratch Coding Classes For Kids to learn from top Scratch coding experts.
Frequently asked questions (FAQs)
Is Scratch easy for beginners to learn?
Yes, Scratch is super easy for beginners to learn. The beginners can even start experimenting on Scratch to know and learn about new things.
What is Costume Pane in Scratch?
Costume Pane in Scratch is used to store costumes (i.e., character designs) for the sprites.
What is the purpose of Motion blocks in Scratch?
Motion blocks in Scratch are used to control the sprite’s movement.
What is Sound Pane in Scratch?
Sound Pane in Scratch is used to store sound effects for the projects.
What is the purpose of Control blocks in Scratch?
Control blocks in Scratch are similar to Motion blocks as Control blocks also control the sprite’s movement but it does that under certain conditions by inserting loops, repeats, and conditional statements.
We hope you understand how to use Scratch and how to create the project explained above in this blog. If you have any doubts, you can ask your doubts in the comment section. For further reading, read our game tutorial on the top 10 games on Scratch to create and play!


