How to Make Maze Game on Scratch? – A Step-By-Step Tutorial On Scratch Games
- Pallabi Mohanty |
- September 4, 2024
Updated By
Reviewed By
Maze Game Coding: Scratch games are visually fun and interactive ways of learning coding and game development, especially for children between the ages of 8 to 16. A Maze game on Scratch can be of different types depending on the sprite’s movement, objective, and rewards. In this blog, we will discuss how to make a maze game on Scratch with levels. Read on to find more.
This is Chapter 2.3 in the
Scratch Game Tutorial
Looking to learn Scratch coding? Explore Wiingy’s Online Scratch Coding Classes For Kids to learn from top Scratch coding experts.
Maze Game Scratch Code
In the Maze game on Scratch, the main sprite (Giga) moves through the maze to reach the birthday cake. If the sprite touches the blue maze wall, then the game restarts. Also, if it touches another sprite, like the obstacle (pufferfish), then the game also restarts. So, the sprite needs to reach the birthday cake without touching the maze wall or the pufferfish.
Scratch Maze Game Download
There are five steps involved in making this maze game on Scratch are given below.
- Setting up the Maze game backdrop and character [sprite]
- Controlling the character [sprite with arrow keys]
- Detecting the character collision [with Maze wall]
- Setting the reward [game endpoint]
- Adding difficulty [levels]
Scratch Login
The first step toward creating a Scratch Catch game is to sign into your Scratch account. The steps to Scratch login are explained here:
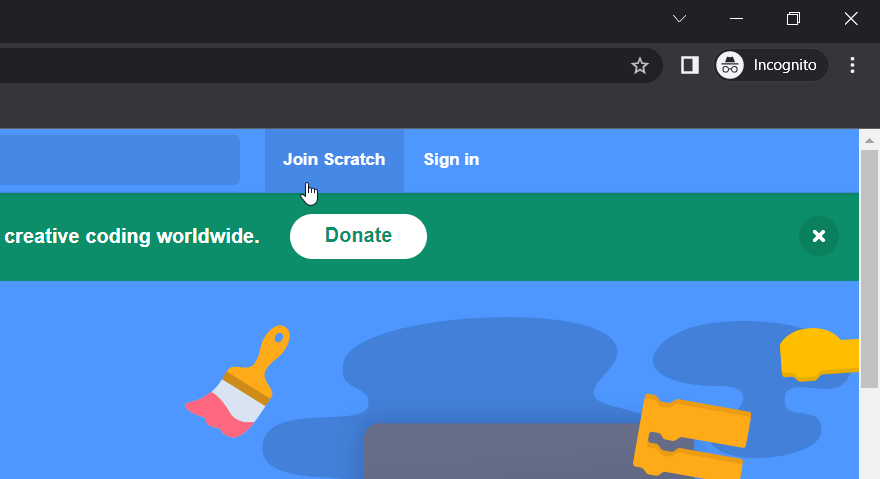
- Open Scratch or click here.
- Click on “Join Scratch”.
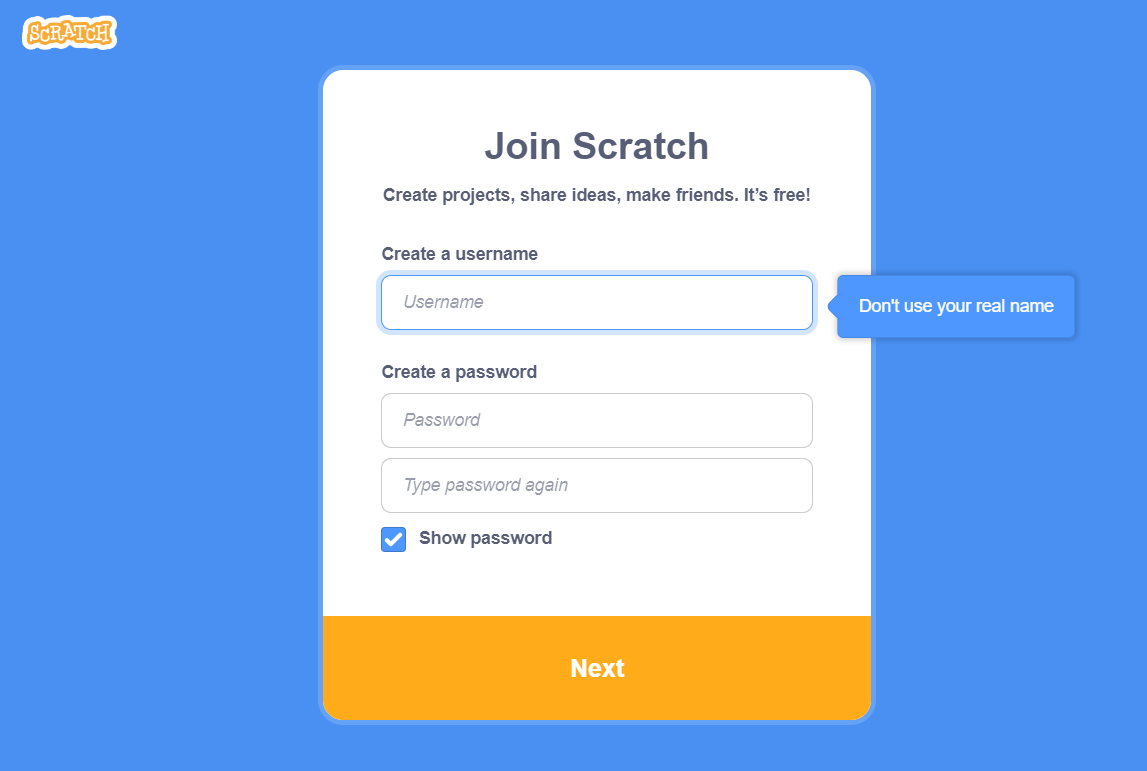
- Type a username and password and click on next.
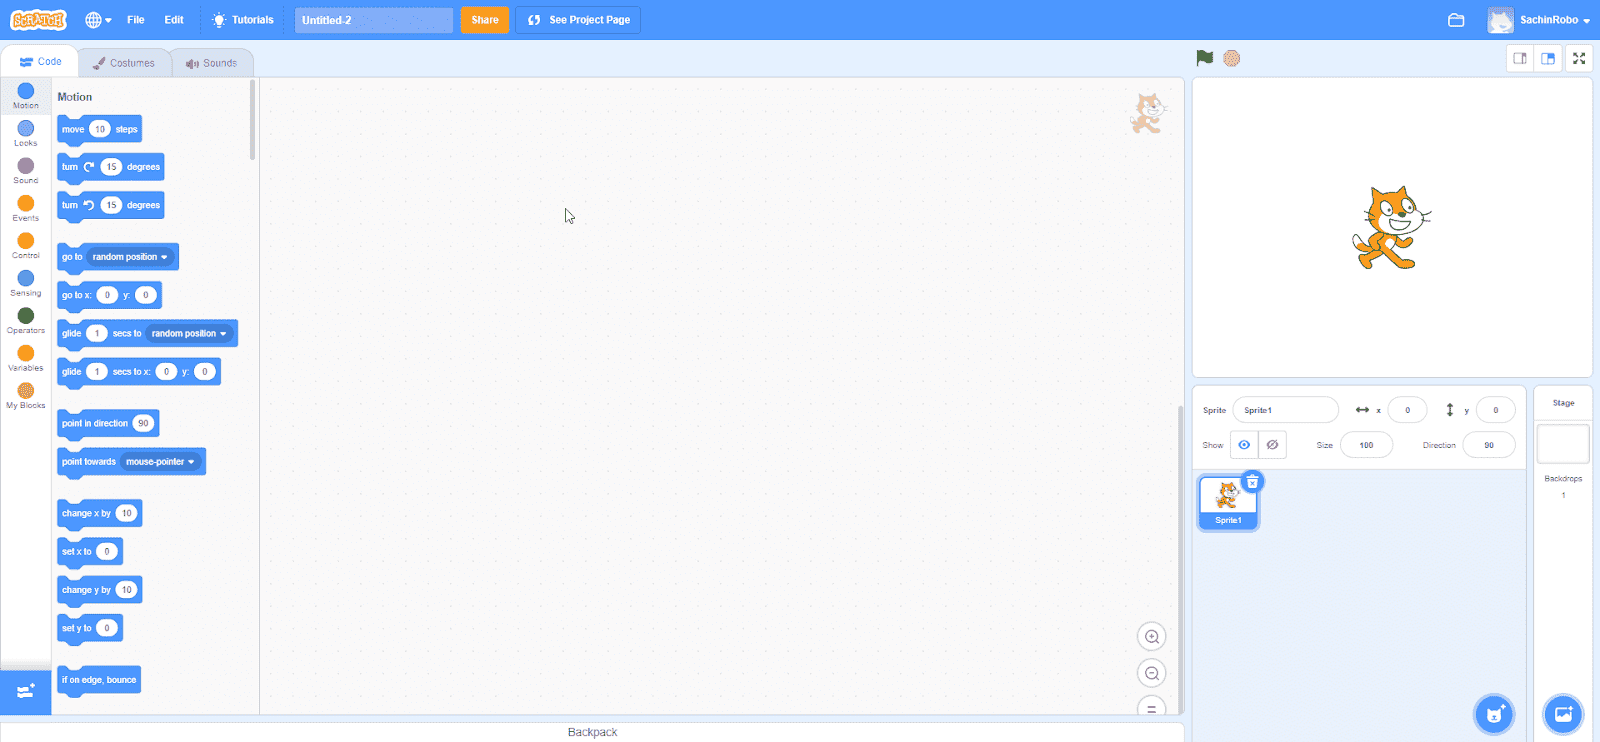
- After clicking on “Scratch Create”, you should see this empty Scratch project screen with a cat in your stage.
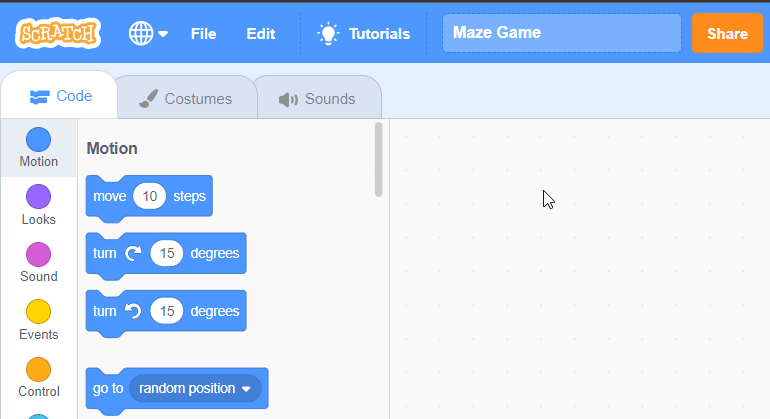
- Double click on “Untitled” and rename your project.
How to Make the Maze Game on Scratch?
The detailed steps on how to create a maze game on Scratch are explained below;
Step 1: Set up the Maze Game Backdrop and Character [Sprite]
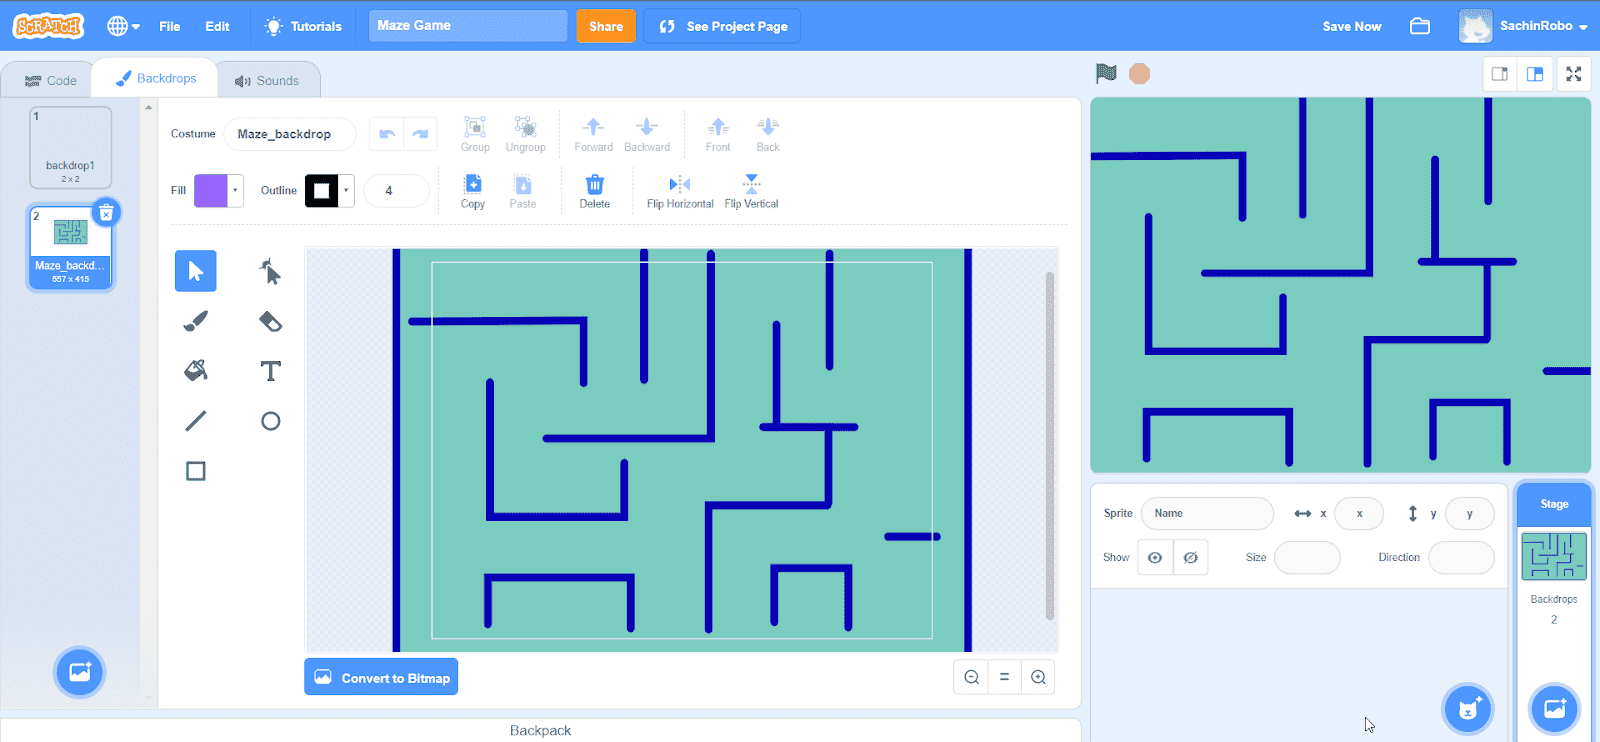
- Let’s add a Maze backdrop to the game.
- Delete the Cat sprite.
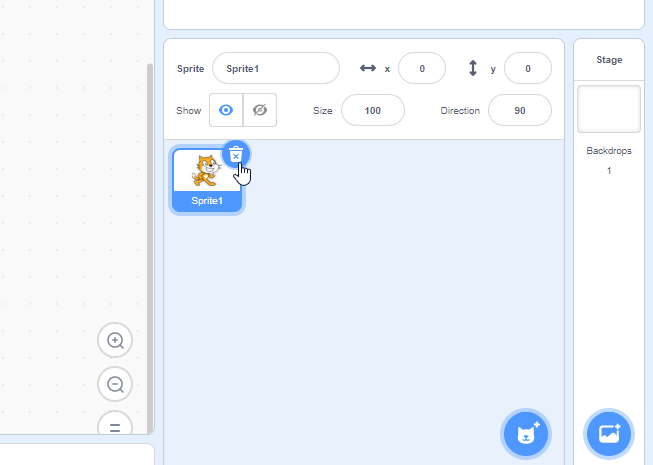
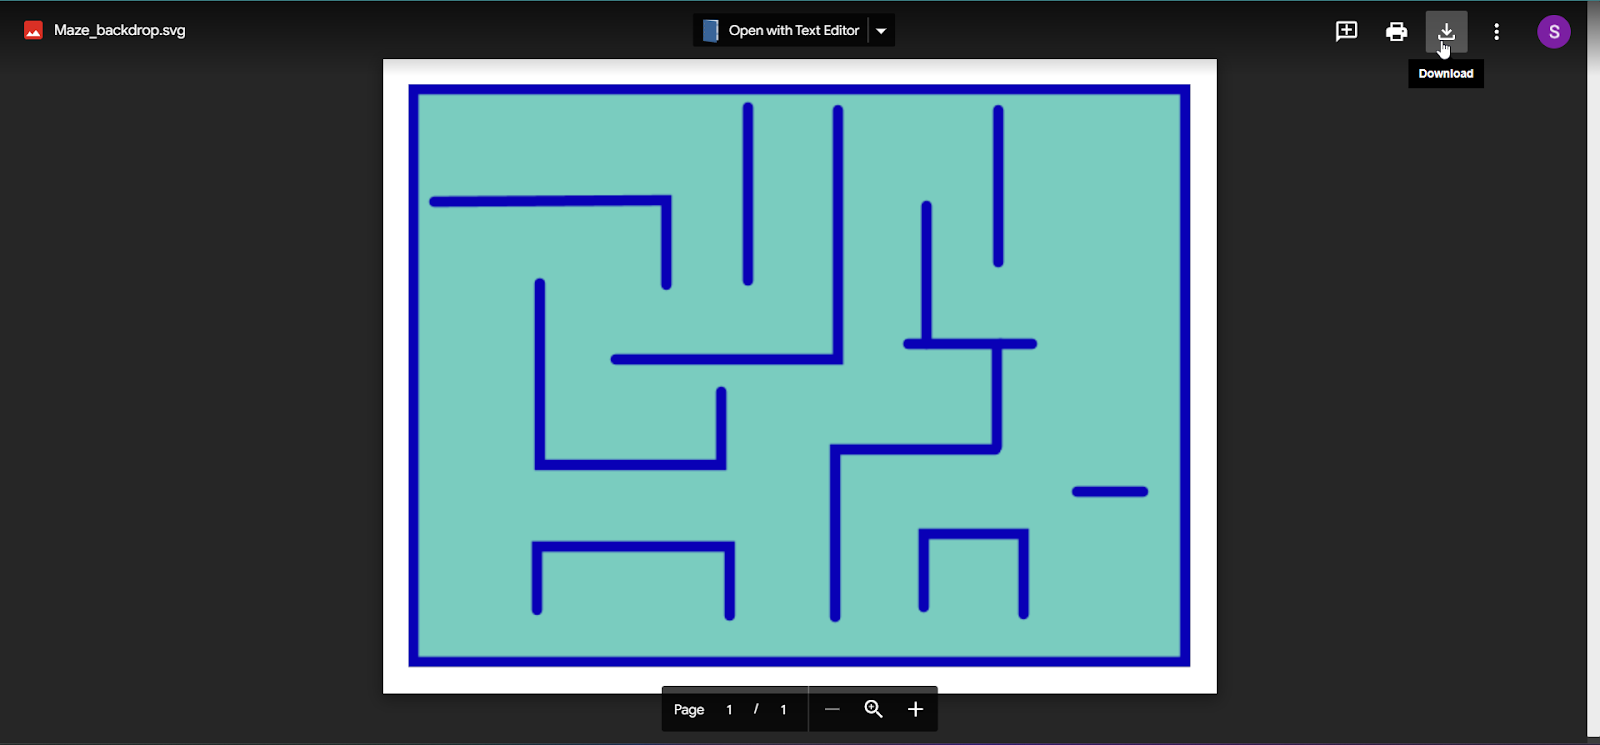
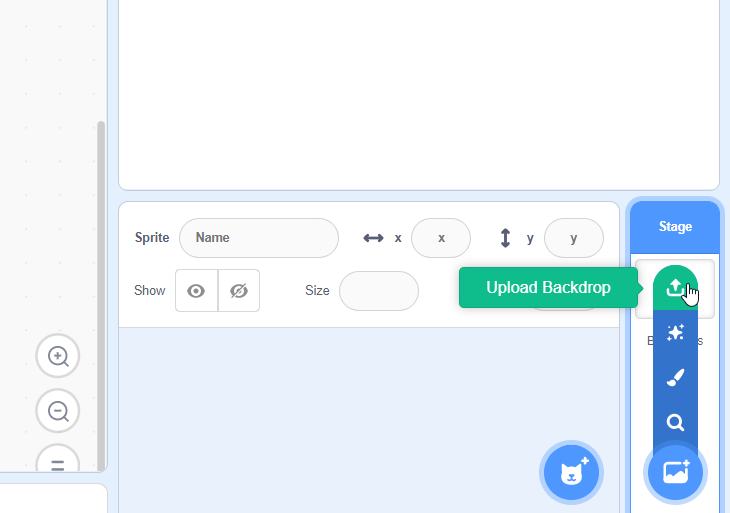
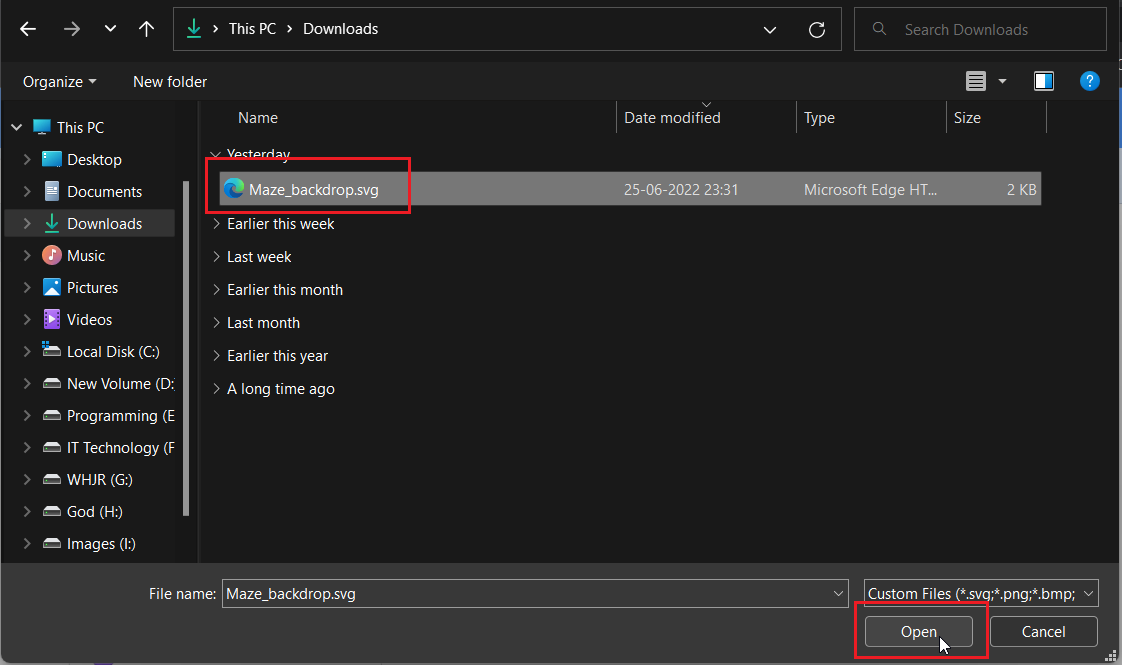
- Upload a maze background from your computer.
- Maze backdrop is added.
- If you want a different backdrop then you can use a Maze generator [ https://www.mazegenerator.net/ ] to create & download your own Maze.
- Now, let’s add a player character [Giga].
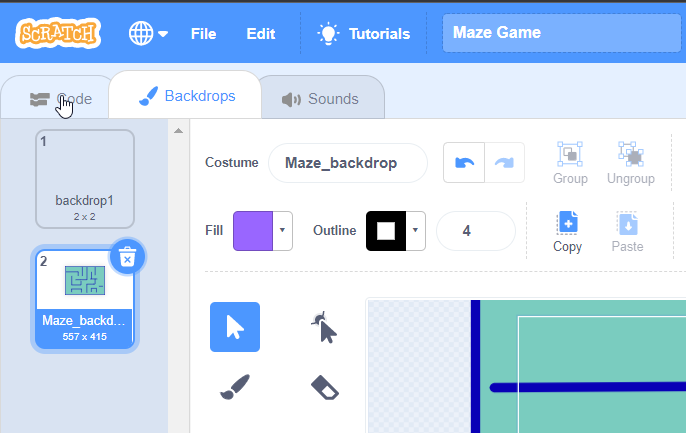
- Click on the “Code” icon, as shown below.
- Click on the “Choose a Sprite” icon.
- Click on the “Giga Walking” icon, you can choose any.
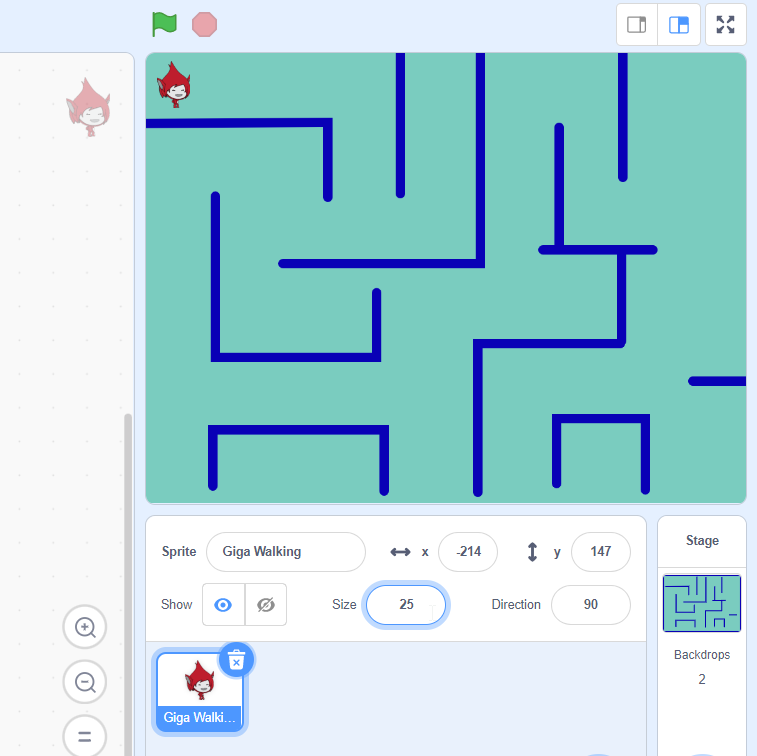
- “Giga Walking” sprite is added but it is big in size in comparison to the Maze.
- Reduce the sprite [Giga] size so that it can easily move in the Maze.
- Set the size to 25.
- Please note that the setting of the size of the Giga will decide the game difficulty because we have to set how it moves in the Maze.
- And place sprite [Giga] at the starting point which is the left top corner of the Maze.
Step 2: Control the Character [Sprite With Arrow Keys]
The main idea of the maze game is to make the sprite, Giga, walk through the maze to reach the birthday cake while avoiding the maze wall and pufferfish.
- Make the sprite to move and control it using arrow keys.
- From the “Motion category” drag & drop “move steps” block.

- From the “Events category” drag & drop “when right arrow key pressed” block as shown below.
- Click on “green flag”.
- Sprite can move in the right direction by pressing the right arrow key.
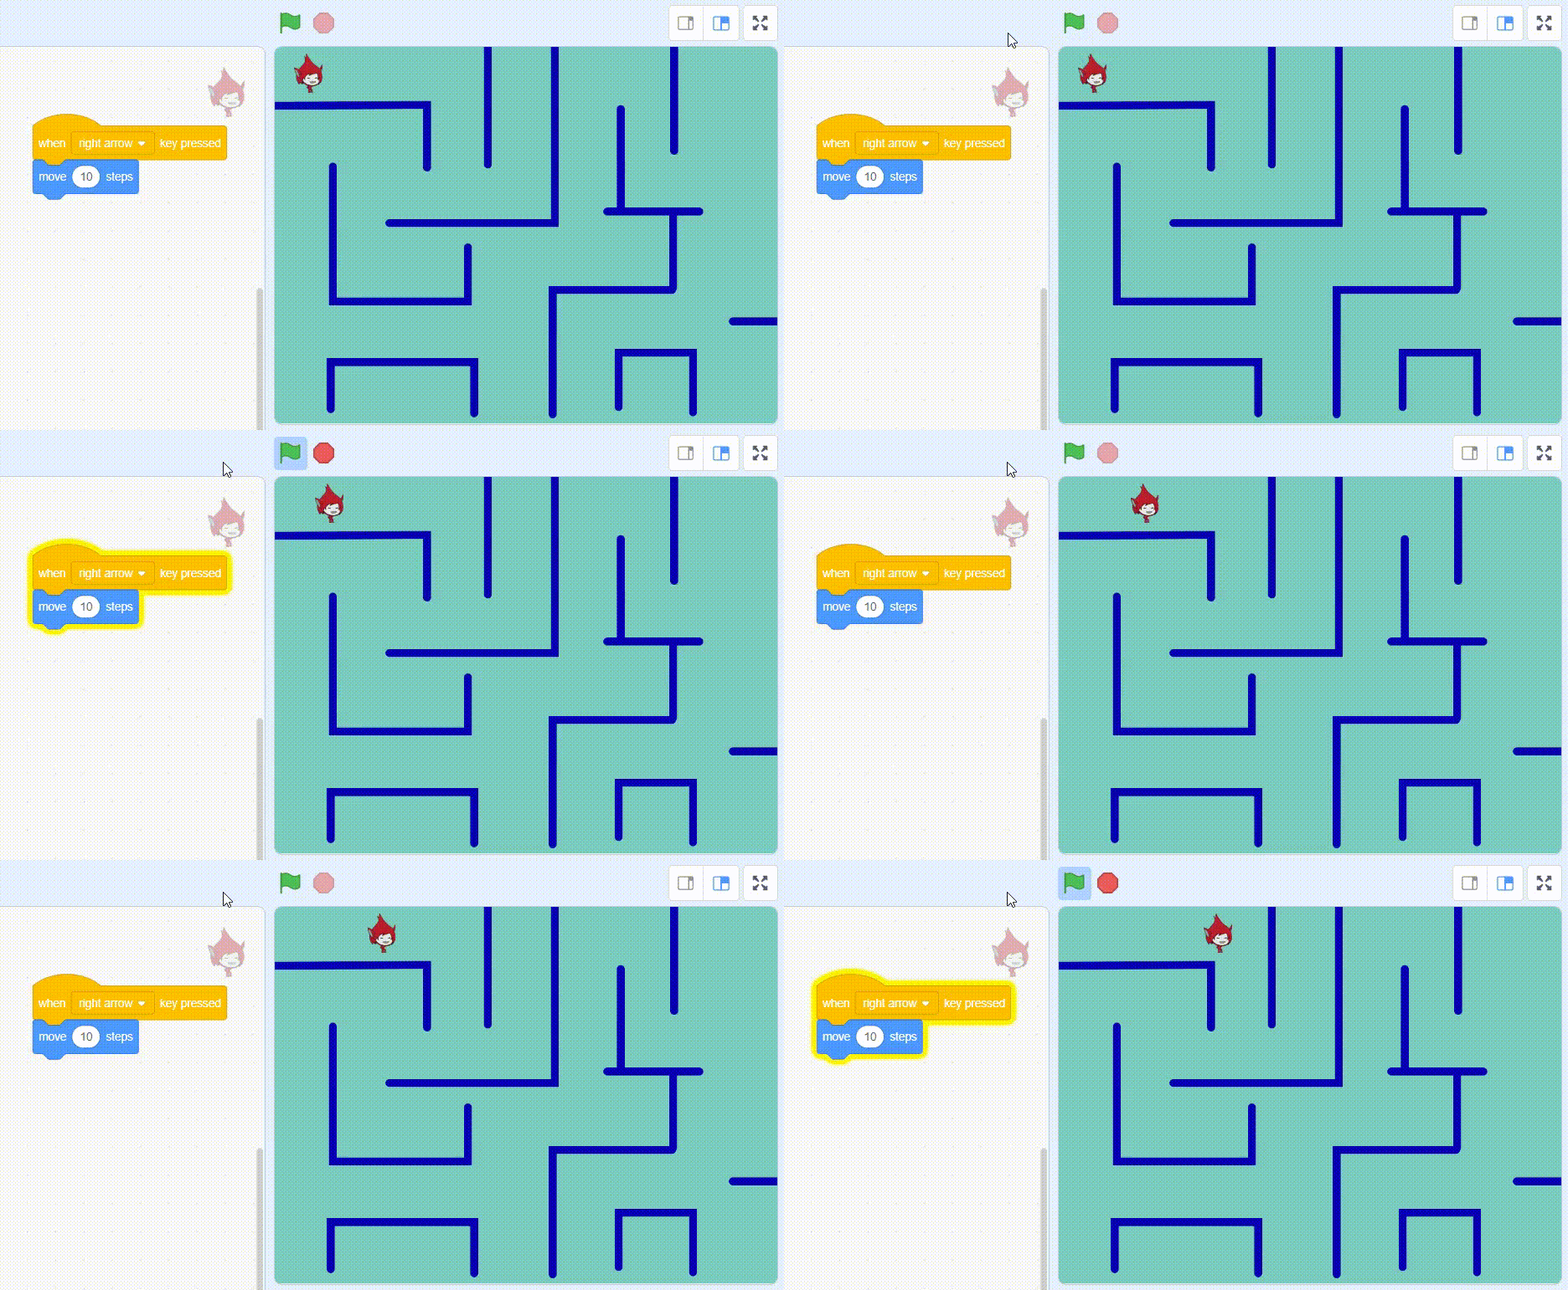
- To move Giga in the left direction, drag & drop “when the left arrow key pressed” block.
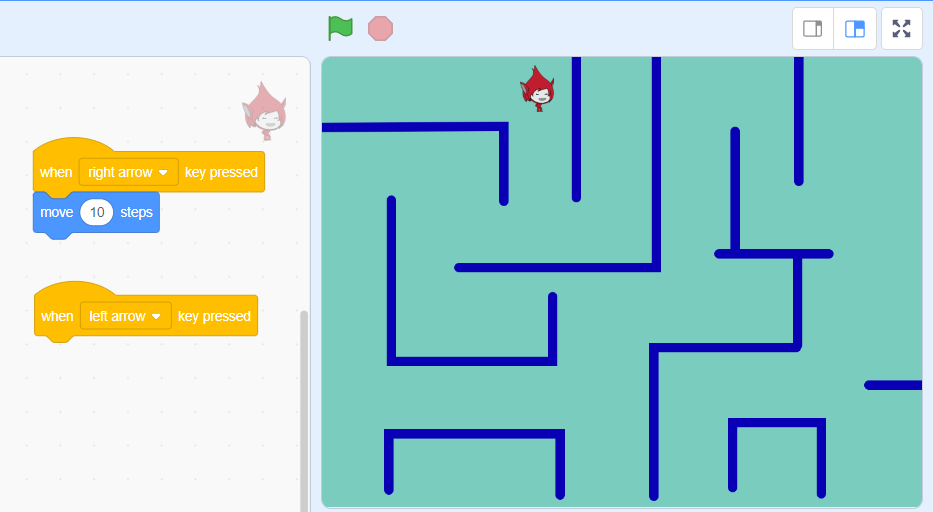
- Drag & drop “move steps” block as shown below.
- Change its value to negative 10 so that the sprite to move left.
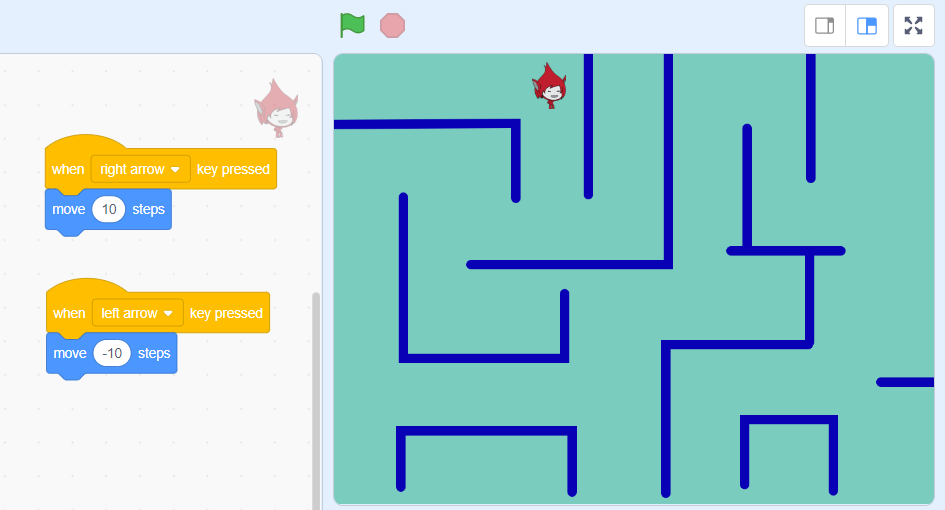
- Click on “green flag”.
- Sprite can move in the right & left direction by pressing the right & left arrow keys.
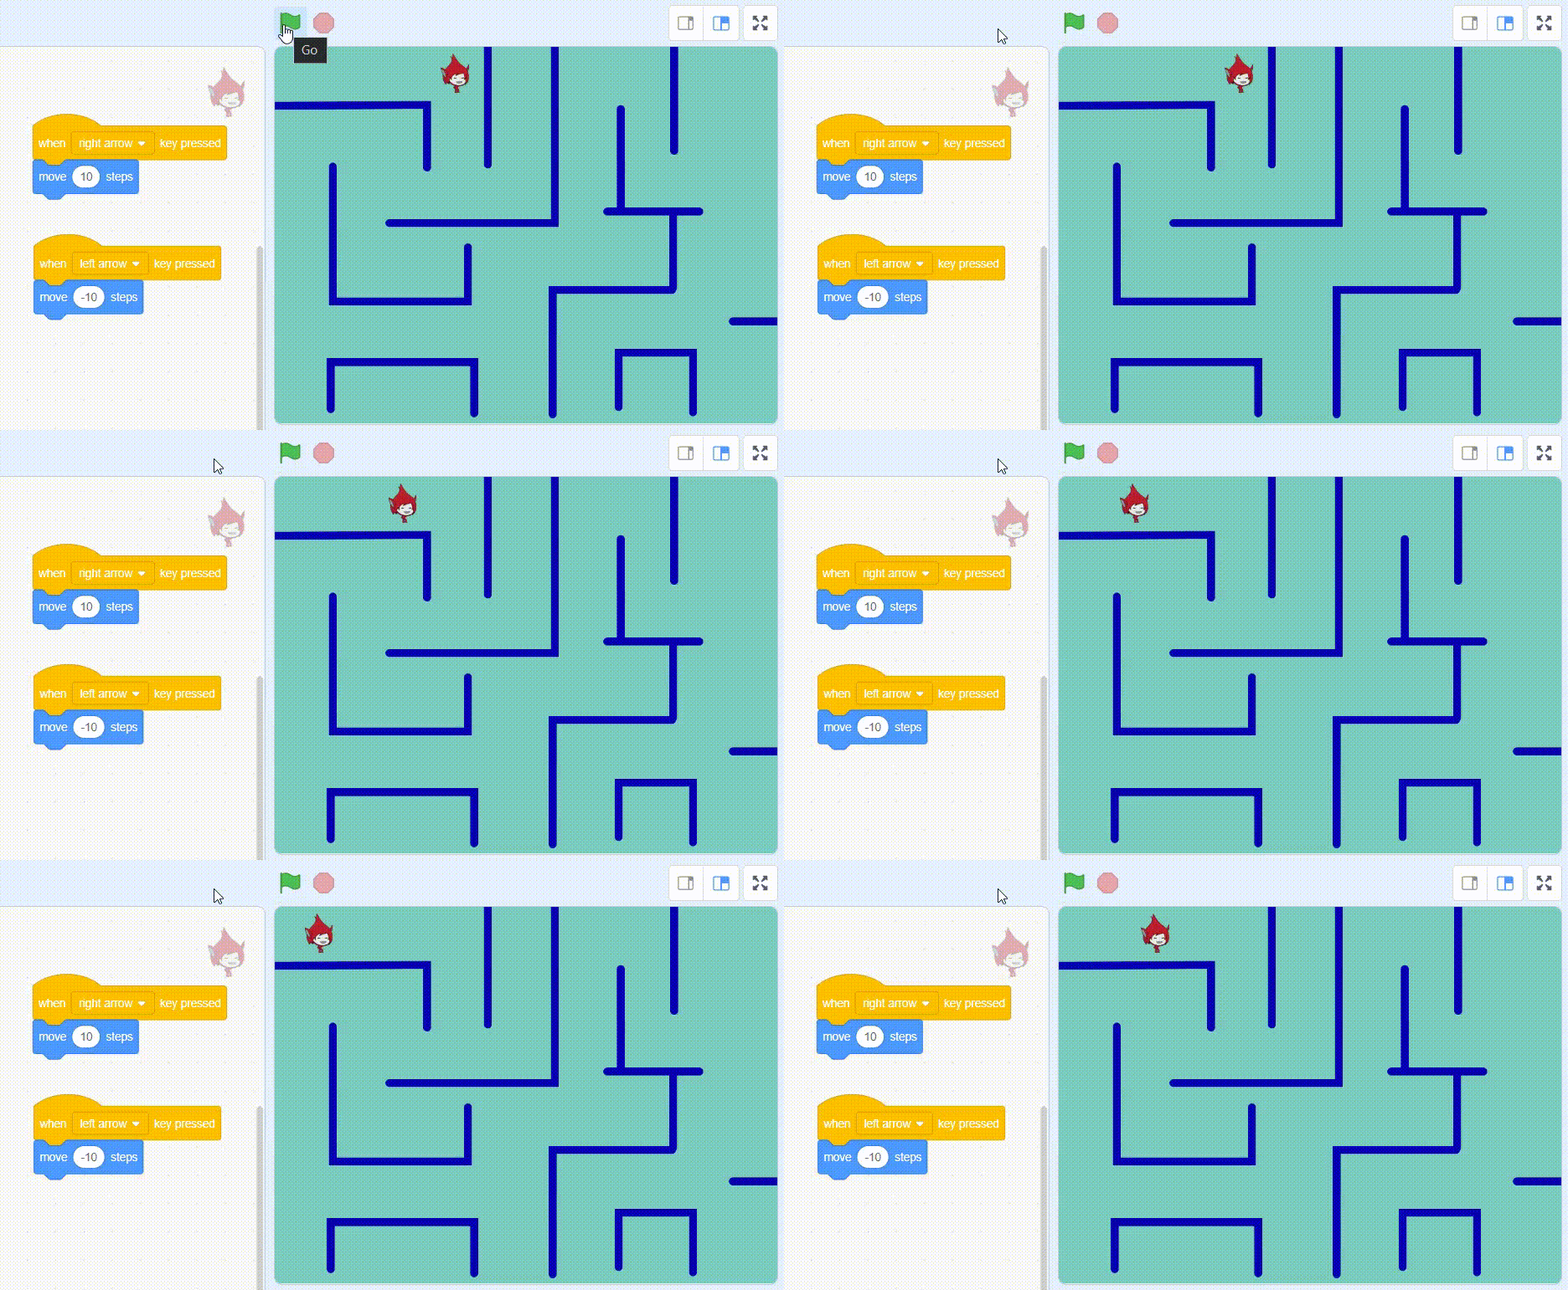
- Instead of changing the value of the step from a positive to a negative value, we can use another motion block “point in direction”.
- Using the “point in direction” block you can point the sprite in an absolute direction (-90 is left, 90 is right, 0 is up, and 180 is down)
- Drag & drop the “point in direction” block as shown below.
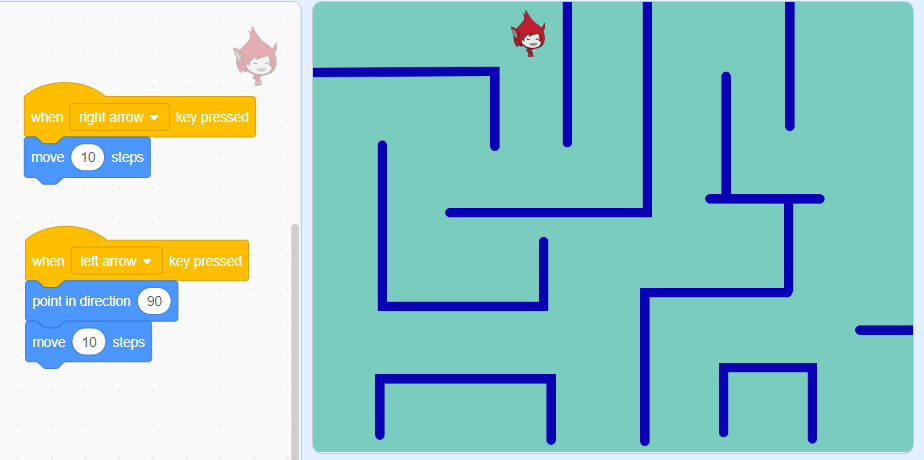
- Click on the “point in direction” block and change the direction to left (-90).
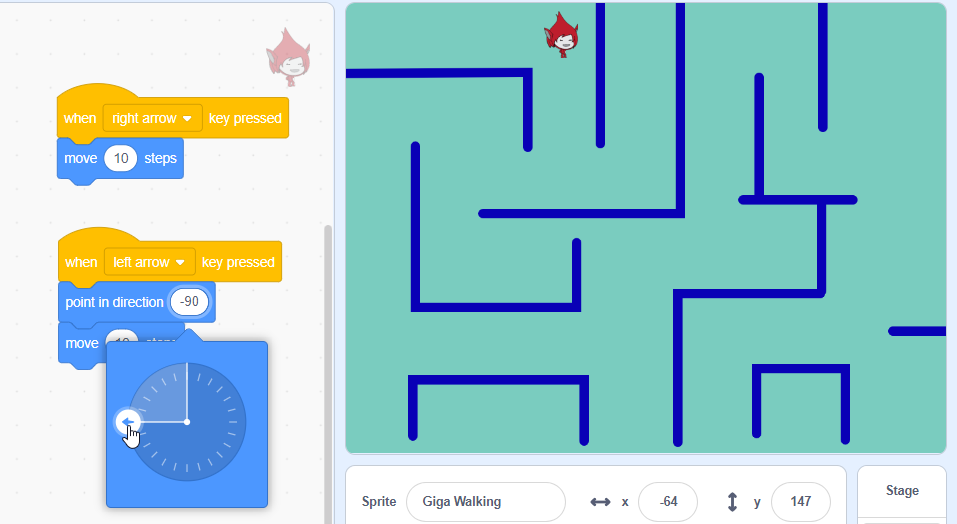
- Similarly set the direction to the right for “when right arrow key pressed”
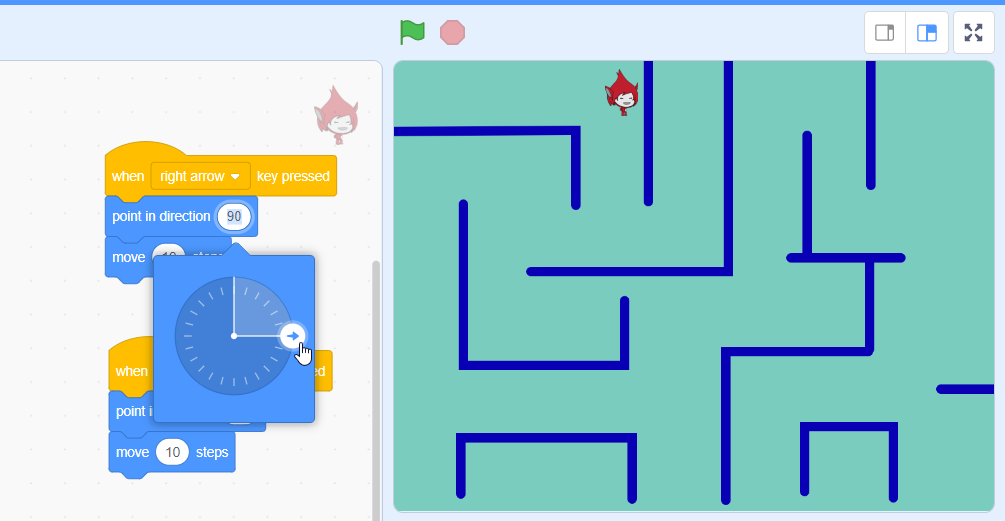
- Click on “green flag”.
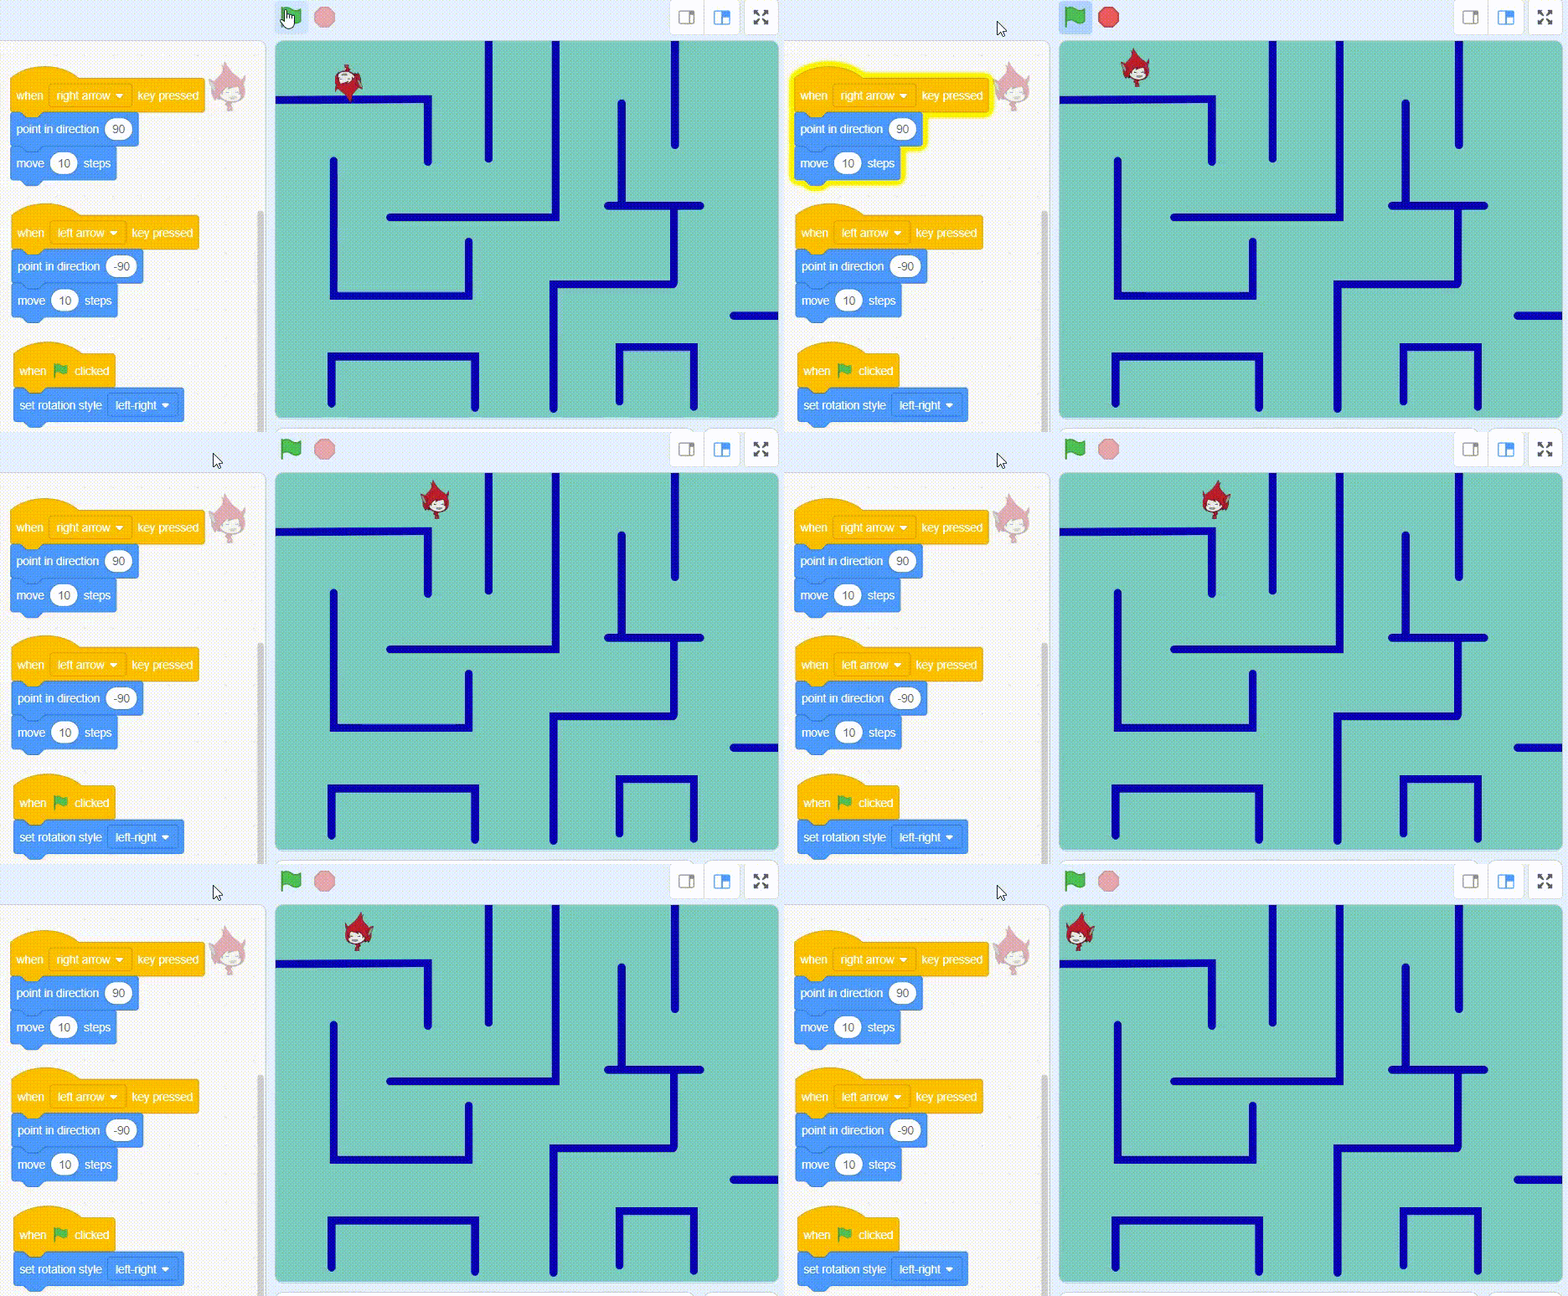
- Sprite can move in the right & left direction by pressing the right & left arrow keys.
- But while moving in the left direction sprite inverts and that is not how it should be.
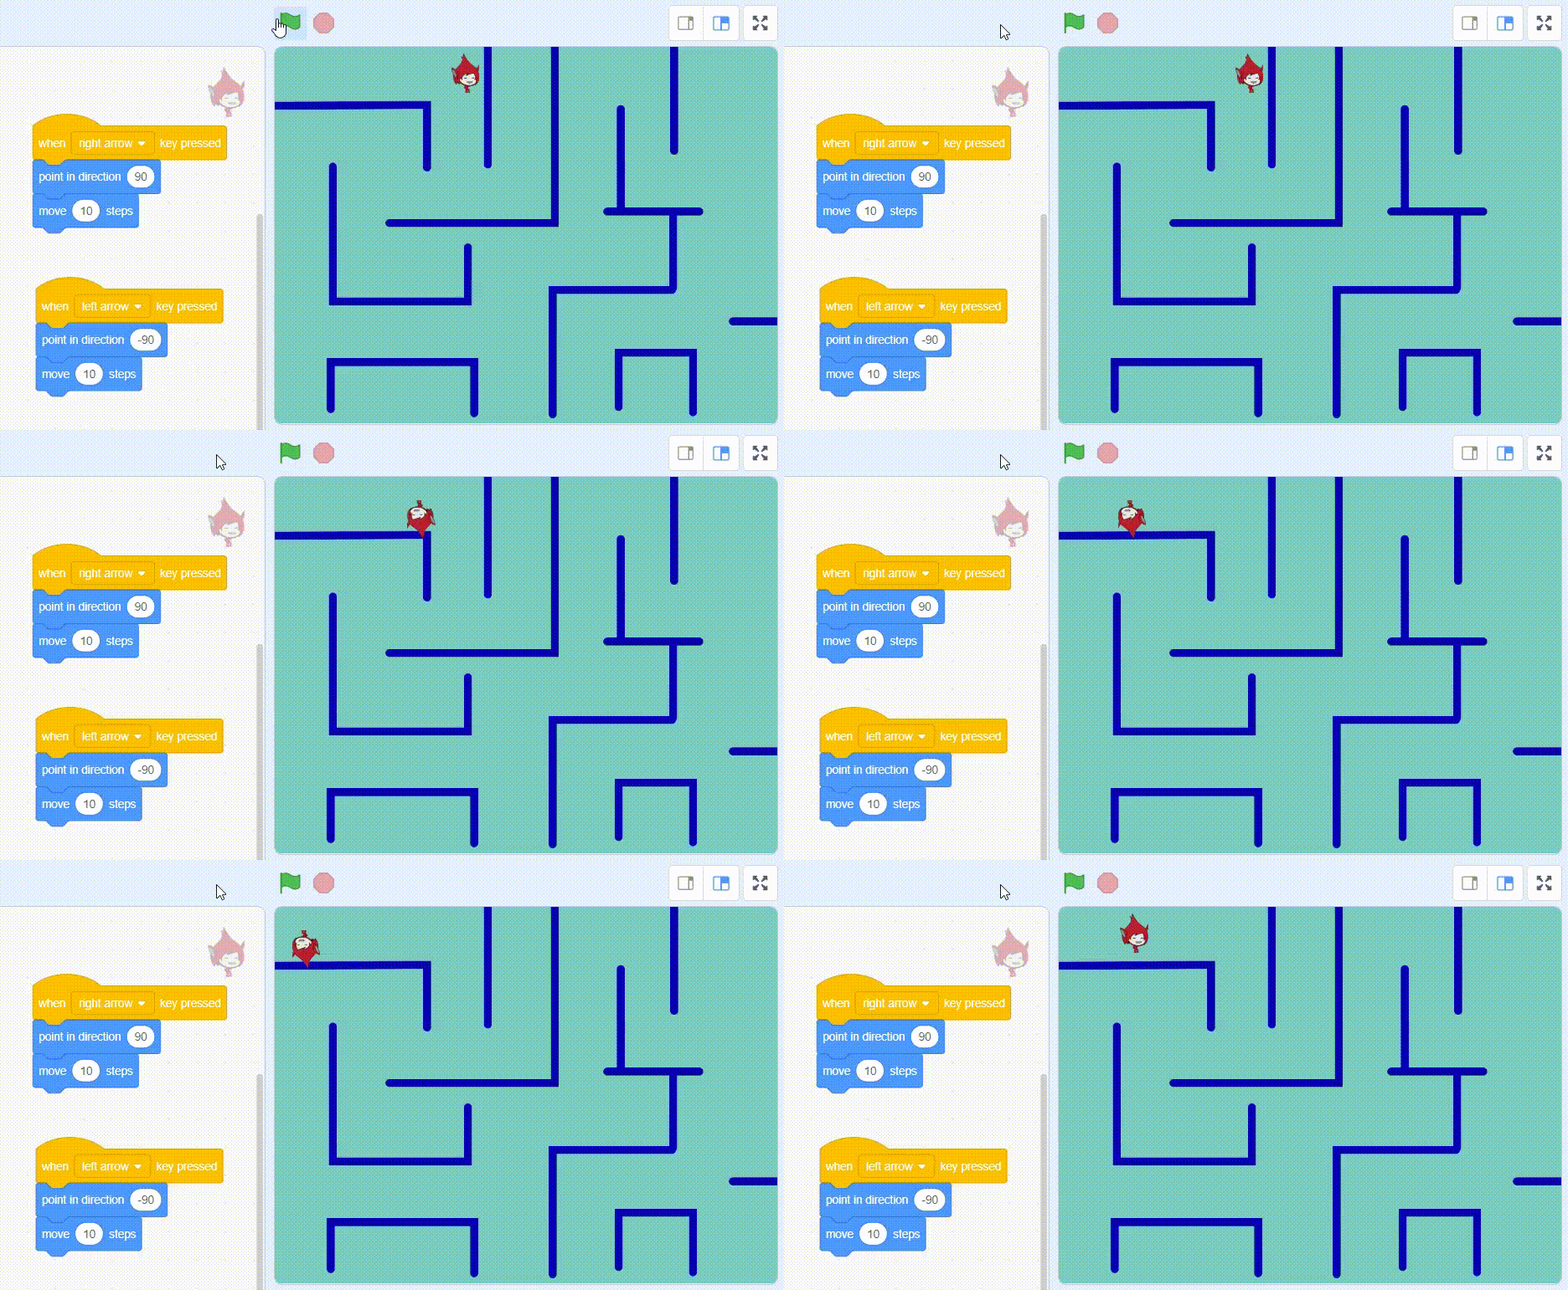
- Let’s change the rotation style to left-right.
- Drag & drop the “set rotation style left-right” block as shown below.
- Drag & drop the “set rotation style left-right”.
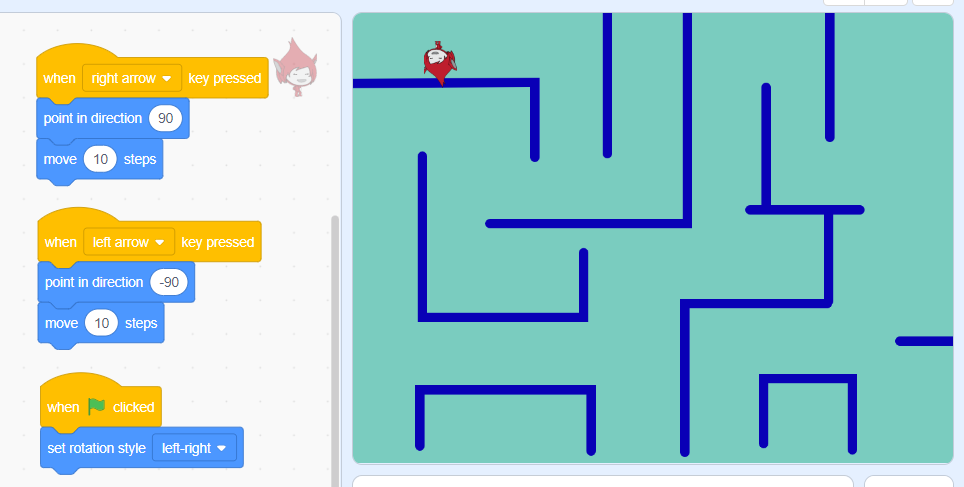
- Click on “green flag”.
- The sprite can move in the right and left direction without inverting by pressing the right and left arrow keys.
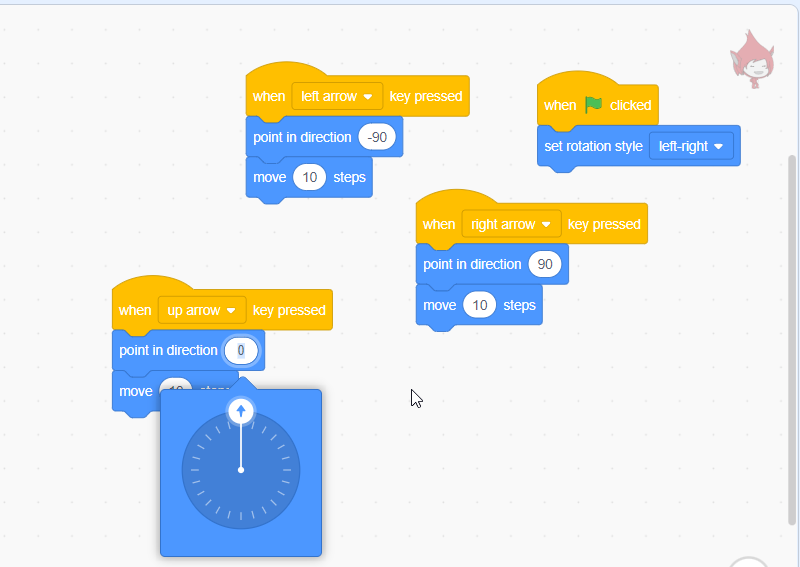
- Similarly, write the code for the “up-arrow” key pressed.
- Drag & drop “when up arrow key pressed”, “point in direction” and “move steps” blocks as shown below.
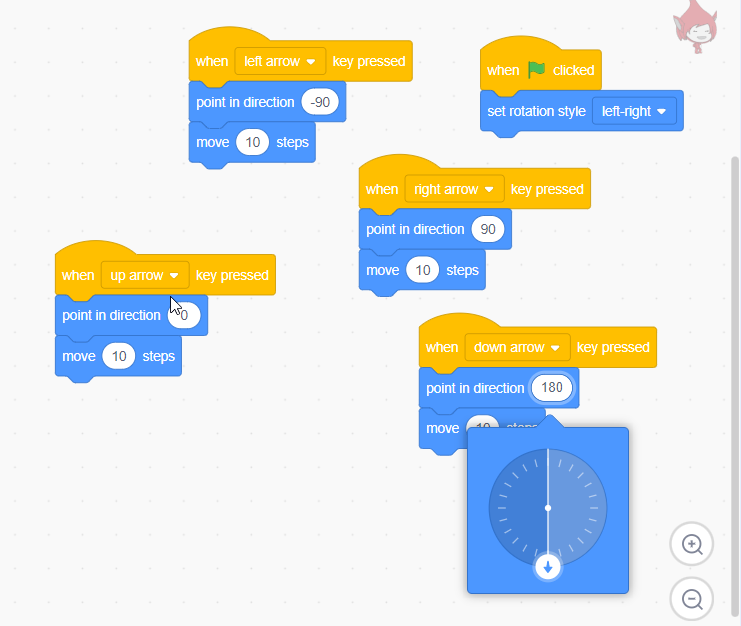
- Similarly, write the code for the “down-arrow” key pressed.
- Drag & drop “when up arrow key pressed”, “point in direction” and “move steps” blocks as shown below.
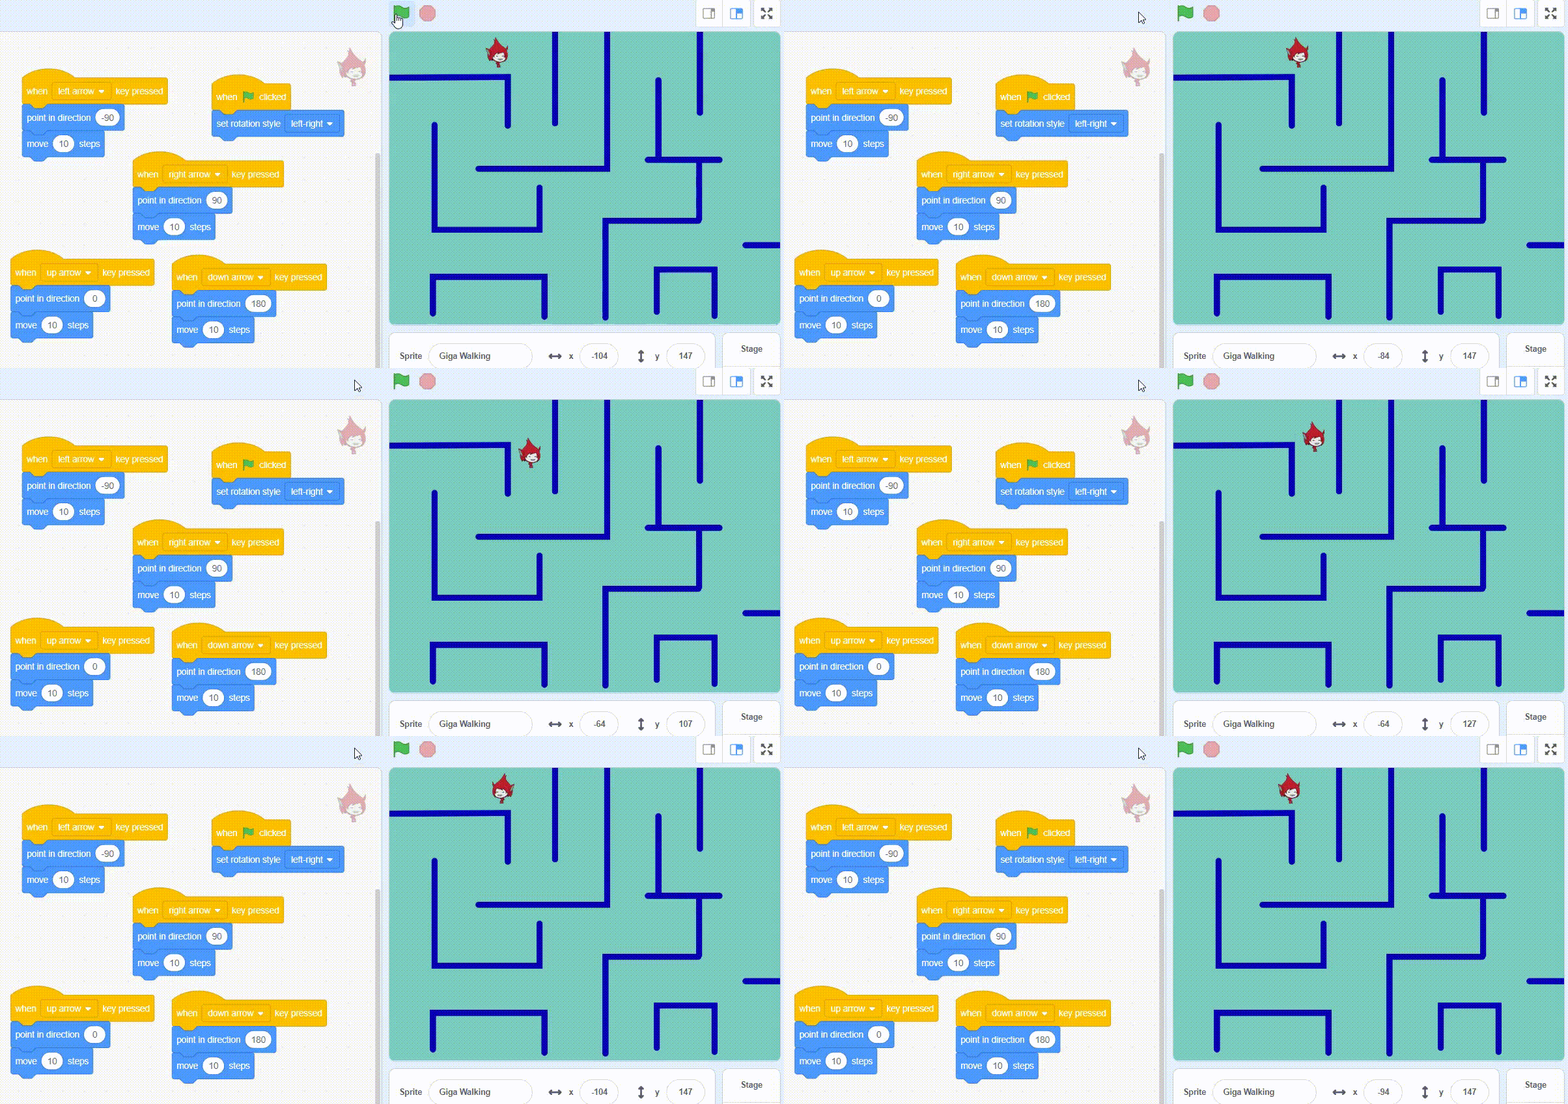
- Click on “green flag”.
- Sprite can move in the right & left direction by pressing the right & left arrow keys.
- Sprite can move in the up & down direction by pressing the up & down arrow keys.
Step 3: Detecting the Character [Giga] Collision [With Maze Wall]
- As of now, we can control our sprite using arrow keys. But it overshoots the Maze walls (blue color) and as per the game rule, it should reset to the starting point when it touches the Maze walls (blue colour). Let’s work on that.
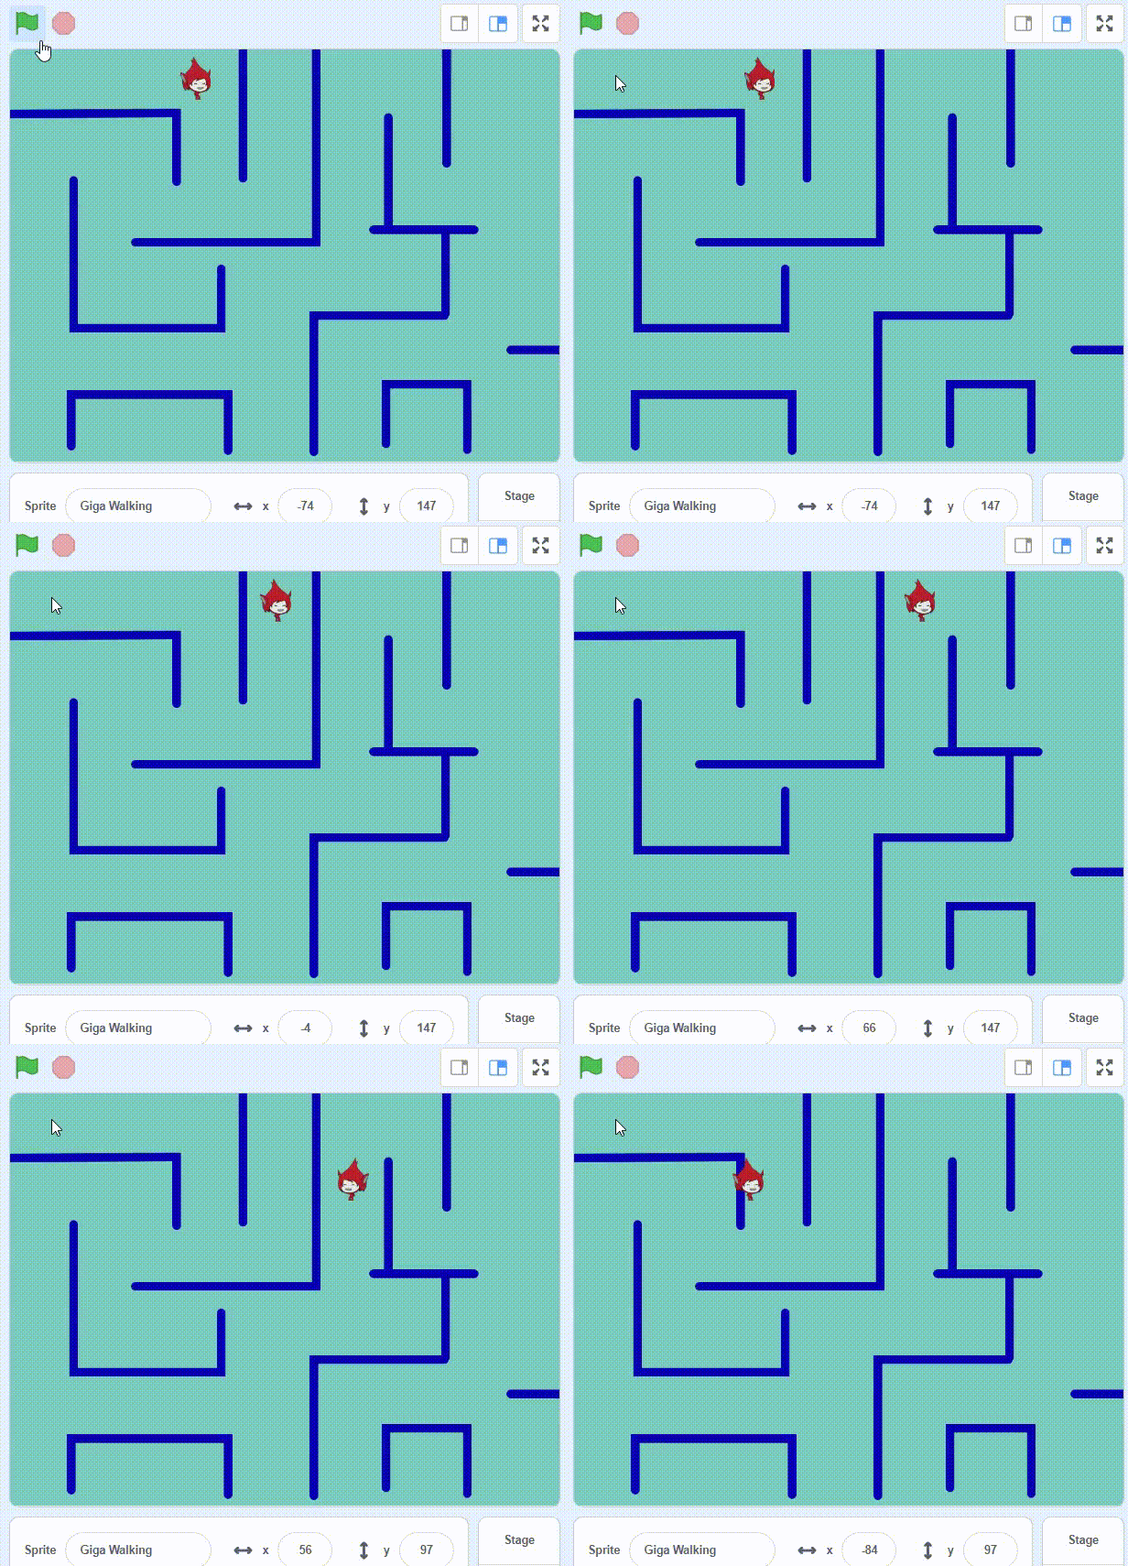
- Click on the “Giga Walking” sprite and write the code.
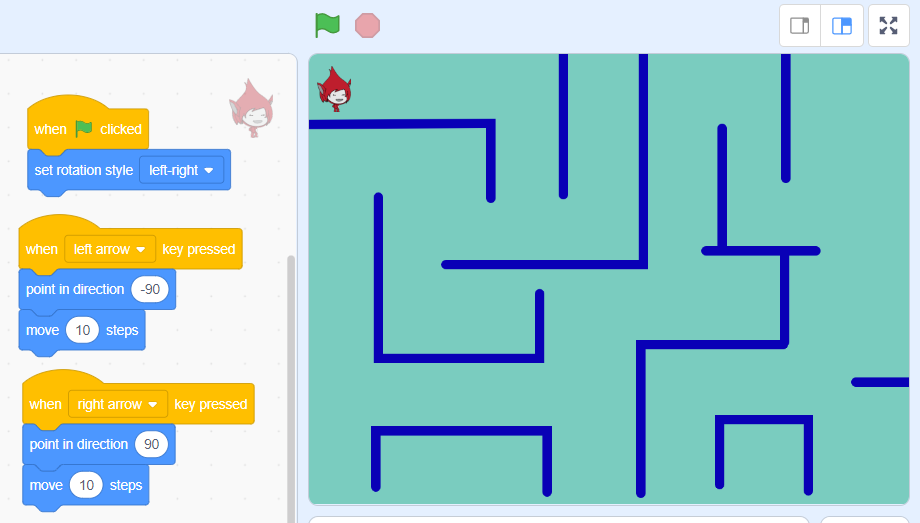
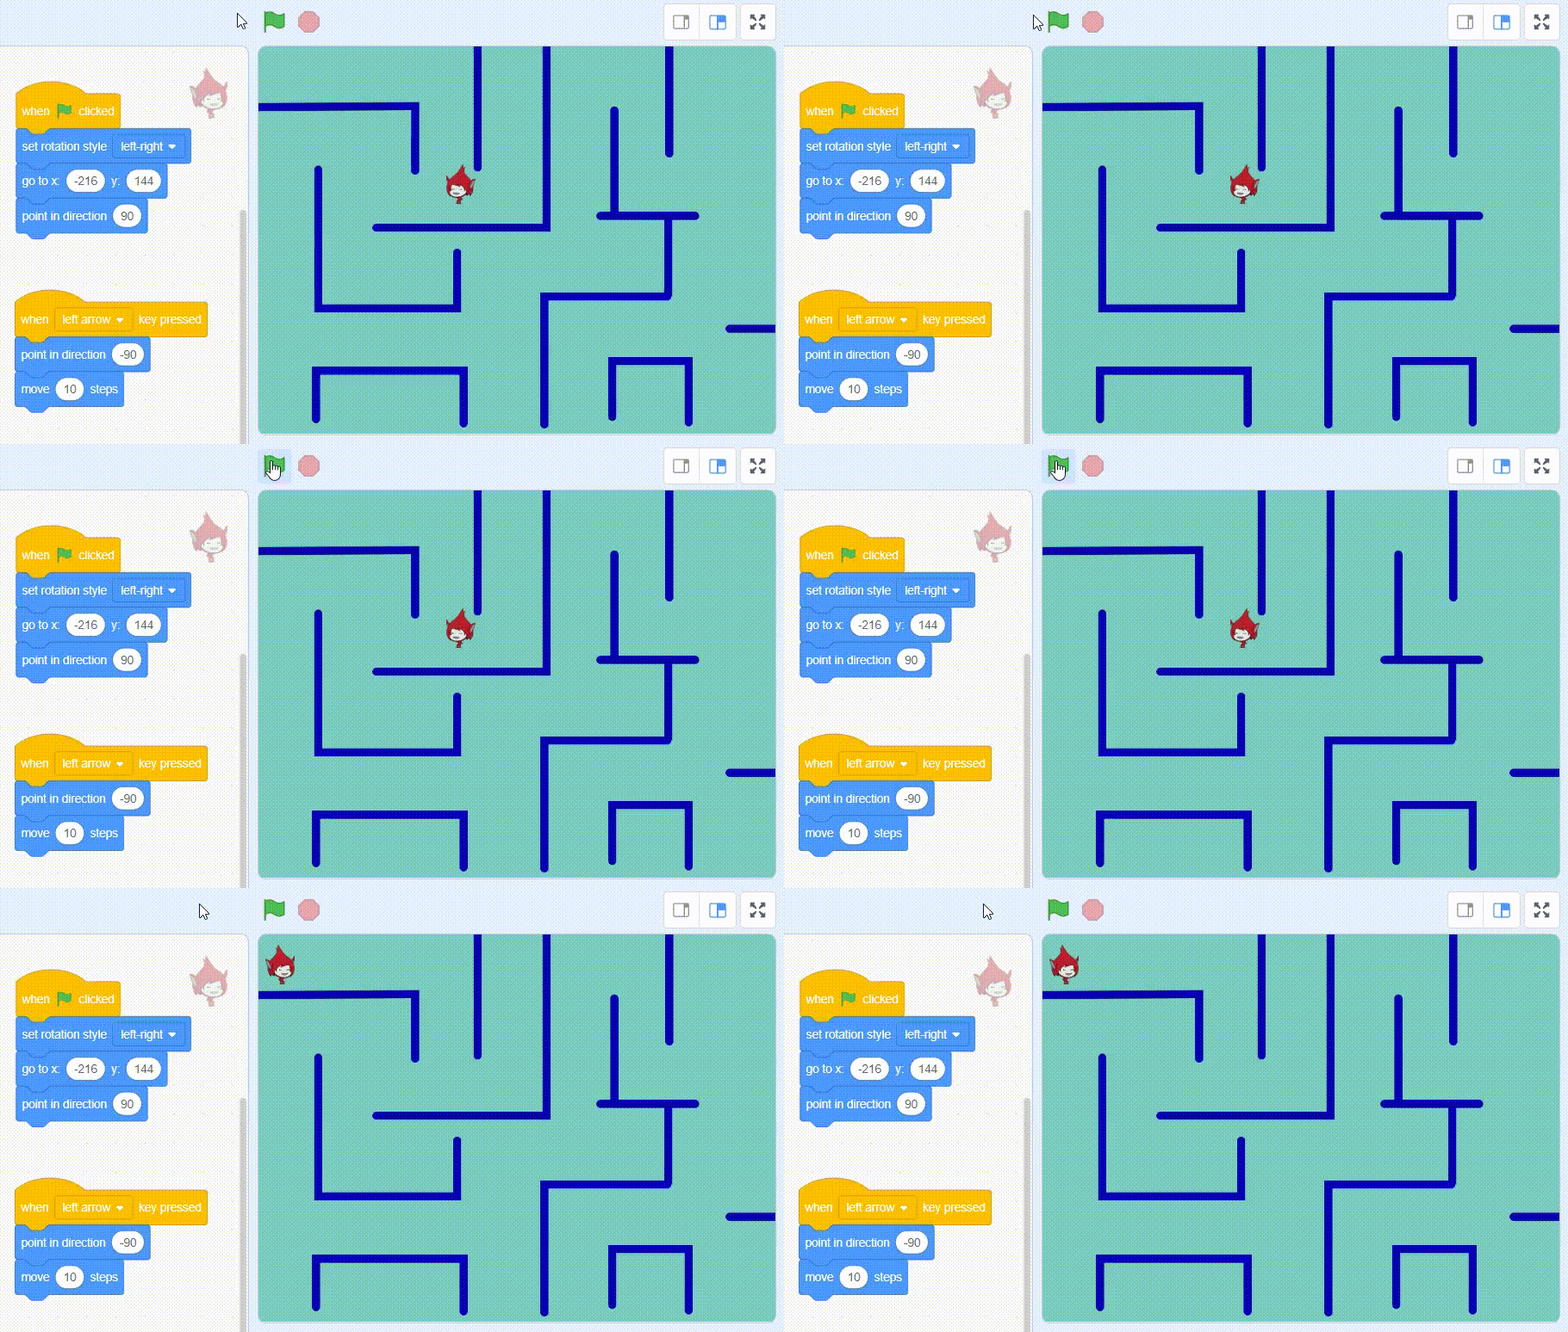
- Move the Giga to the starting point when we start the game by clicking “green flag”.
- Drag & drop the “go to x y” block to the “set rotation style left-right” block as shown below.
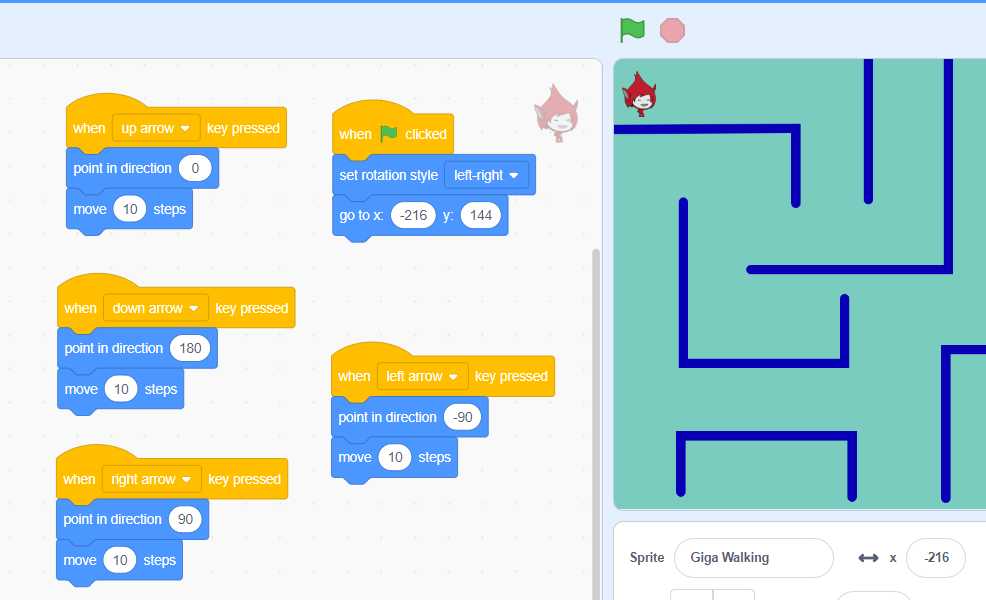
- Also, set the Giga direction to the right when starting the game.
- Drag & drop the “point in direction” block and set its value to 90 as shown below.
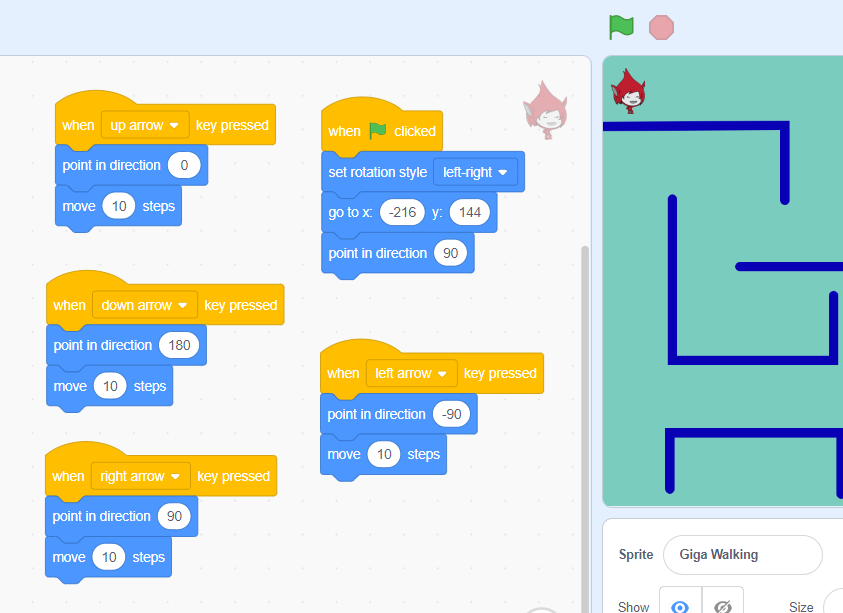
- Click on “green flag”.
- Sprite can go back to the starting point and the direction they will go is from right.
- Move the Giga back to the starting point when it touches the Maze walls [blue colour].
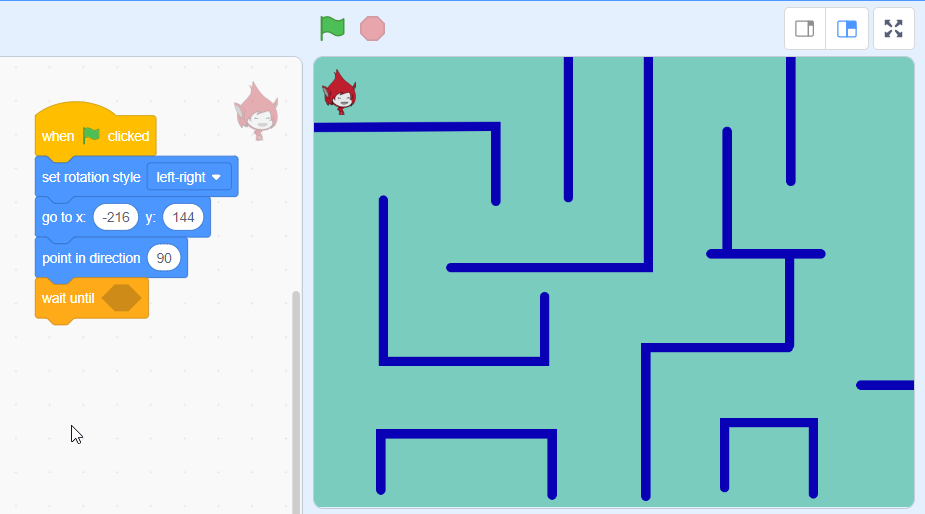
- Write a conditional statement to determine whether the Giga touches the Maze wall or not.
- From the “control category” drag & drop “wait until” block as shown below.
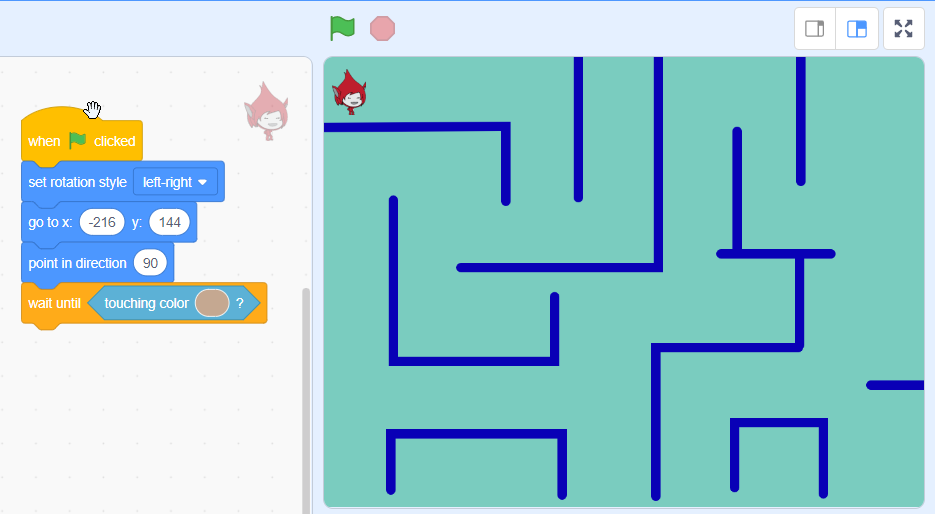
- From the “sensing category” drag & drop “touching color” block to “wait until” block as shown below.
- Select the Maze wall’s colour. Click on “paint option”.
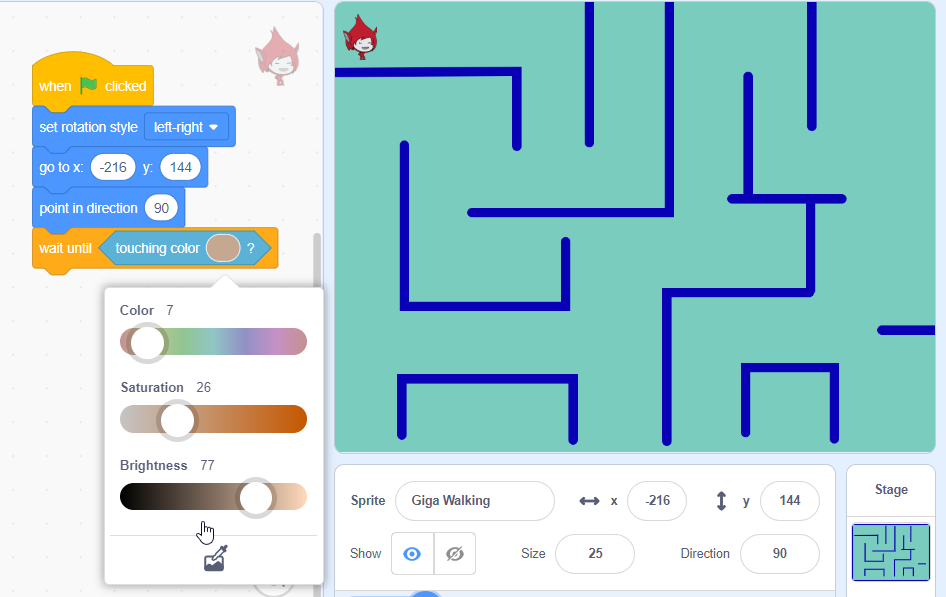
- Click on the middle of the wall.
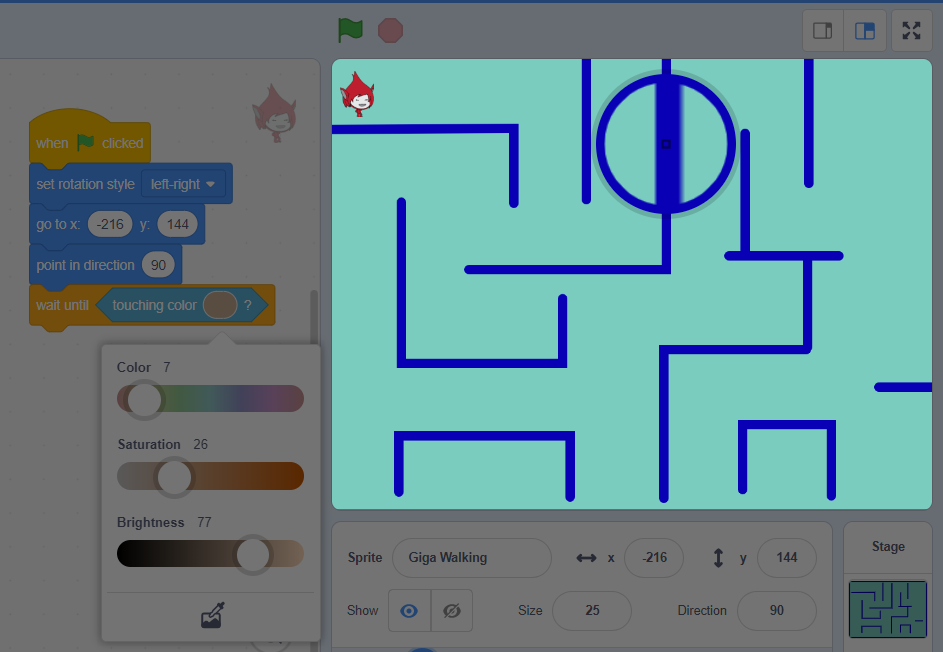
- Wall colour selected.
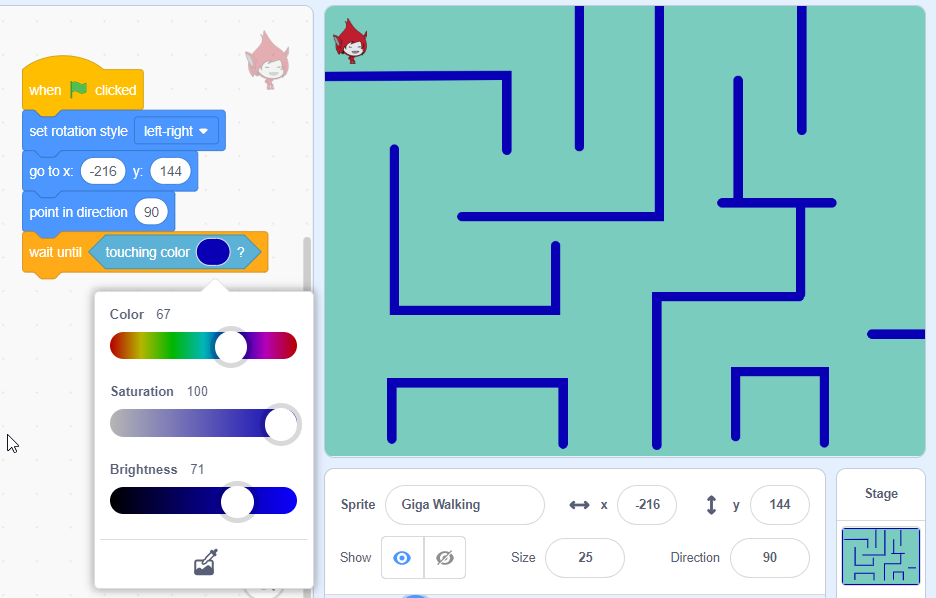
- Reset the Giga to the starting point when it touches the Maze wall.
- Drag & drop “glide secs to x y” block as shown below.
- Also, set the Giga direction to right.
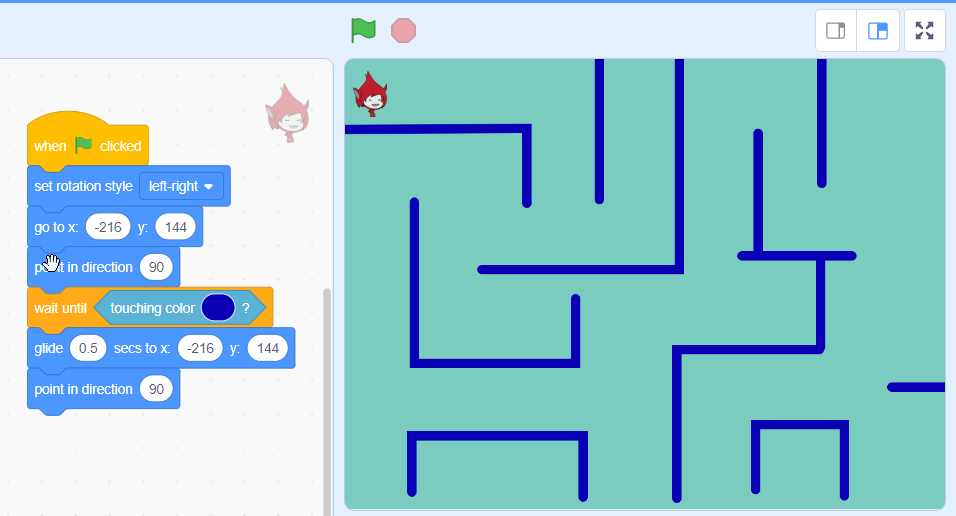
- Click on “green flag”.
- Game will reset if the sprite touches the Maze wall, but this condition only happens for once.
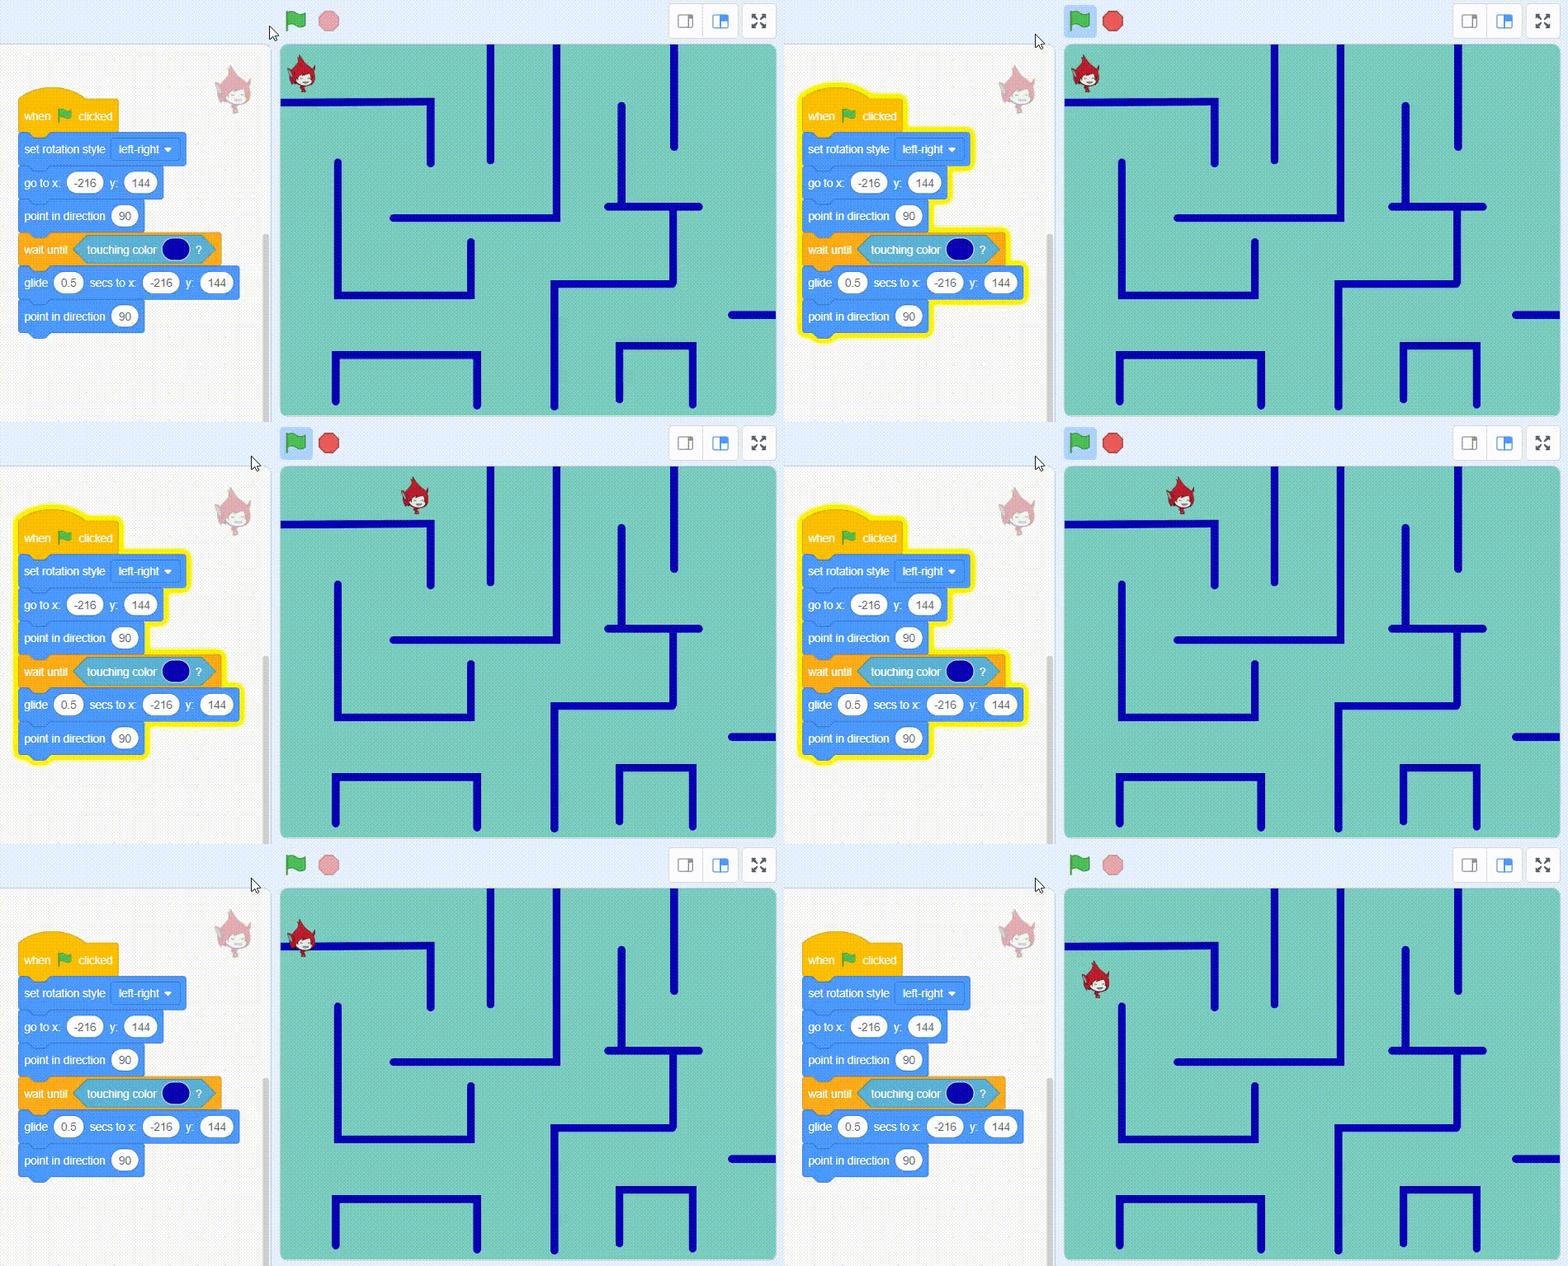
- Put the conditional statement into the “forever” loop.
- Click on “green flag”.
- Sprite will back to the starting point every time it touches the Maze wall.
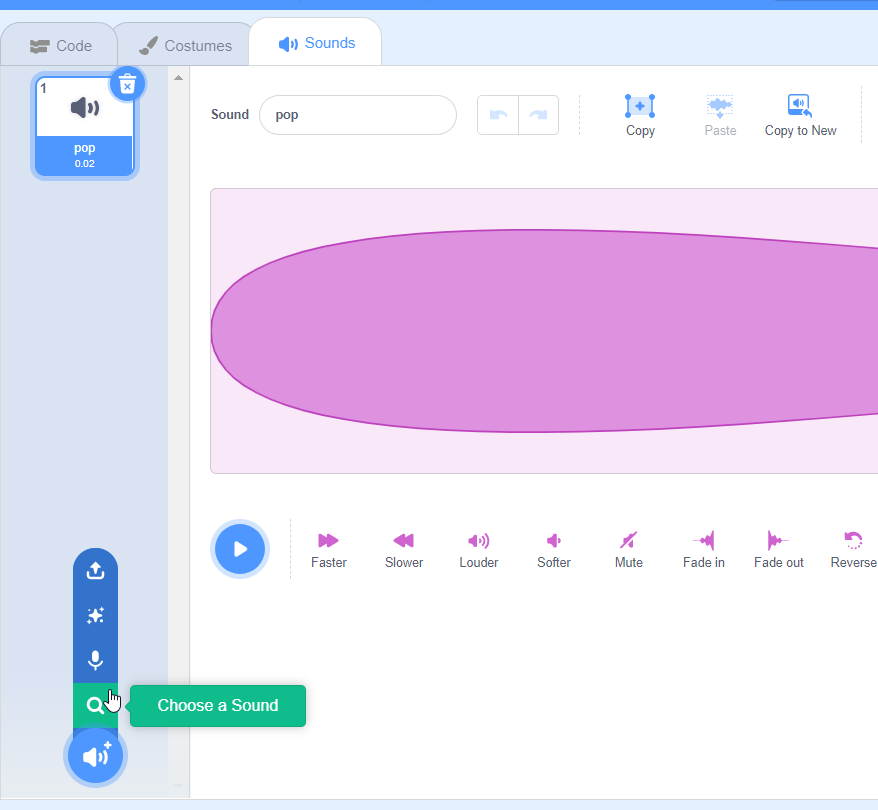
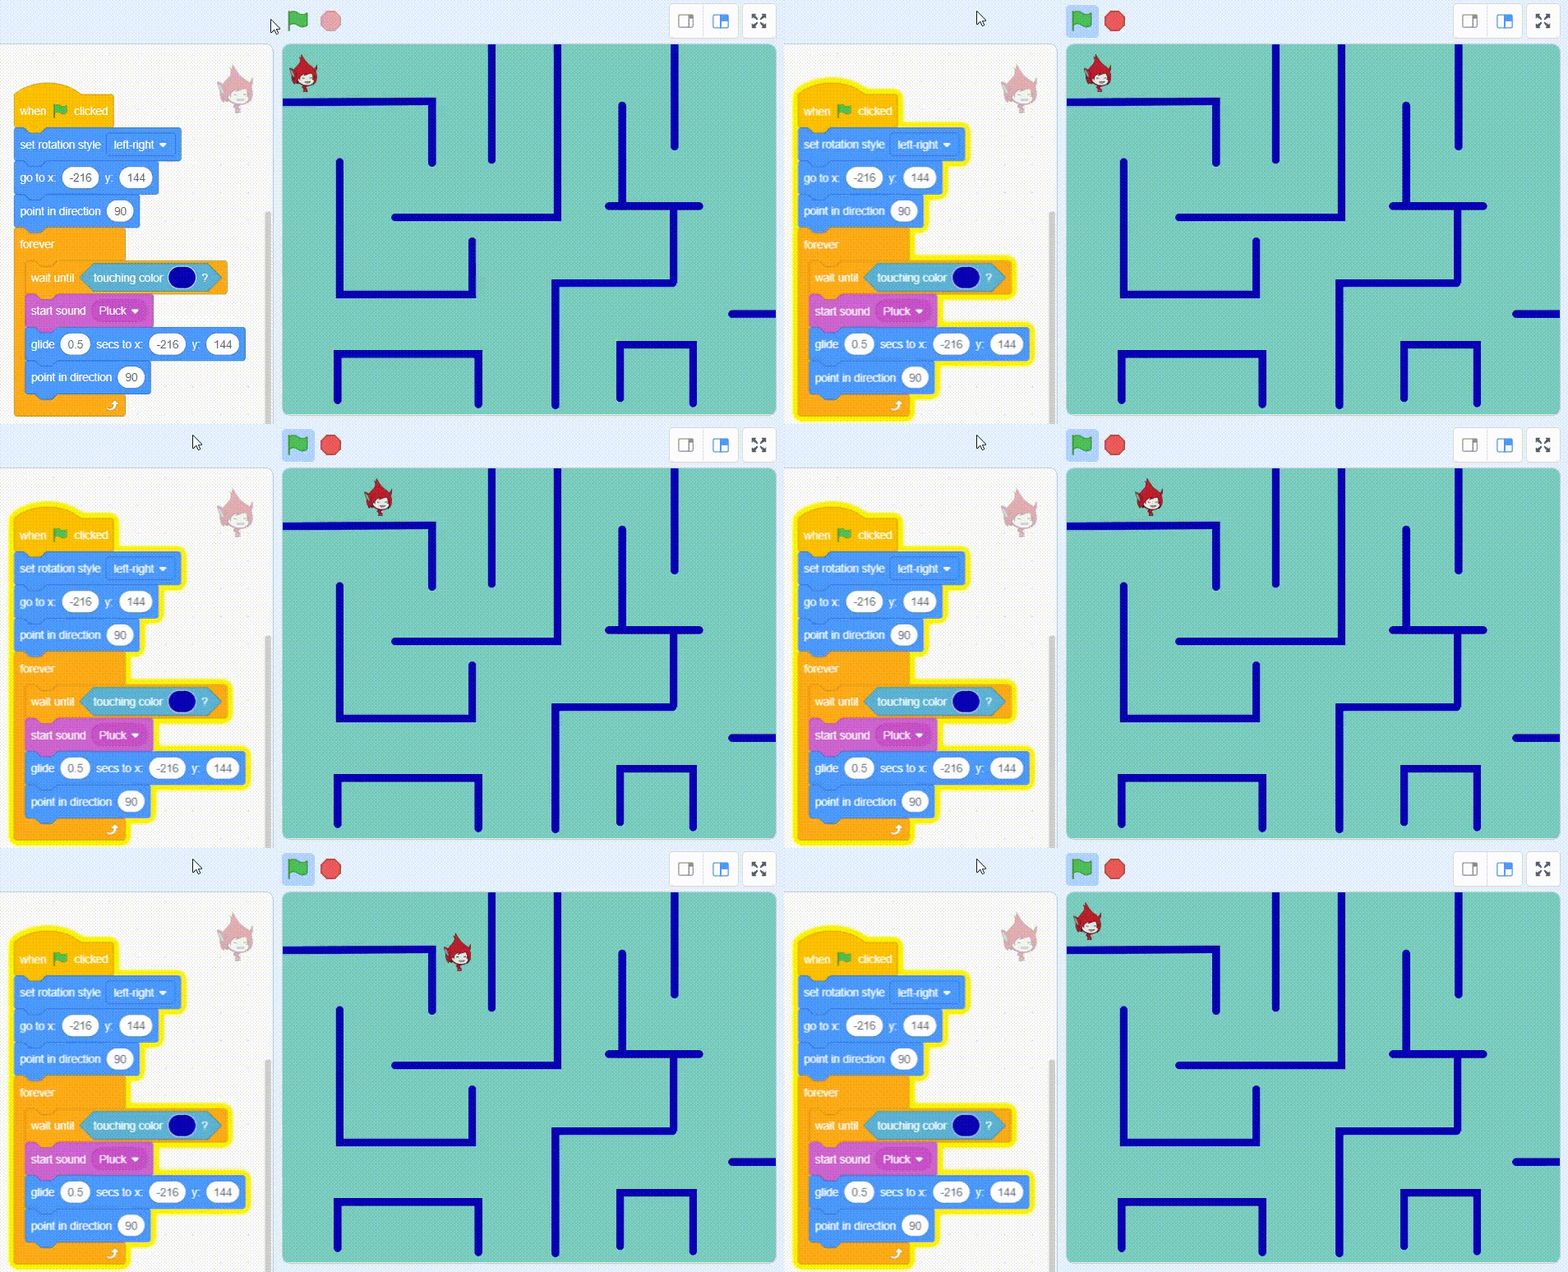
- To enhance the game let’s add a sound to it. It is for when & if the Giga touches the Maze wall.
- Click on “Sounds”
- Click on the “choose a sound”
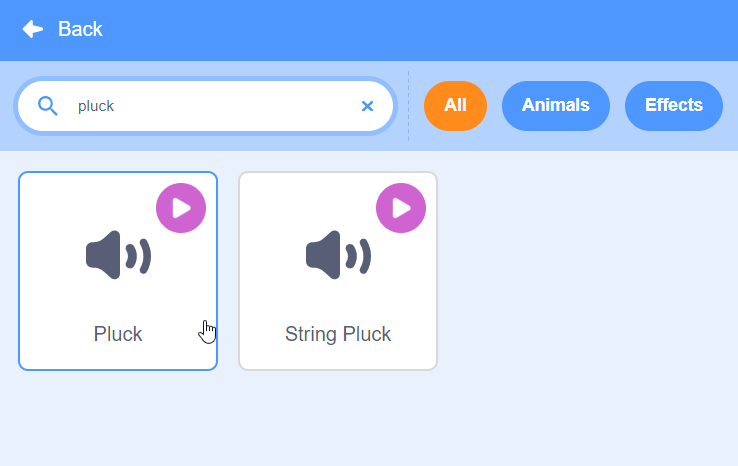
- Search “Pluck” and click on it.
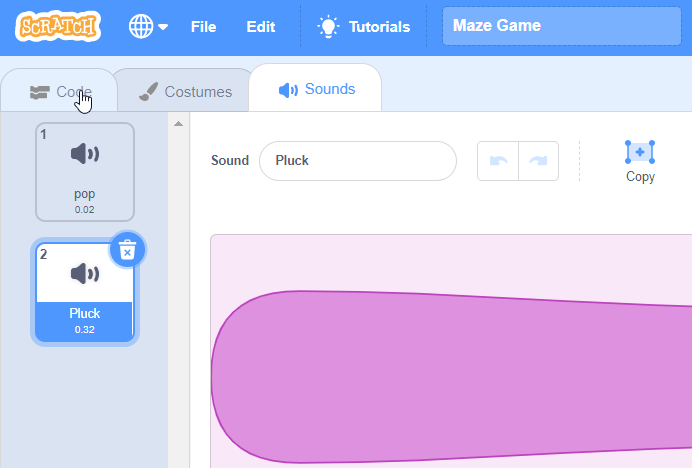
- Back to code, click on the “Code”
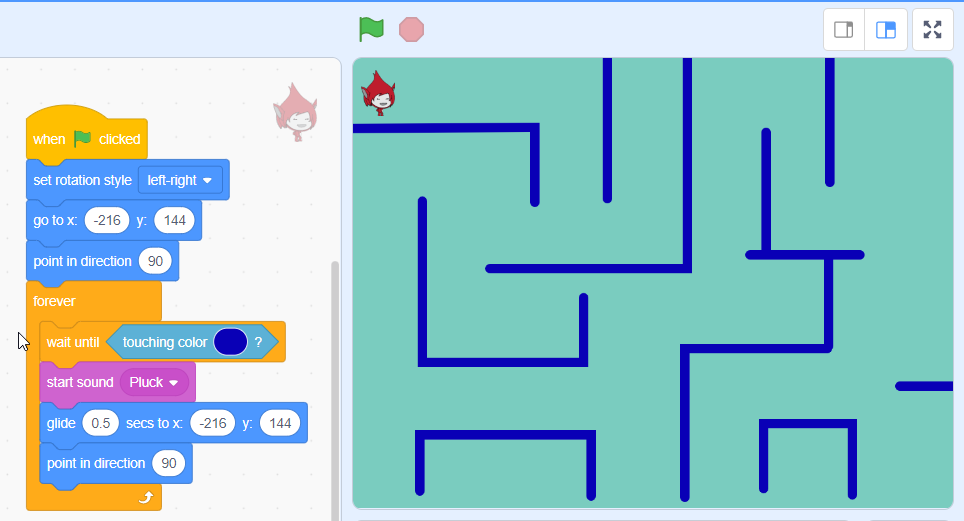
- Add the sound for when sprite touches the Maze wall.
- Drag & drop “start sound” block as shown below.
- Click on “green flag”.
Step 4: Setting the Reward [Game Endpoint]
Now, let’s set the game endpoint. A reward will be given if the sprite [Giga] reaches the endpoint.
- Pick a sprite as a prize and click on “Choose a Sprite”
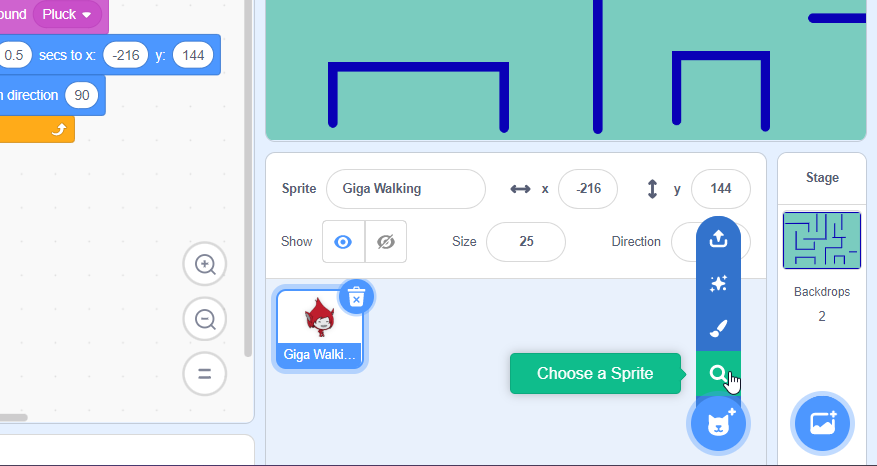
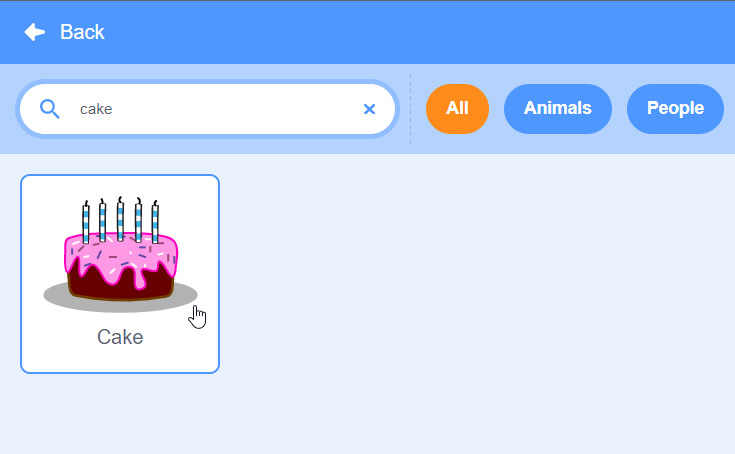
- Search for cake and click on it.
- Please place the cake at the endpoint of the Maze and reduce its size according to the Maze size, as shown below.
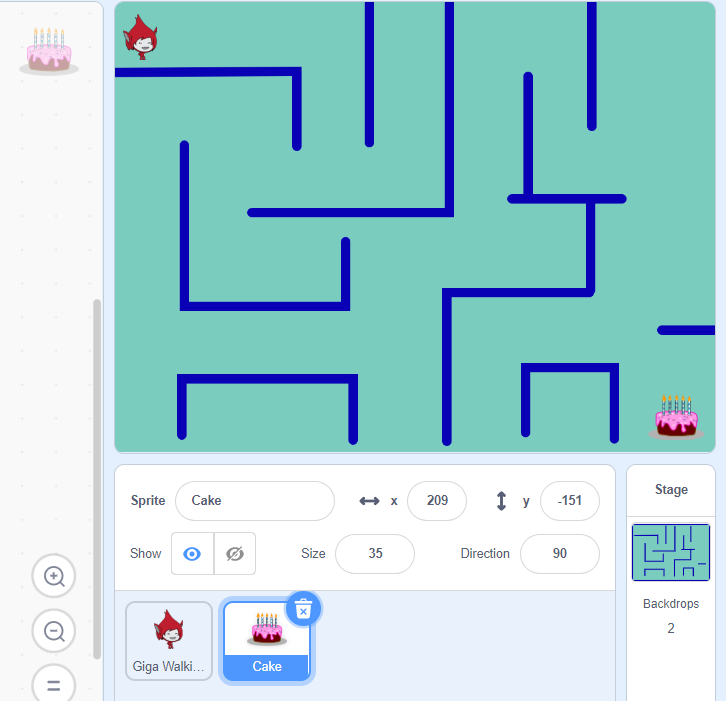
- Game endpoint is now set.
- Click on the “Giga Walking” sprite to code it.
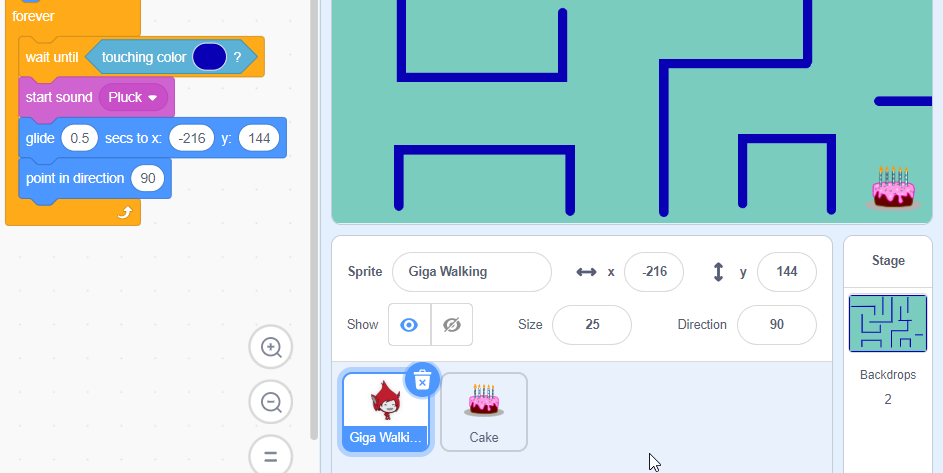
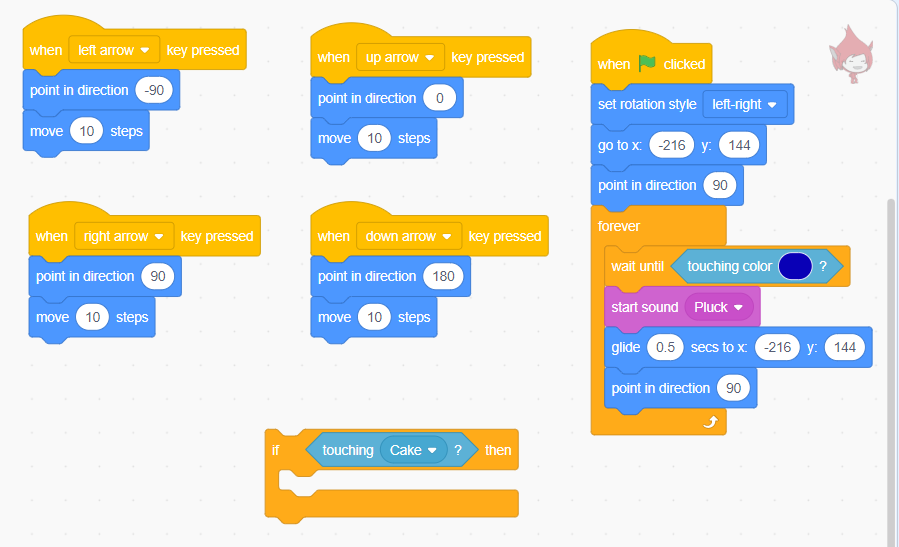
- Let’s write a conditional statement to check whether the Giga touches the cake or not.
- Drag & drop “if-then” and “touching” blocks, as shown below.
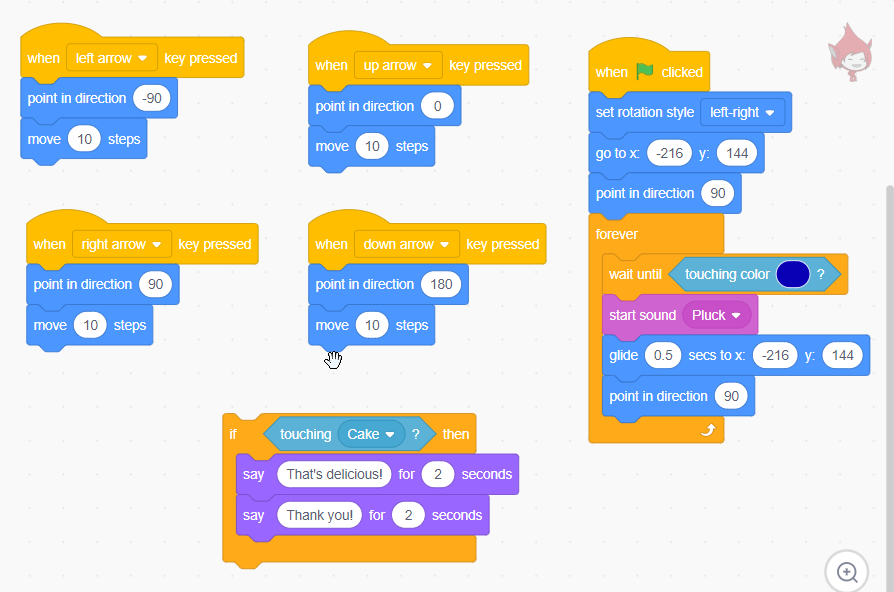
- Write a message to be displayed when the sprite touches the cake.
- Drag & drop the “say” block from the “looks” category and write your message, as shown below. You can write anything.
- Stop the game because the Giga reached the game endpoint.
- Drag & drop “stop all” block as shown below.
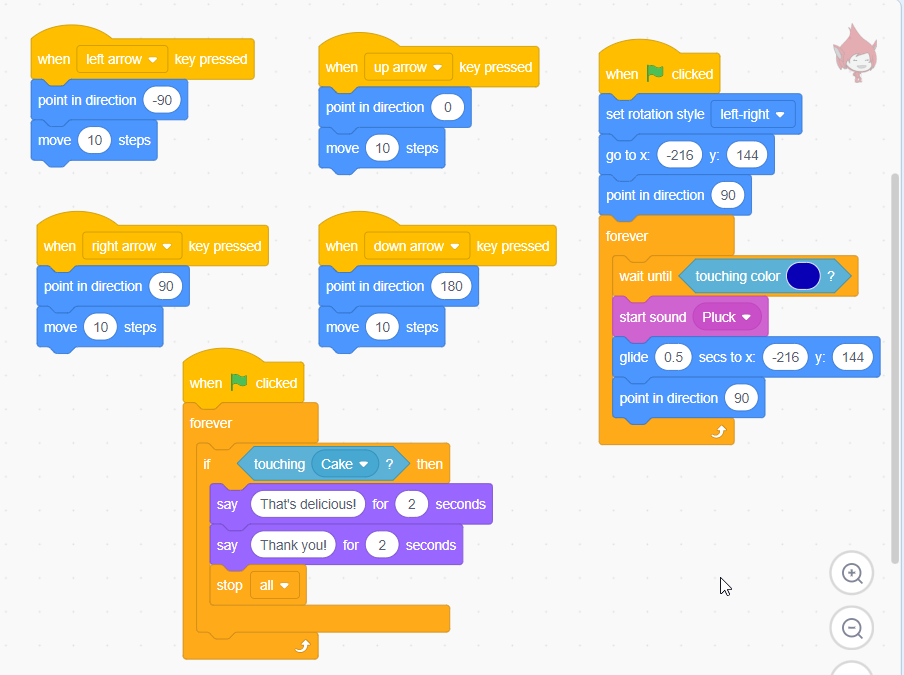
- Put this conditional statement into a “forever” loop to check it continuously.
- Drag & drop the “forever” block, as shown below.
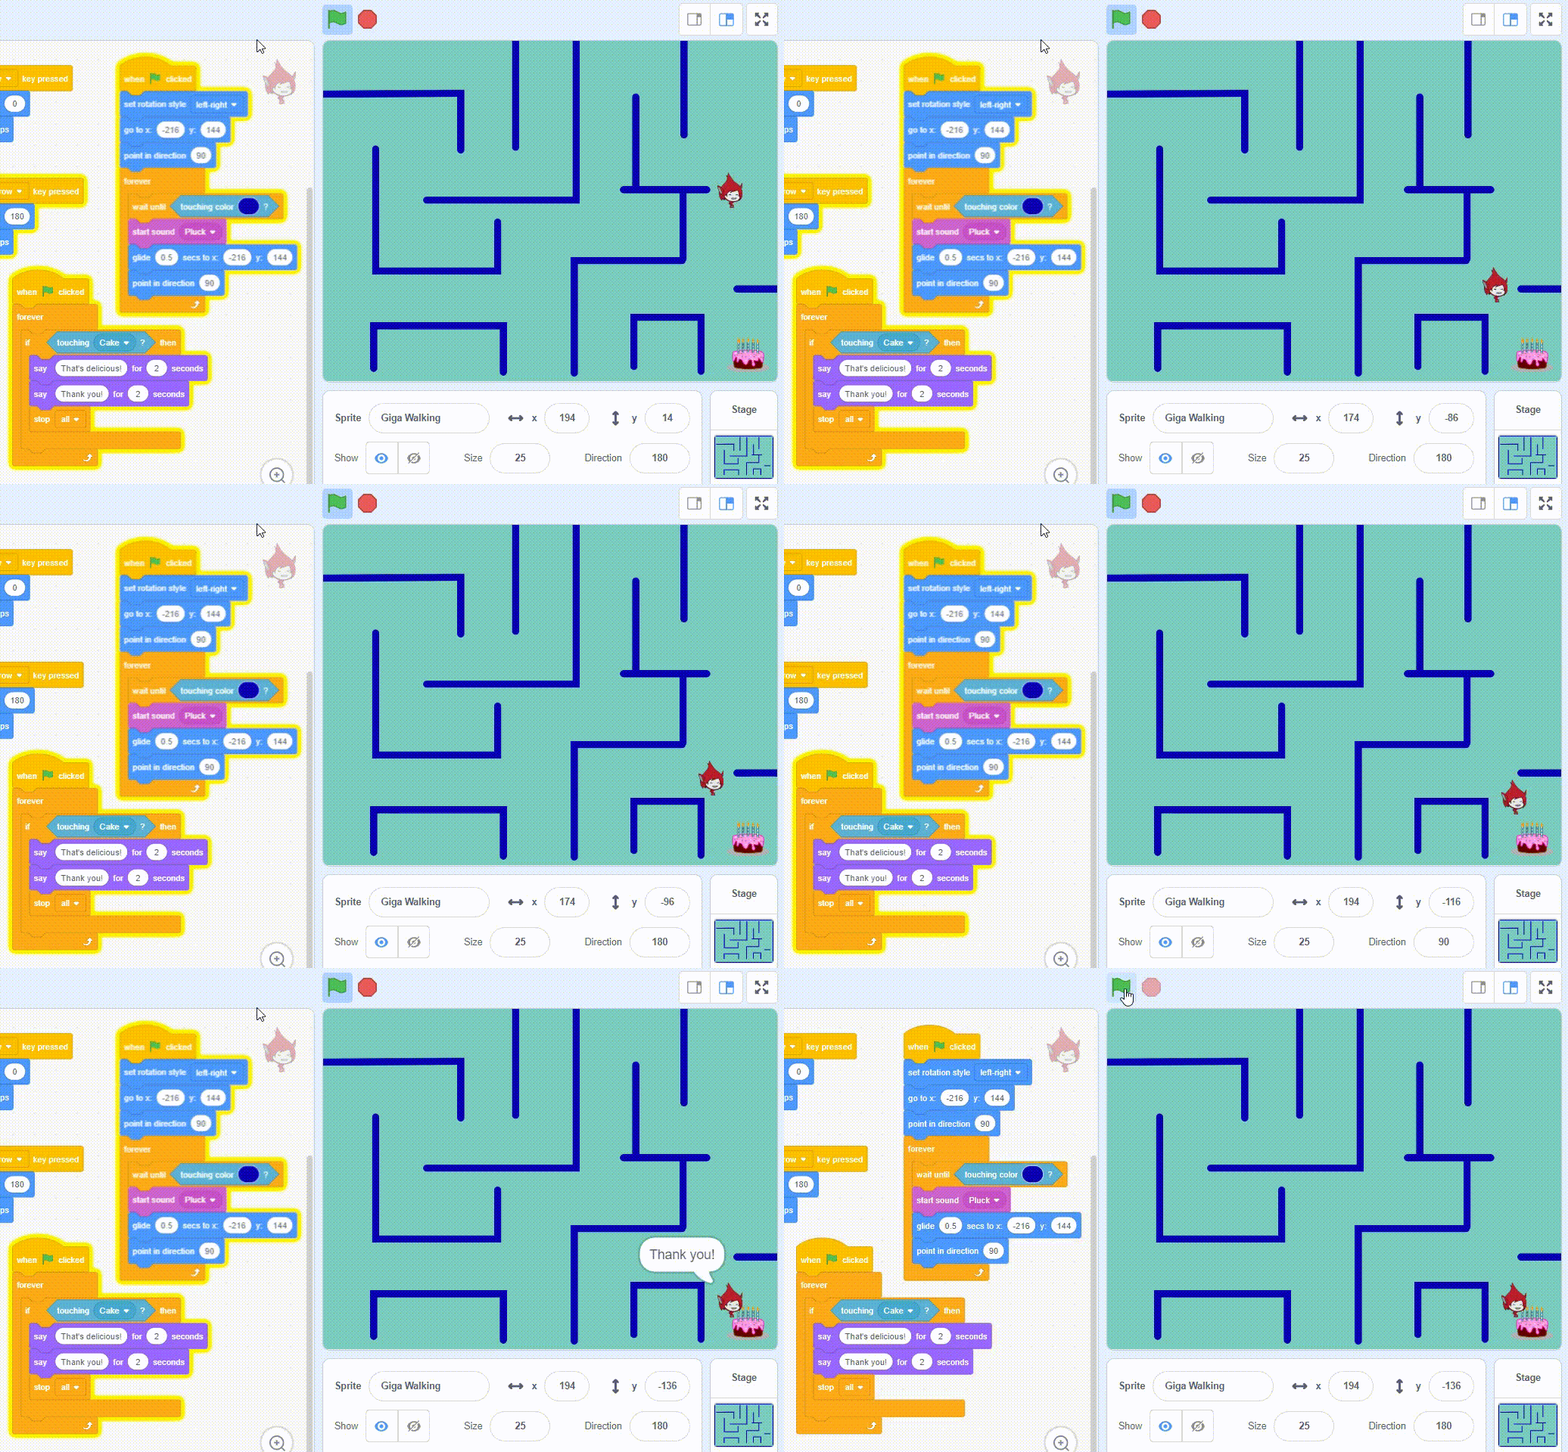
- Click on “green flag”.
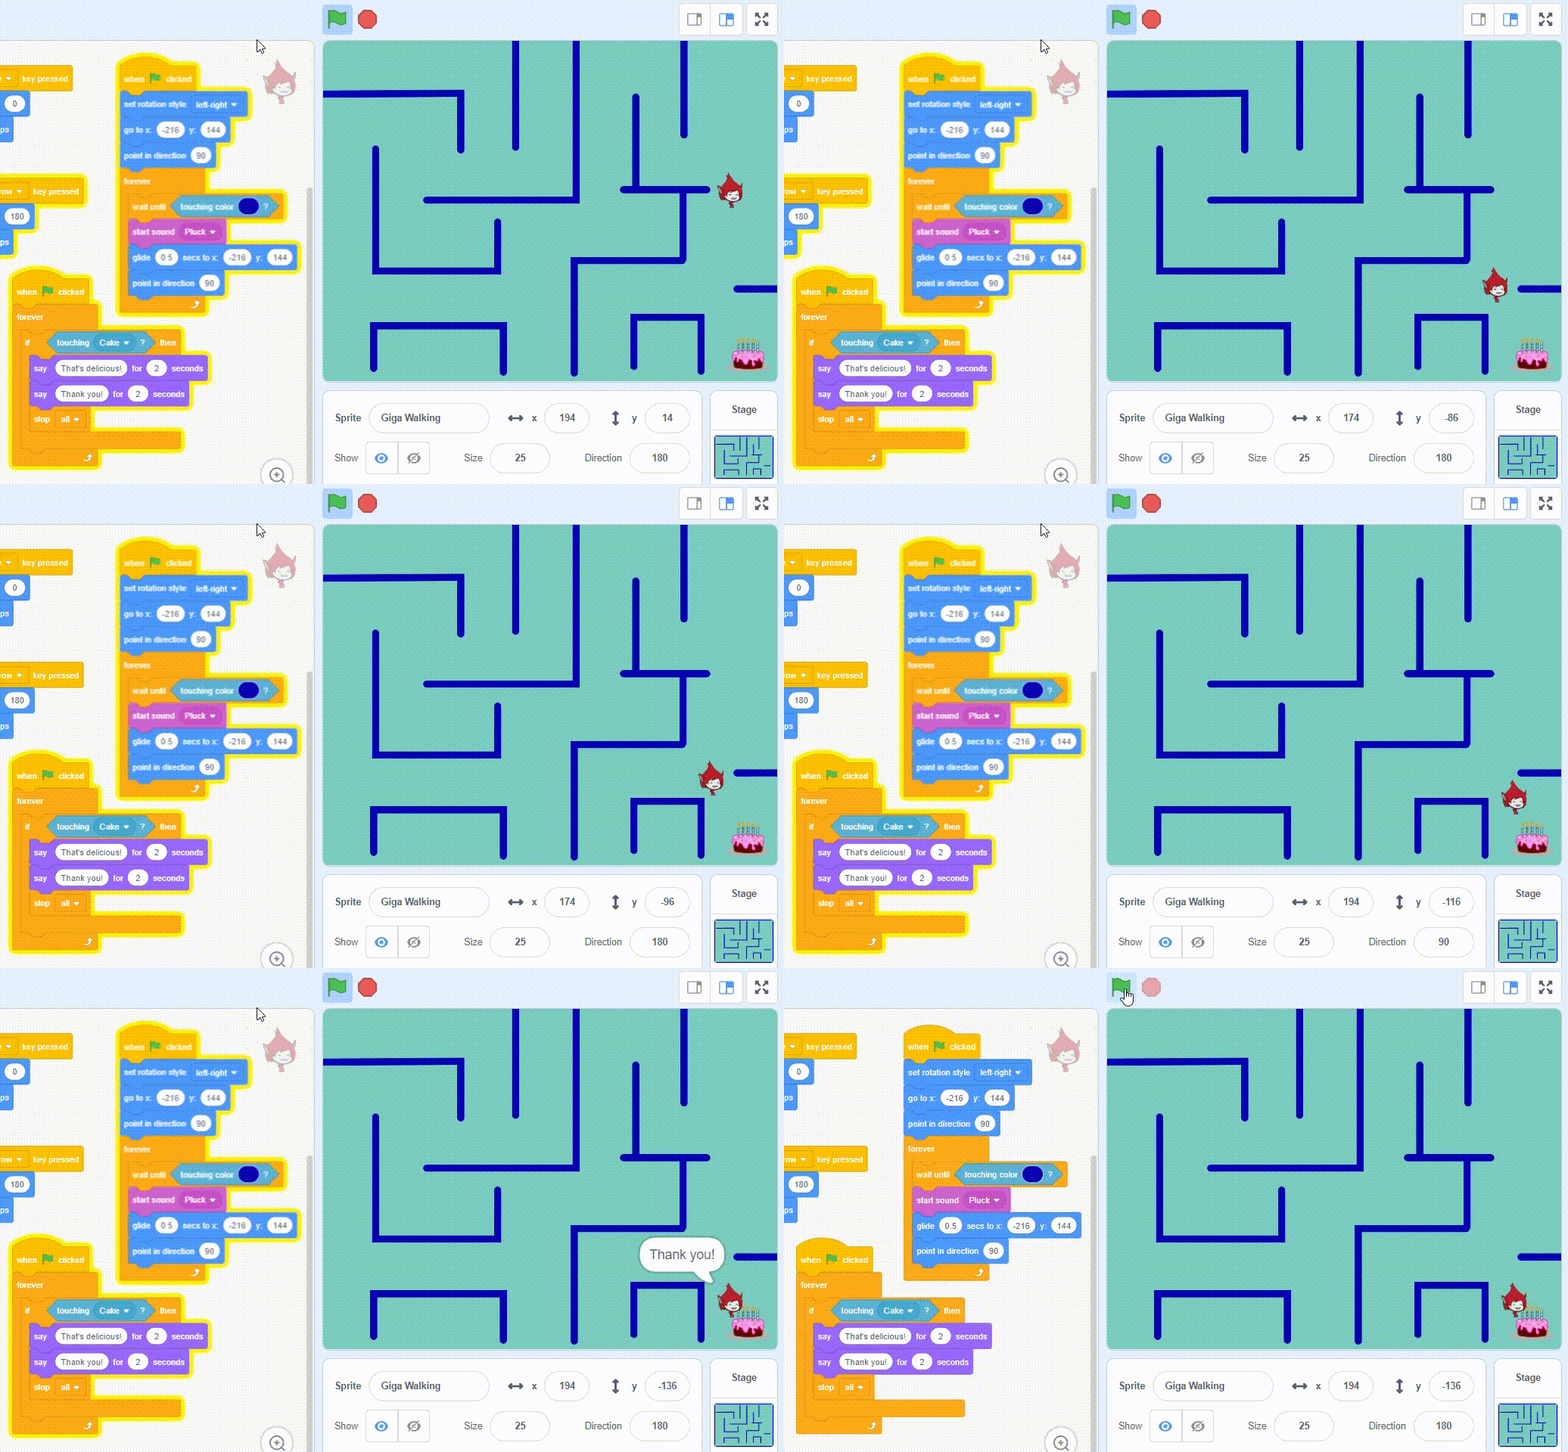
- If the Giga reaches to the cake, a reward message will be displayed and the game will stop.
Step 5: Adding Difficulty [Levels]
To enhance the game, let’s add another sprite to it. This sprite will act as an enemy and randomly move around the Maze. If the Giga touches this sprite, the game will restart.
- Click on “Choose a Sprite”
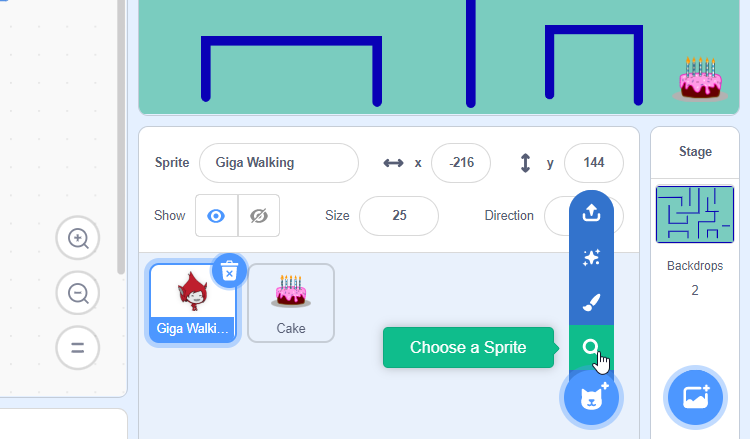
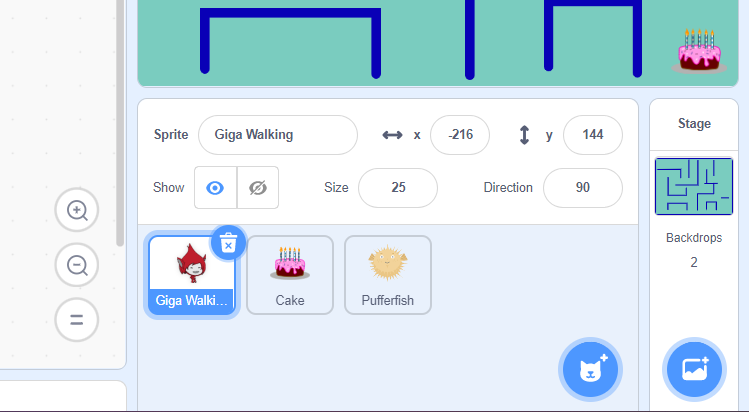
- Click on “Pufferfish”
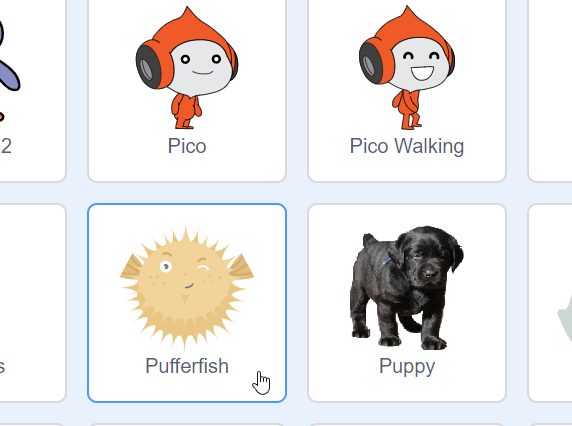
- Reduce the size of pufferfish as per the Maze.
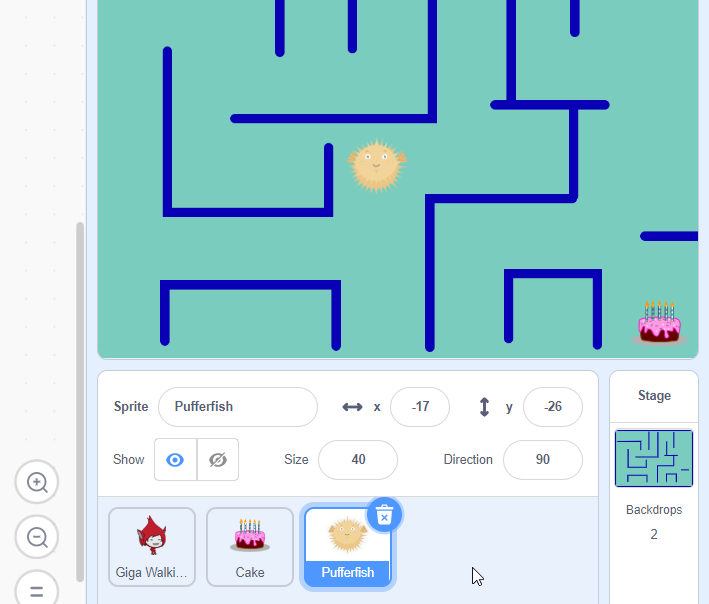
- To move the pufferfish smoothly over the Maze, use the “glide secs to” block.
- Drag & drop “glide secs to slot bonus new member 100 di awal random position”, “forever” and “when green flag clicked” blocks as shown below.
- Click on “green flag”.
- You can see pufferfish moving over the Maze randomly. You can control the speed of this sprite by increasing and decreasing the glide “secs” value (here, 2).
- Now, let’s write a code that if the “Giga” touches the pufferfish then the game will restart.
- Click on “Giga Walking”
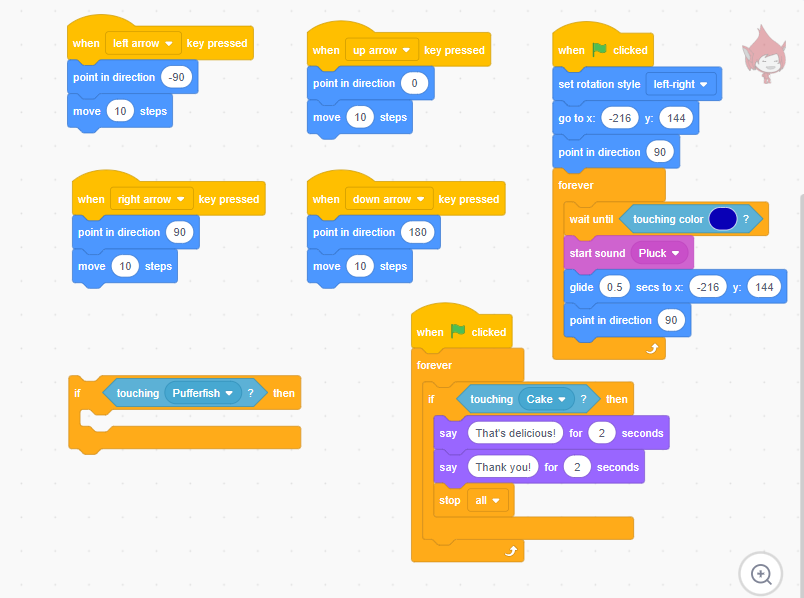
- Write a conditional statement to determine whether the Giga touches the pufferfish or not.
- Drag & drop “if-then” and “touching Pufferfish?” blocks as shown below.
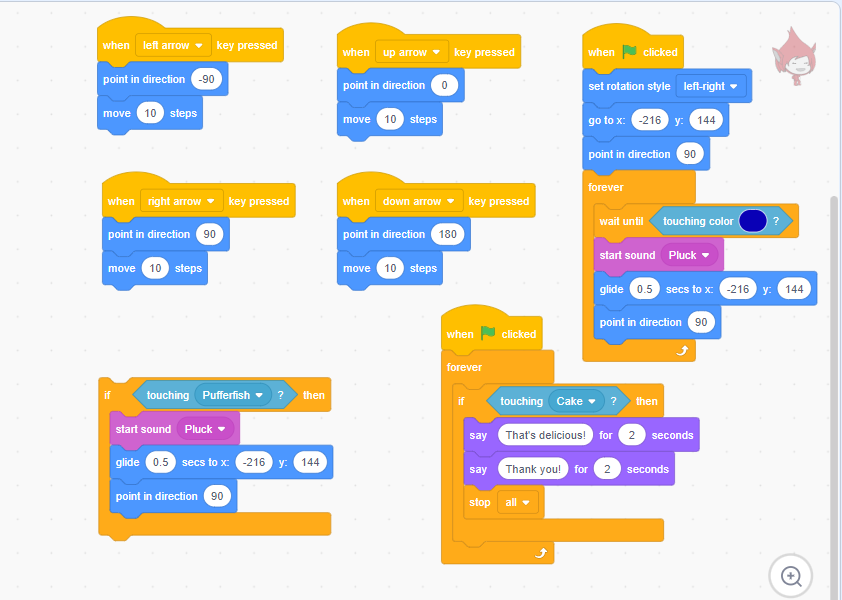
- Add sound and glides the Giga to the game start point when it touches the pufferfish.
- Drag & drop the “start sound Pluck”, “glide secs to x y”, and “point in direction” blocks, as shown below.
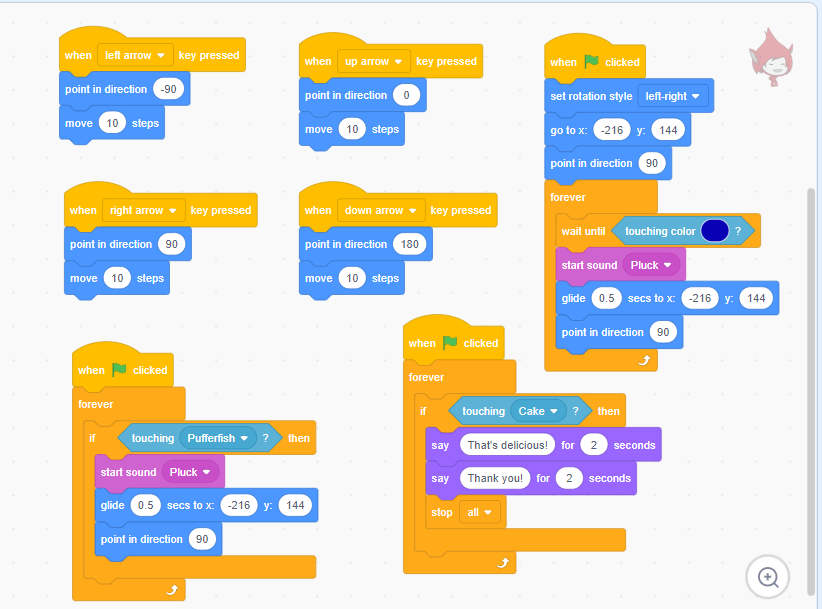
- Put this conditional statement into the “forever” loop.
- Click on “green flag”.
- Now, you can see if Giga touches the pufferfish it goes back to the game starting point.
Congratulations, You have completed the Maze game in Scratch.
Check out our compilation of some of the most popular Scratch Games for Kids along with step-by-step tutorials on how to build those games.
Looking to learn Scratch coding? Explore Wiingy’s Online Scratch Coding Classes For Kids to learn from top Scratch coding experts.
FAQs on Maze Game on Scratch
How to make a maze game on Scratch step by step?
To build the maze game on Scratch you need to create a sprite that moves through a maze, avoiding the maze’s boundary, in order to reach the prize. You can also add difficulty level by adding obstruction that will appear out of nowhere. The steps to create the game will be:
- Setting up the Maze game backdrop and character [sprite]
- Controlling the character [sprite with arrow keys]
- Detecting the character collision [with Maze wall]
- Setting the reward [game endpoint]
- Adding difficulty [levels]
How to download the Scratch maze background?
You can download a maze background in Scratch for your maze game by simply clicking on the “backdrop” tab under the sprite pane. You will now be taken to many pre-made backdrops, search for a maze backdrop and add it to your game.
How to run the script in the maze game on Scratch?
After you have created your maze game on Scratch, simply click on the “green flag” option located in the top-right corner of the Scratch editor and your script will now run. To stop your script, click on the “red dot” option next to the “green flag” option.
How to make a simple maze game on scratch?
To make a simple maze game on Scratch follow the below-mentioned steps:
- Setting up the Maze game backdrop and character [sprite]
- Controlling the character [sprite with arrow keys]
- Detecting the character collision [with Maze wall]
- Setting the reward [game endpoint]

