How To Make A 3D Game In Scratch? [Free Scratch 3D Game Code!]
- Aditi |
- May 30, 2024
Updated By
Reviewed By
Contents

In this article, we are going to show you how to make a 3-dimensional game or project in the Scratch programming language. This type of project can be used for various purposes, such as learning about 3D shapes and their properties or creating a game with an interesting 3D environment.
Looking to learn Scratch coding? Explore Wiingy’s Online Scratch Coding Classes For Kids to learn from top Scratch coding experts.
How to make a 3D game in Scratch?
For creating a 3-dimensional game in Scratch, the most important thing you need to know is the knowledge of the illusion of depth because the Scratch platform is for creating 2-dimensional games as it offers an x-axis which gives the perspective of left and right coordinates and a y-axis which gives the perspective of up and down coordinates. For a 3-dimensional platform, a third axis, that is, the z-axis is also required which runs at a right angle to the x-axis and y-axis.
To create the illusion of depth, Scratch mostly uses changes in movement and size. In this article, I will explain how to make a 3D maze game in Scratch using a 2D element. This will be done by the method of ‘raycasting’.
So, to create a 3D maze game in Scratch, just patiently follow the below-given steps:
- Step 1: Open Scratch and start creating sprites. Before drawing new sprites, make sure to delete the cat sprite. For this game, you need to create 4 different sprites. Now, to create the first sprite, click on the blue circle with the cat icon.
- Step 2: After clicking on the blue circle for choosing a sprite, select the second option from below that says ‘Paint’.
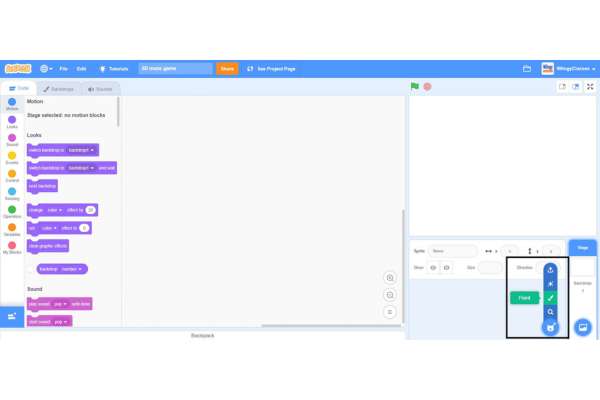
- Step 3: Once you click on the ‘Paint’ option, the following screen will appear.

- Step 4: Now, first draw a 2D maze using the line option with two openings on opposite sides which will act as the ‘exits’.
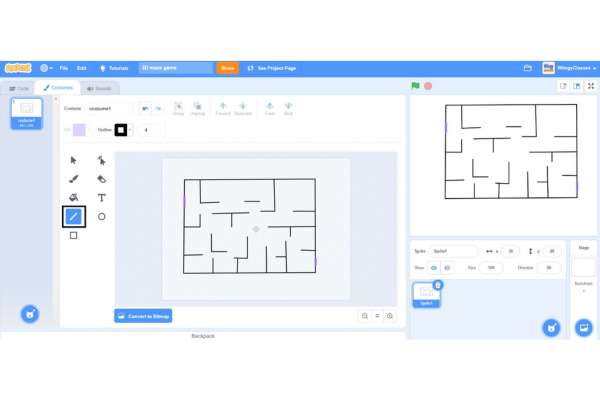
- Step 5: Rename this sprite as a ‘maze’ to avoid confusion while coding.
- Step 6: To create the second sprite, just repeat steps 1, 2, and 3 and after repeating these steps, simply draw the exit lines as you did in the first sprite.
- Step 7: Rename this sprite as ‘exit’ to avoid confusion while coding.
- Step 8: To create the third sprite, again repeat steps 1, 2, and 3 and after repeating these steps, create a with “YOU WIN!!!” text on it using the text option.
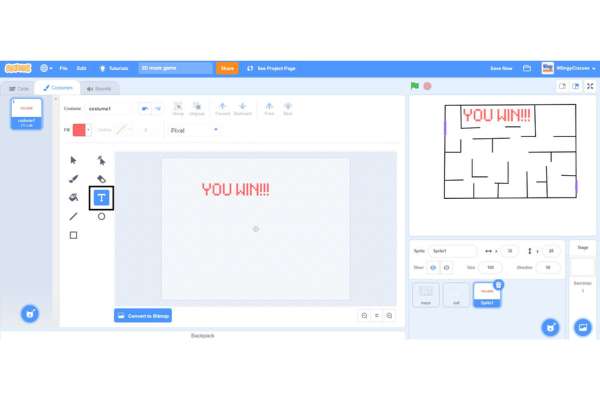
- Step 9: Rename this sprite as ‘win’ to avoid confusion while coding.
- Step 10: For the fourth sprite, you need to draw the main player. So, for that, again repeat steps 1, 2, and 3 and after repeating these steps, simply draw a box using the rectangle option and rename this sprite as ‘player’.
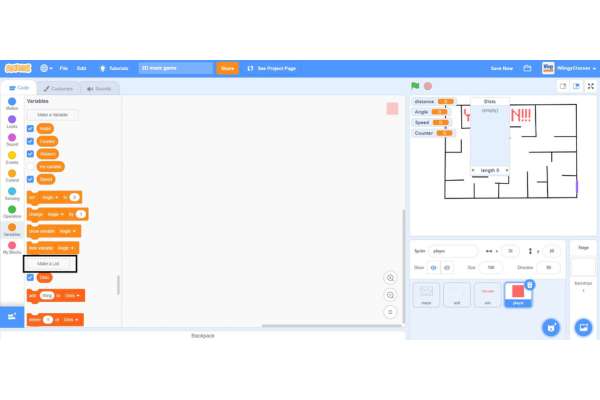
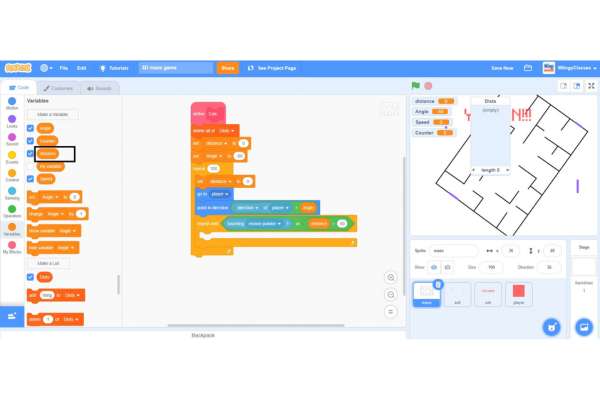
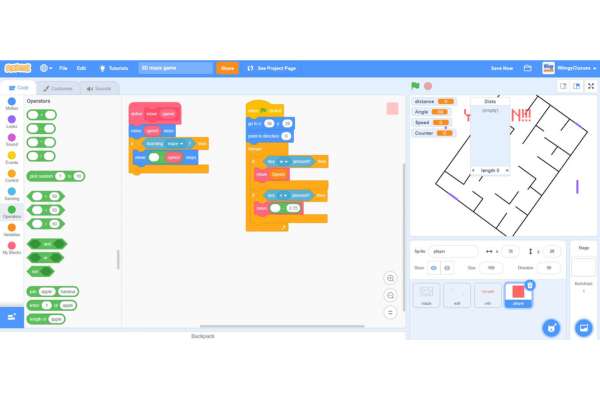
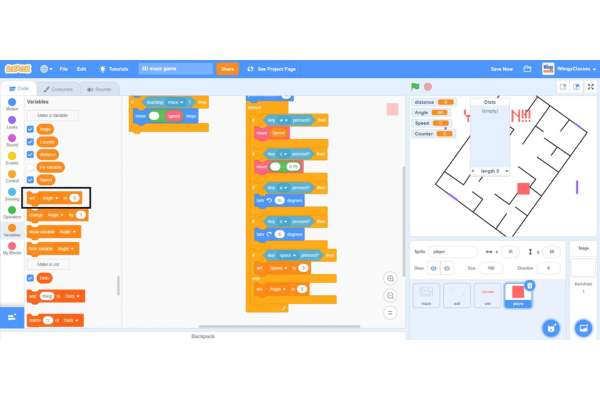
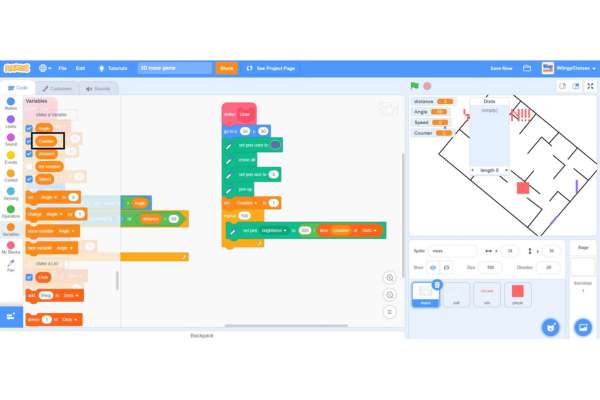
- Step 11: After drawing all the sprites, it’s time to make the variables of the game. So, first, switch to the ‘Code’ section, then go to the “Variables” block in the block palette, click on the ‘Make a Variable’ option, and create a variable named ‘distance’, ‘Angle’, ‘Speed’, and ‘Counter’.
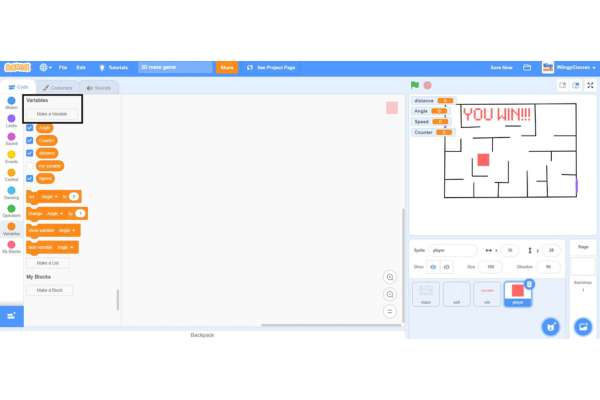
- Step 12: After making the variables of the game, it’s time to make a list of the game. To make a list, go to the “Variables” block in the block palette, click on the ‘Make a List’ option, and create a variable named ‘Dists’.
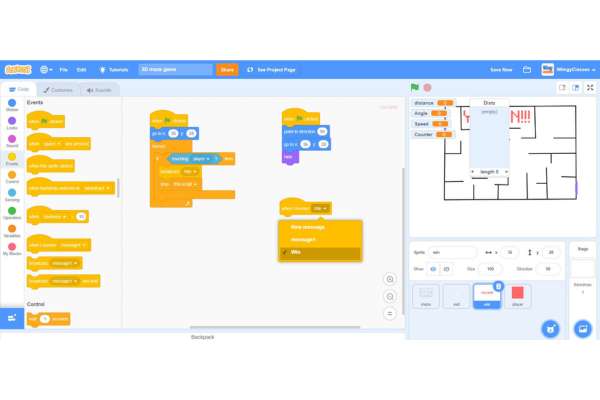
Code to trigger the ‘YOU WIN!!!’ text
It’s time for coding, so let’s start by creating a code to trigger the ‘YOU WIN!!!’ text when the player passes the opening points, that is, exits of the maze. Make sure that the ‘WIN’ sprite is selected while coding this part.
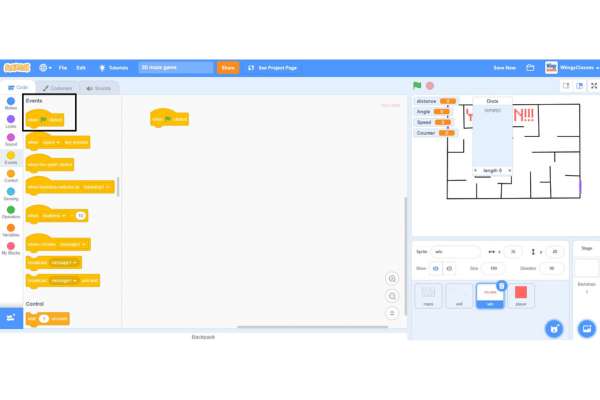
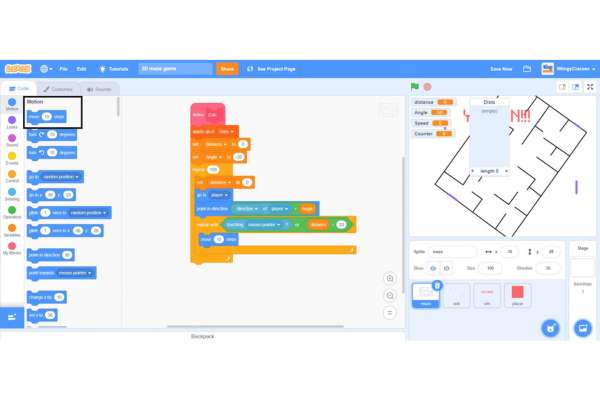
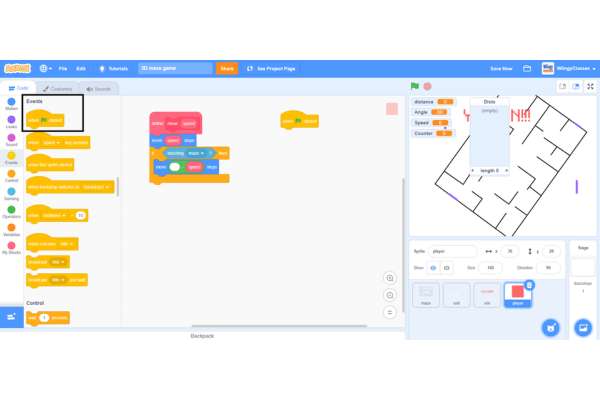
- Step 1: Go to the “Events” block in the block palette, select the ‘when green flag clicked’ block, and drag it to the coding area.
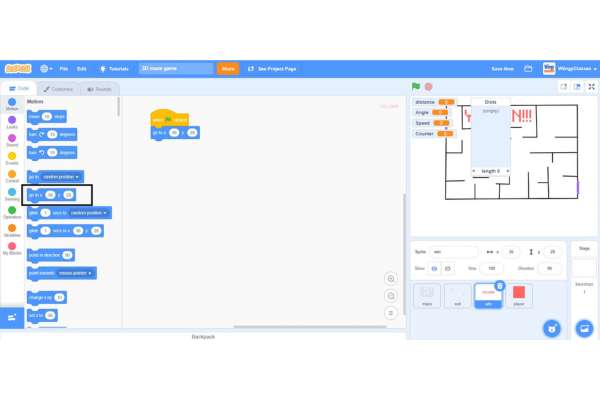
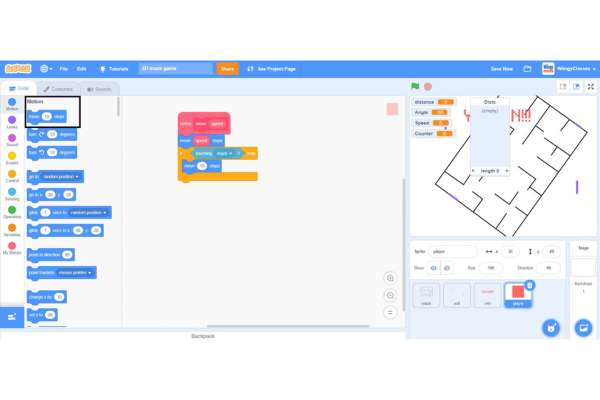
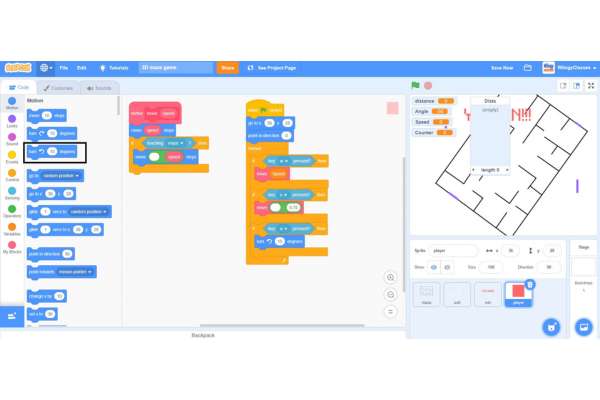
- Step 2: Go to the “Motion” block in the block palette, select the ‘go to x: ( ) y: ( )’ block, drag it to the coding area, and place it under the ‘when green flag clicked’ block.
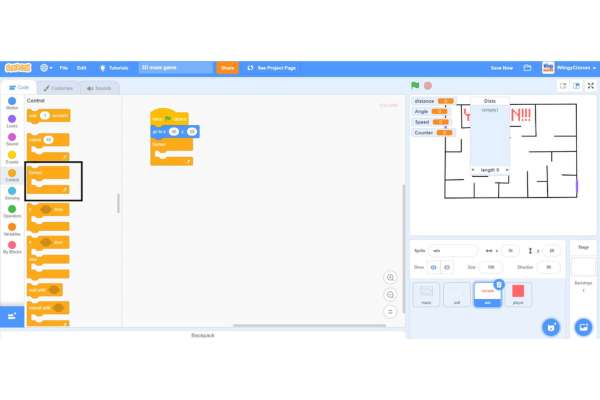
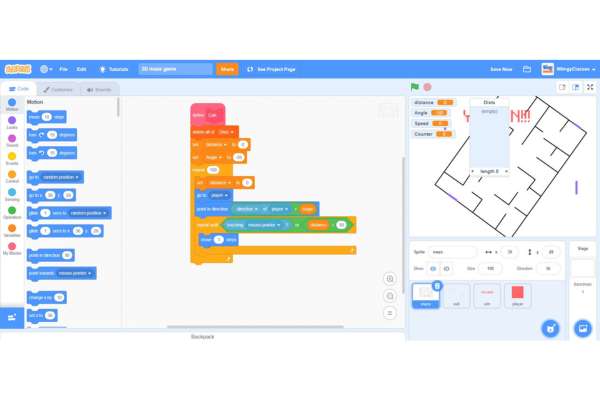
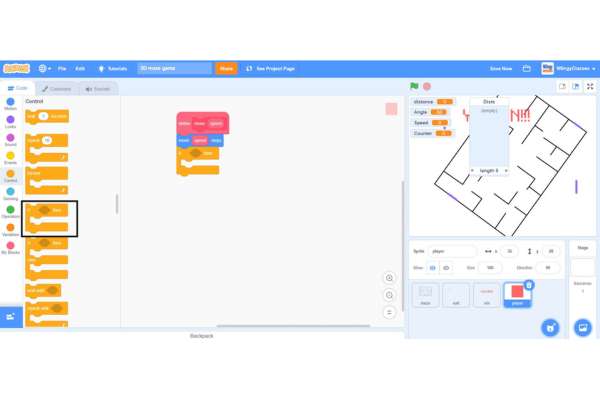
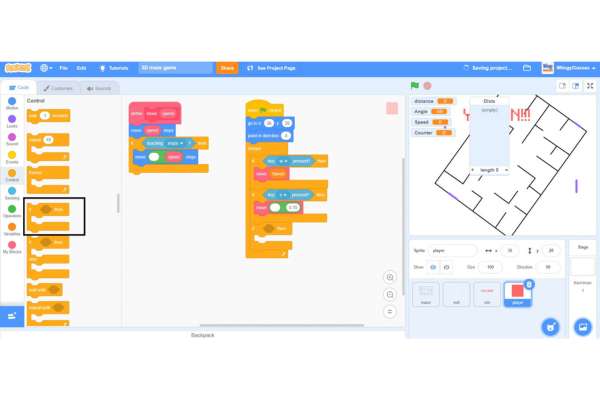
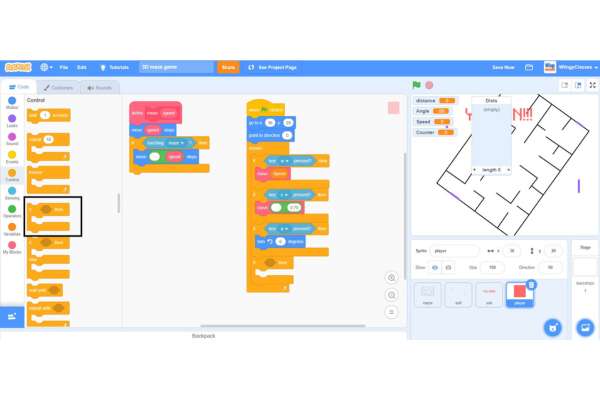
- Step 3: Go to the “Control” block in the block palette, select the ‘forever’ block, drag it to the coding area, and place it under the ‘go to x: ( ) y: ( )’ block.
- Step 4: From the “Control” block in the block palette, select the ‘if ( ) then ( )’ block, drag it to the coding area, and place it inside the ‘forever’ block.
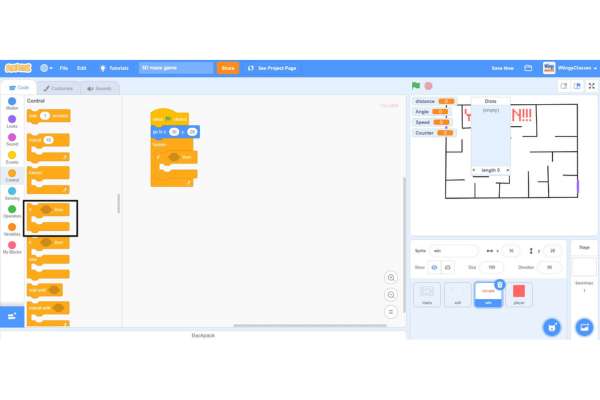
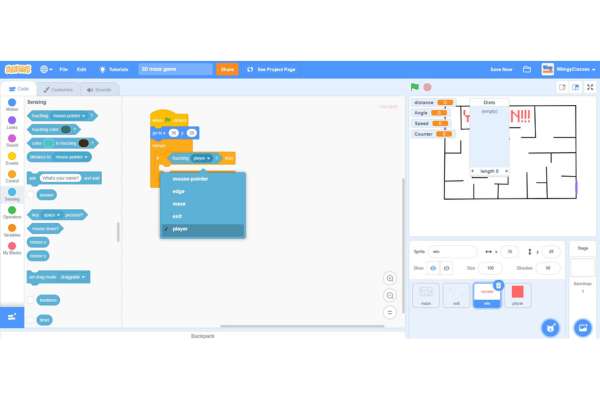
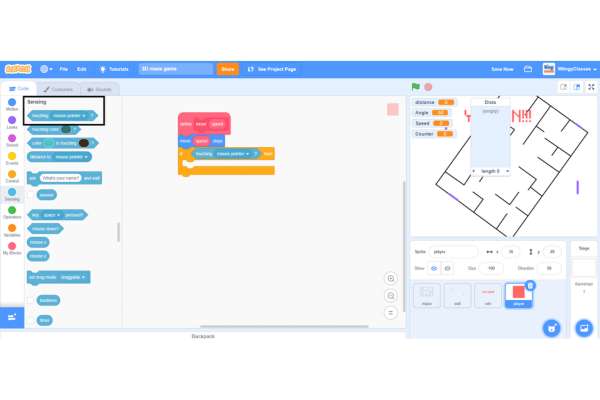
- Step 5: Go to the “Sensing” block in the block palette, select the ‘touching ( )?’ block, drag it to the coding area, and place it in the if condition of the ‘if ( ) then ( )’ block inside the ‘forever’ block.
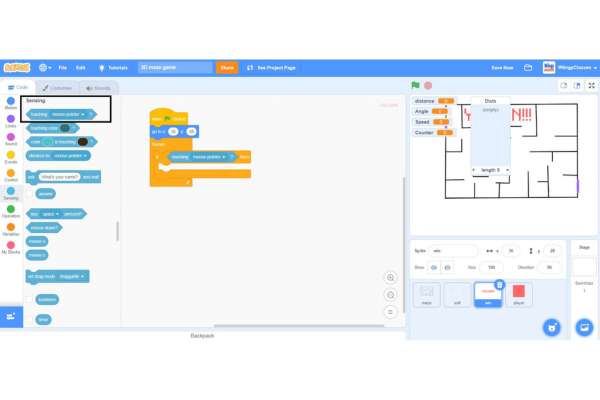
- Step 6: In the ‘touching ( )?’ block, select the value as ‘player’ from the drop-down menu.
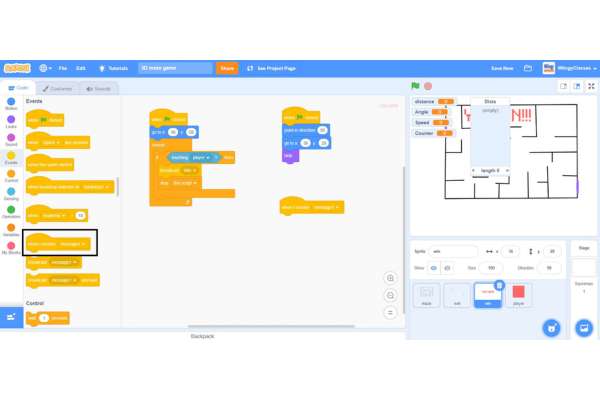
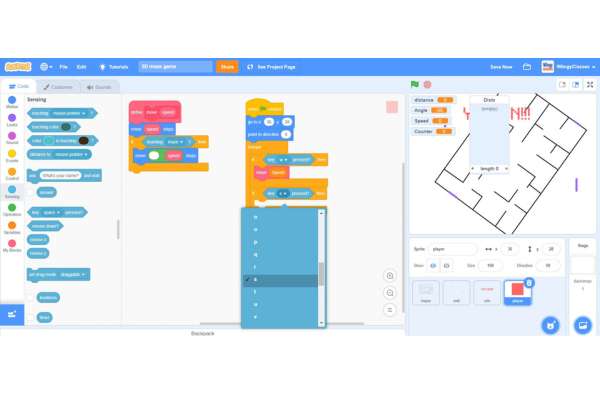
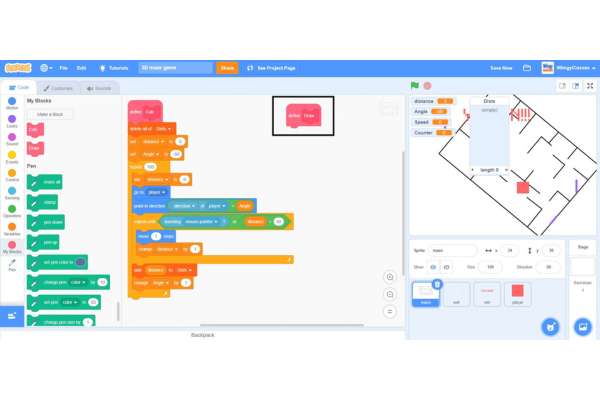
- Step 7: Go to the “Events” block in the block palette, select the ‘broadcast ( )’ block, drag it to the coding area, and place it in the then condition of the ‘if ( ) then ( )’ block inside the ‘forever’ block.
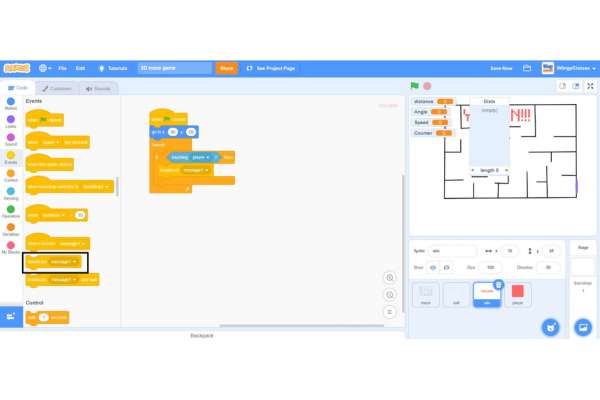
- Step 8: In the ‘broadcast ( )’ block, select ‘New Message’ from the drop-down menu and name the new message as ‘Win’.
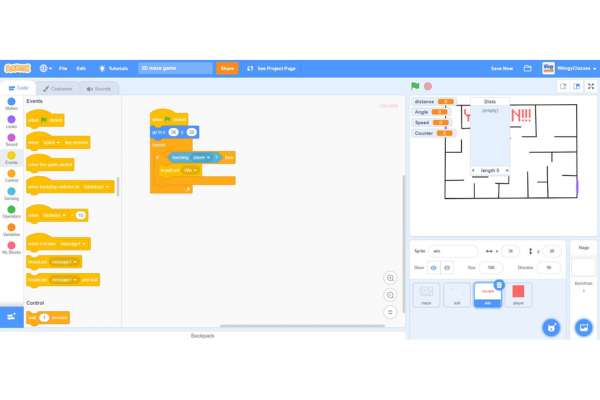
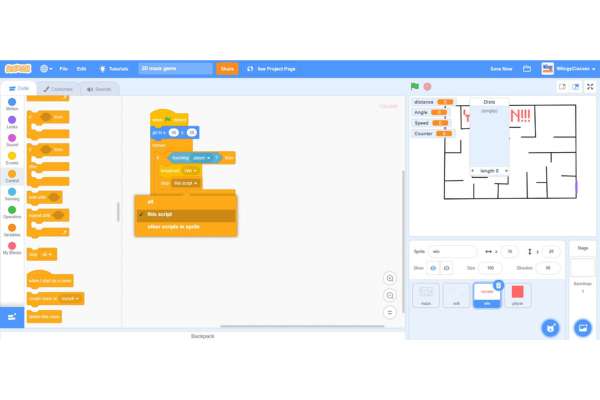
- Step 9: Go to the “Control” block in the block palette, select the ‘stop (all)’ block, drag it to the coding area, and place it under the ‘broadcast ( )’ block in the then condition of the ‘if ( ) then ( )’ block inside the ‘forever’ block.
- Step 10: In the ‘stop (all)’ block, select the value ‘this script’ from the drop-down menu.
Code to display the ‘YOU WIN!!!’ text
Make sure that the ‘WIN’ sprite is selected while coding this part.
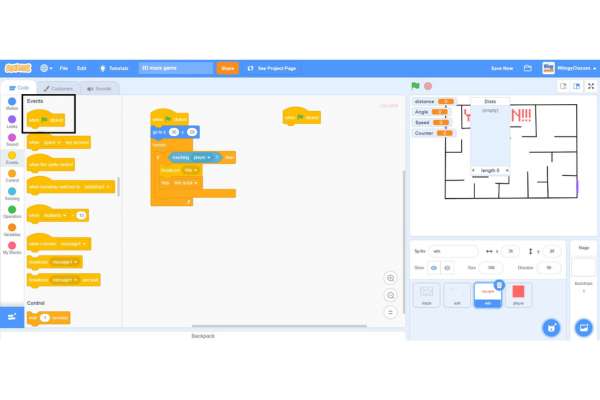
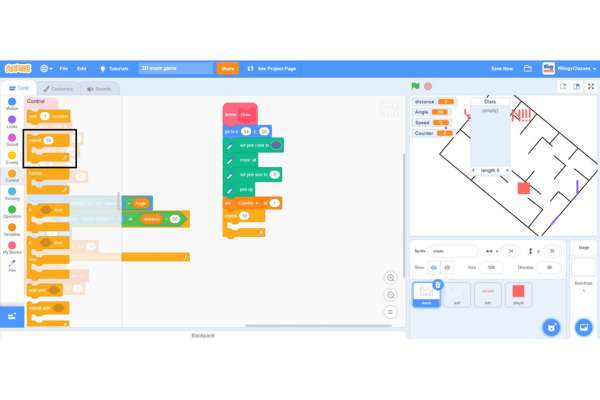
- Step 1: Go to the “Events” block in the block palette, select the ‘when green flag clicked’ block, and drag it to the coding area.
- Step 2: Go to the “Motion” block in the block palette, select the ‘point in direction ( )’ block, drag it to the coding area, and place it under the ‘when green flag clicked’ block. In the ‘point in direction ( )’ block, leave the value as ‘90’.
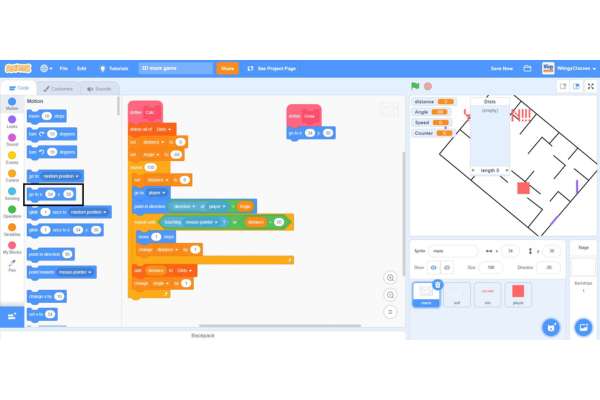
- Step 3: From the “Motion” block in the block palette, select the ‘go to x: ( ) y: ( )’ block, drag it to the coding area, and place it under the ‘point in direction ( )’ block.
- Step 4: Go to the “Looks” block in the block palette, select the ‘hide’ block, drag it to the coding area, and place it under the ‘go to x: ( ) y: ( )’ block.
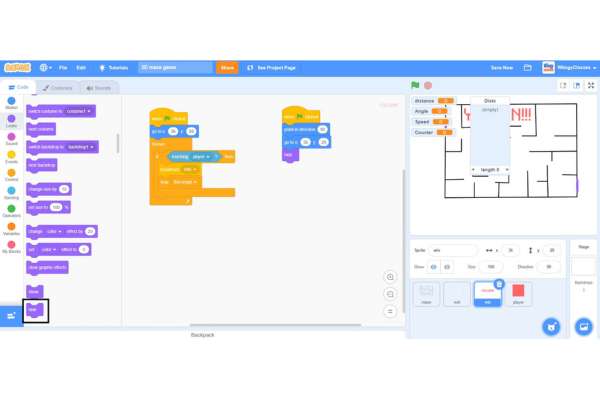
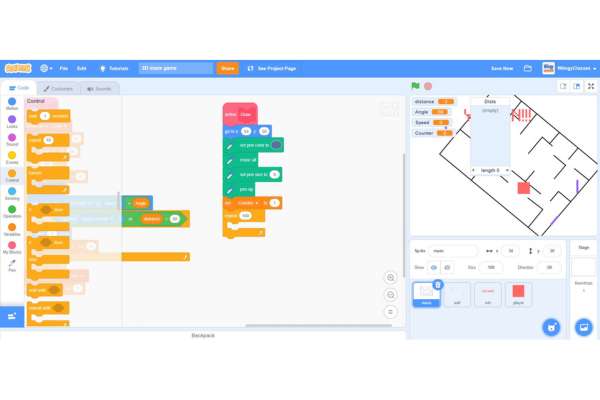
- Step 5: Again go to the “Events” block in the block palette, select the ‘when I receive ( )’ block, and drag it to the coding area.
- Step 6: In the ‘when I receive ( )’ block, select the value as ‘Win’ from the drop-down menu.
- Step 7: Go to the “Looks” block in the block palette, select the ‘show’ block, drag it to the coding area, and place it under the ‘when I receive ( )’ block.

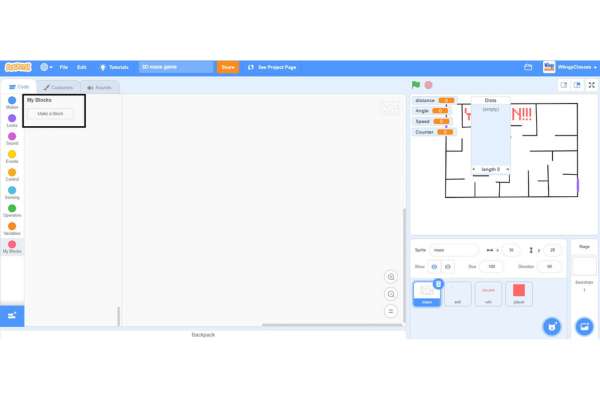
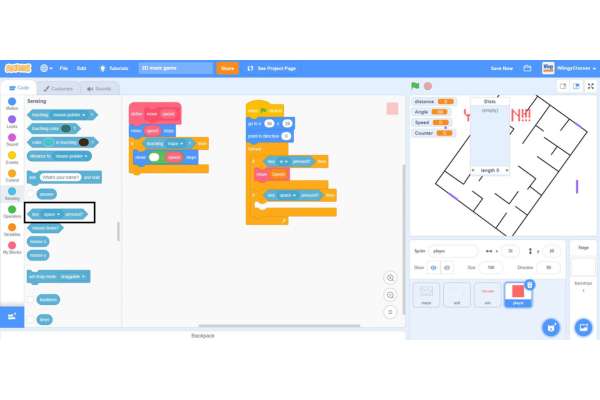
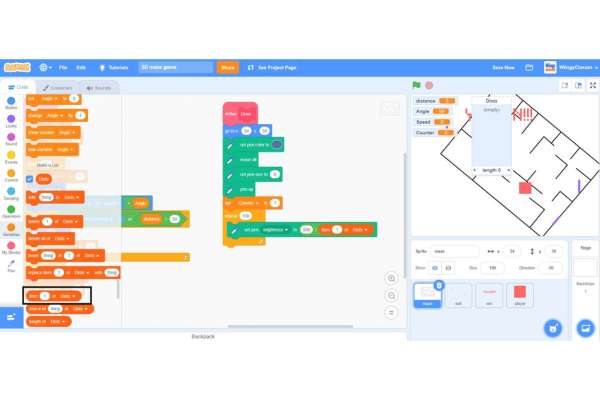
Code to make a Radar
Radar in Scratch basically keeps track of the space available between the player and the walls, in this game, the maze walls. It allows the game visuals to adjust as per the movement of the player. Make sure that the maze sprite is selected while coding this part.
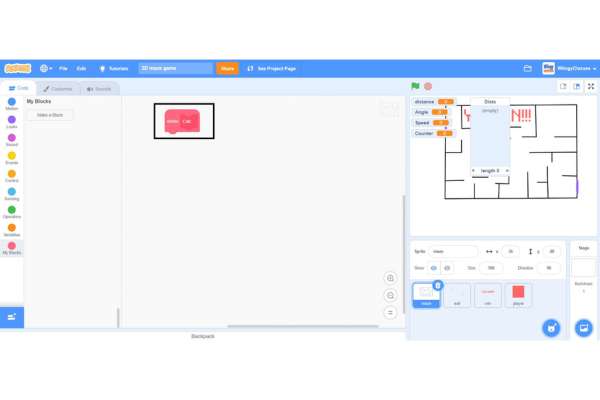
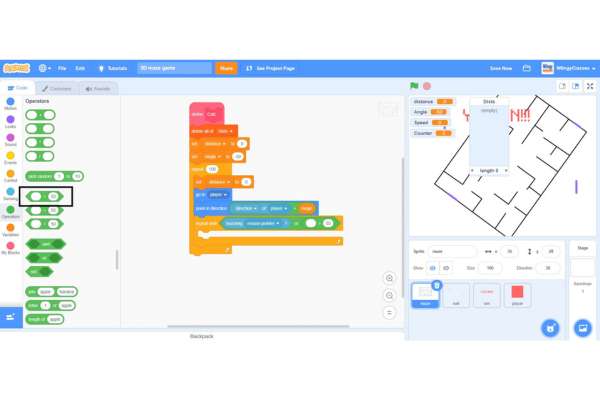
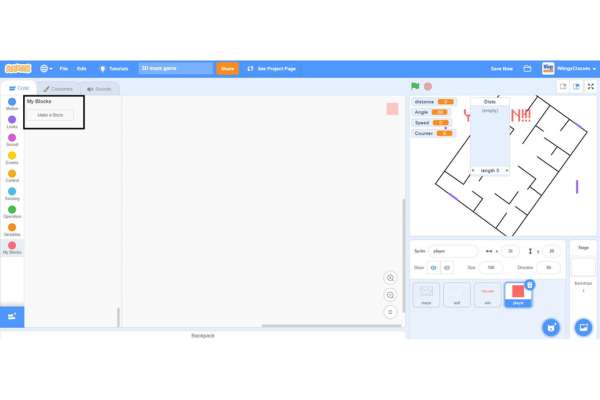
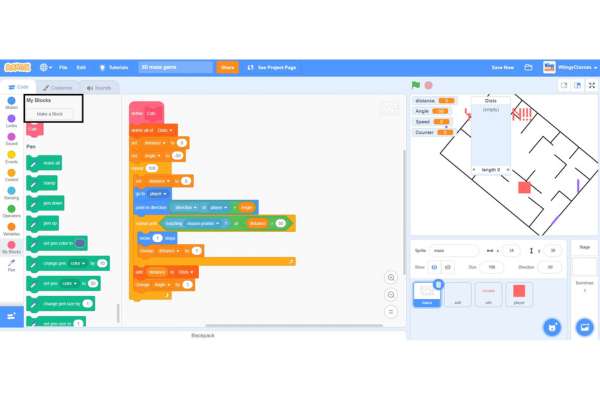
Step 1: Go to the “My Blocks” block in the block palette and click on the ‘Make a Block’ option to create a custom block.
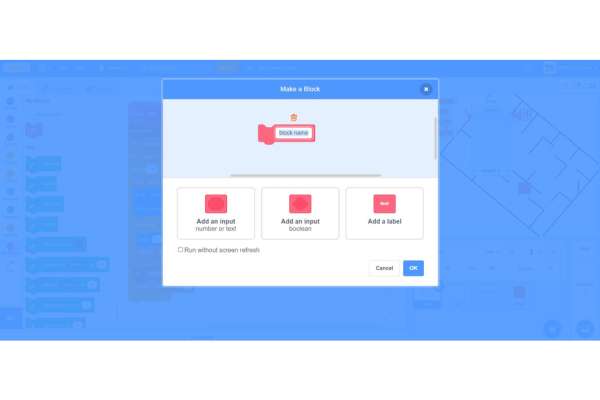
- Step 2: When you click on the ‘Make a Block’ option, the following screen will appear.
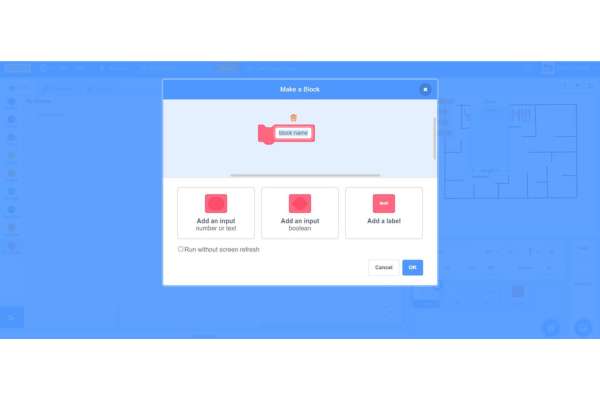
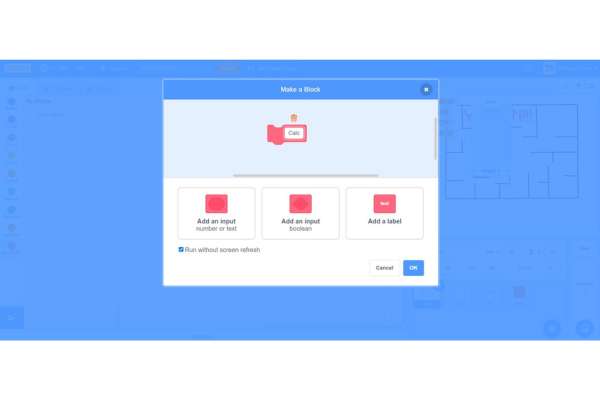
- Step 3: Give the name to the block as ‘Calc’ and click on the ‘OK’ option which is available at the bottom right corner. Make sure to check the ‘Run without screen fresh’ option while creating the custom block.
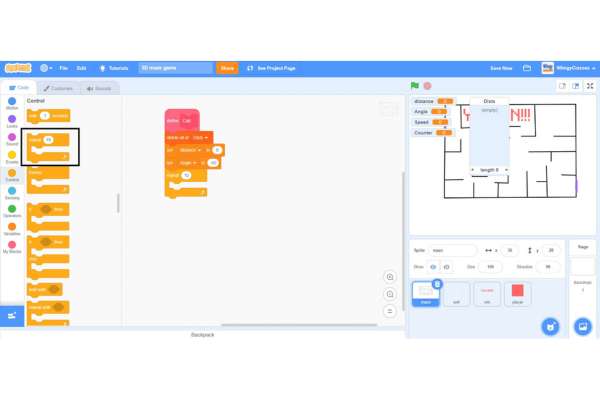
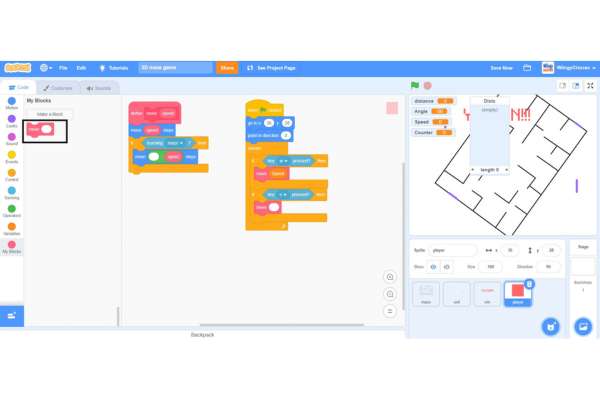
- Step 4: After the creation of the custom block, one block would have automatically appeared on the screen, as shown below.
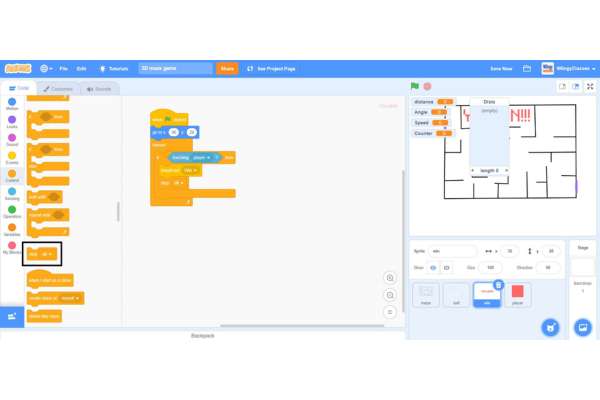
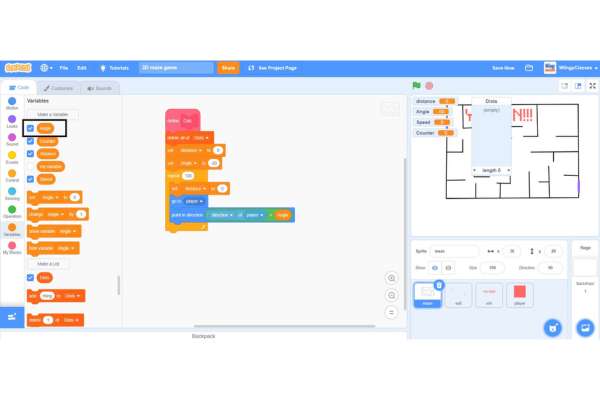
- Step 5: Go to the “Variables” block in the block palette, select the ‘delete all of (Dists)’ block, drag it to the coding area, and place it under the custom block that you’ve created.
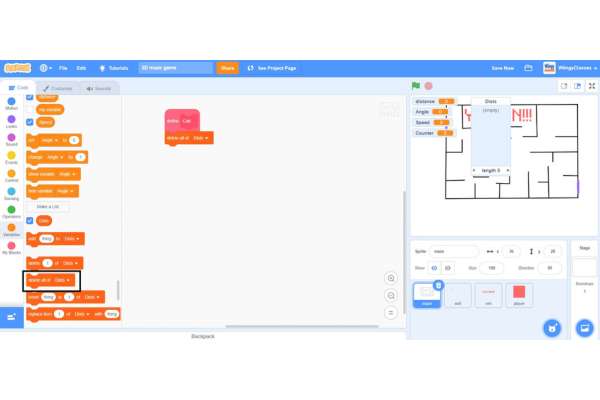
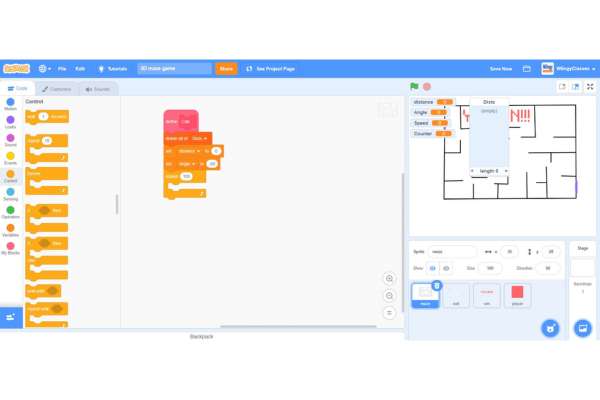
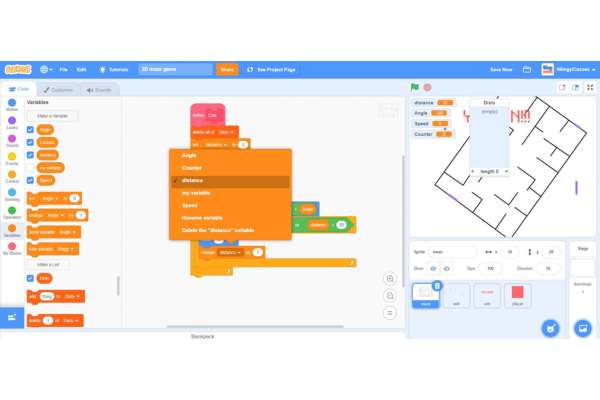
- Step 6: From the “Variables” block in the block palette, select the ‘set ( ) to ( )’ block, drag it to the coding area, and place it under the ‘delete all of (Dists)’ block.
- Step 7: In the ‘set ( ) to ( )’ block, select the first value as ‘distance’ from the drop-down menu and leave the second value as ‘0’.

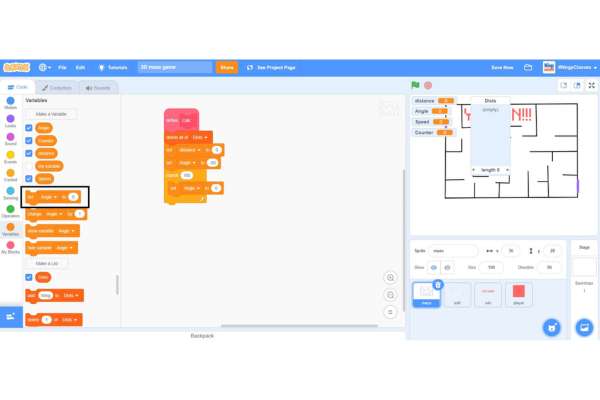
- Step 8: Again to the “Variables” block in the block palette, again select the ‘set ( ) to ( )’ block, drag it to the coding area, and place it under the first ‘set ( ) to ( )’ block.
- Step 9: In the ‘set ( ) to ( )’ block, select the first value as ‘Angle’ from the drop-down menu and change the second value to ‘-50’.

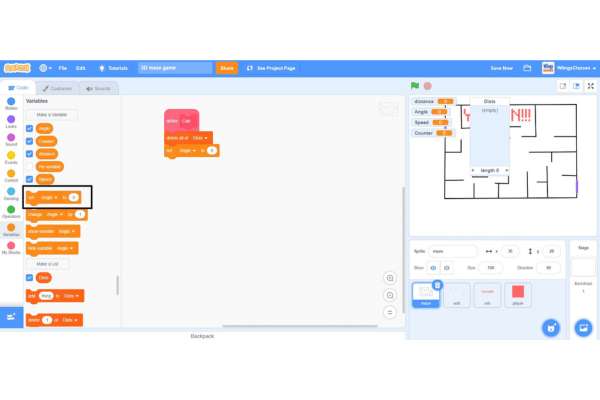
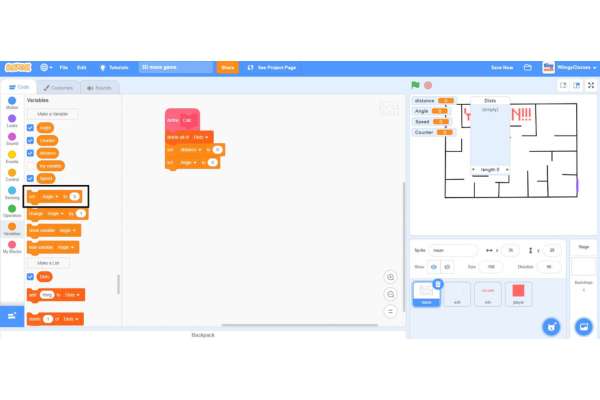
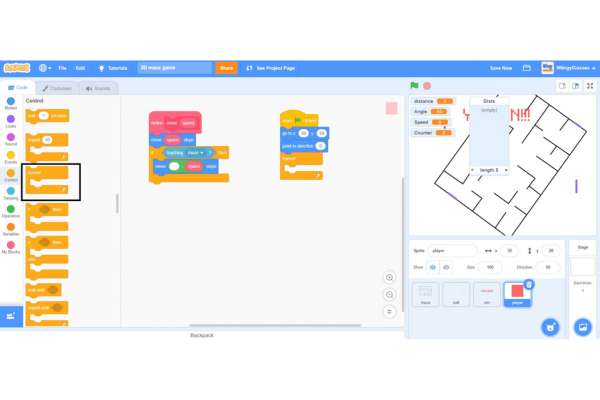
- Step 10: Go to the “Control” block in the block palette, select the ‘repeat ( )’ block, drag it to the coding area, and place it under the second ‘set ( ) to ( )’ block.
- Step 11: In the ‘repeat ( )’ block, change the value to ‘100’.
- Step 12: Go to the “Variables” block in the block palette, select the ‘set ( ) to ( )’ block, drag it to the coding area, and place it inside the ‘repeat ( )’ block.
- Step 13: In the ‘set ( ) to ( )’ block, select the first value as ‘distance’ from the drop-down menu and leave the second value as ‘0’.

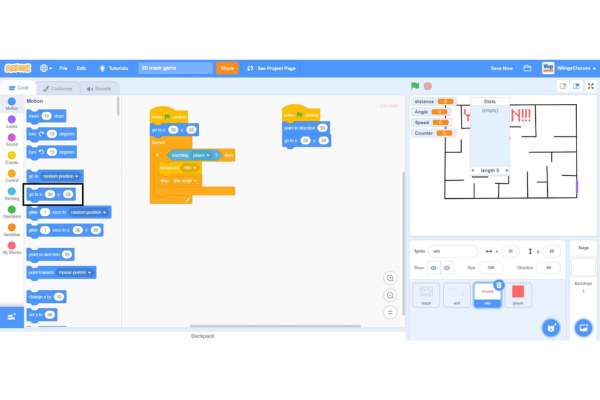
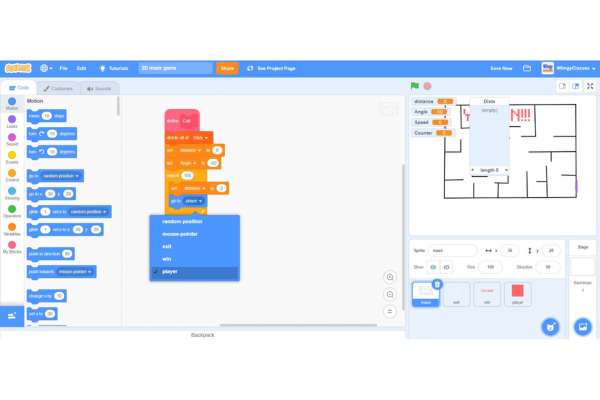
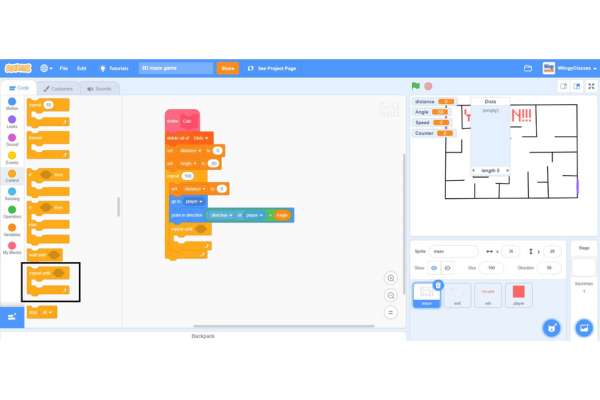
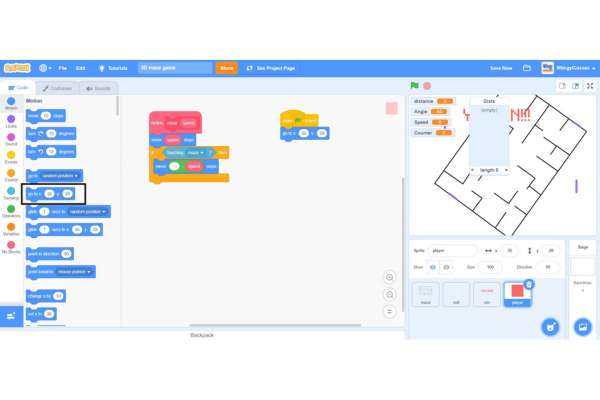
- Step 14: Go to the “Motion” block in the block palette, select the ‘go to ( )’ block, drag it to the coding area, and place it under the ‘set ( ) to ( )’ block inside the ‘repeat ( )’ block.
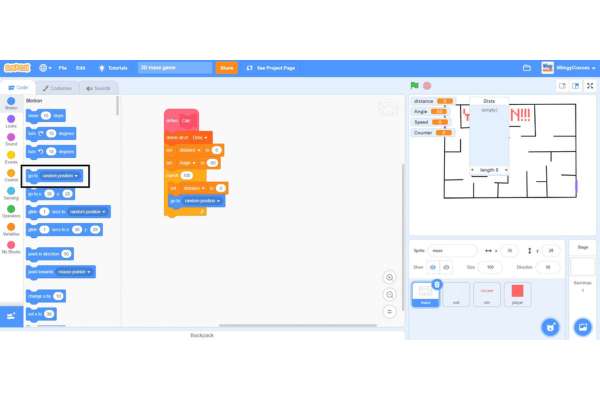
- Step 15: In the ‘go to ( )’ block, select the value as ‘player’ from the drop-down menu.
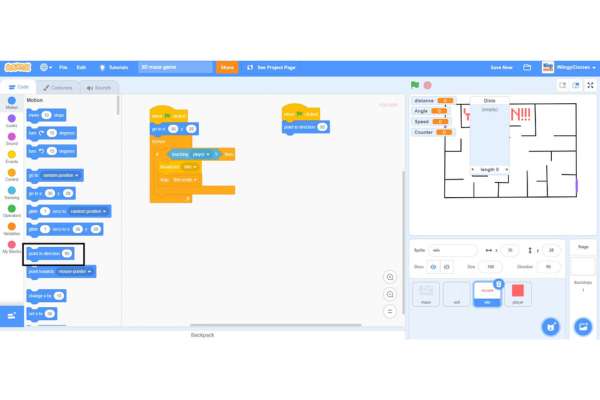
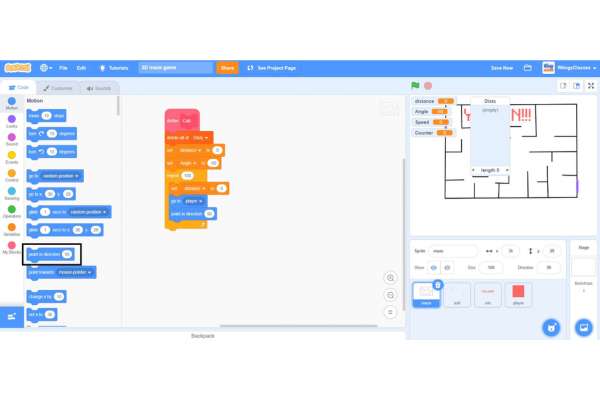
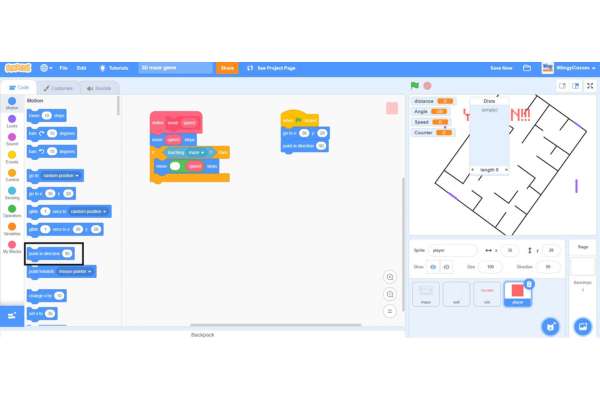
- Step 16: From the “Motion” block in the block palette, select the ‘point in direction ( )’ block, drag it to the coding area, and place it under the ‘go to ( )’ block inside the ‘repeat ( )’ block.
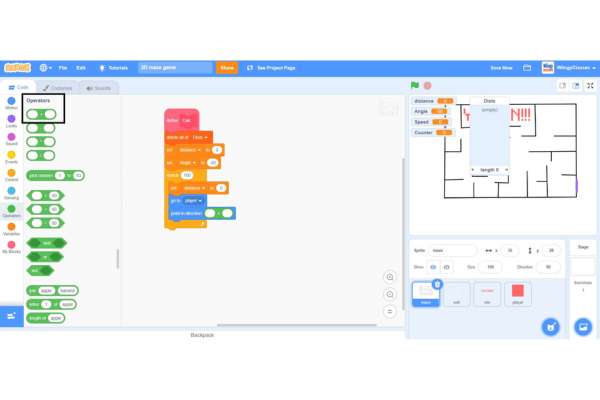
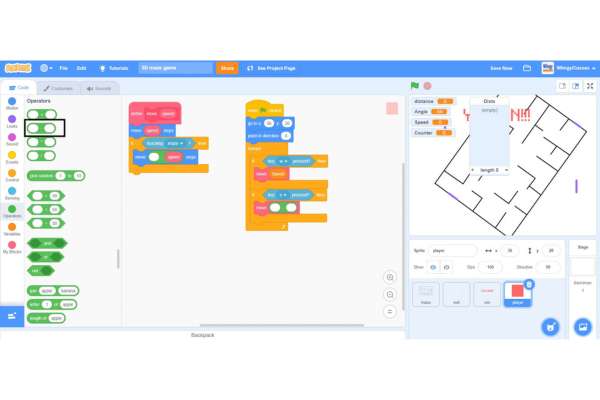
- Step 17: Go to the “Operators” block in the block palette, select the ‘( ) + ( )’ block, drag it to the coding area, and place it in the value part of the ‘point in direction ( )’ block.
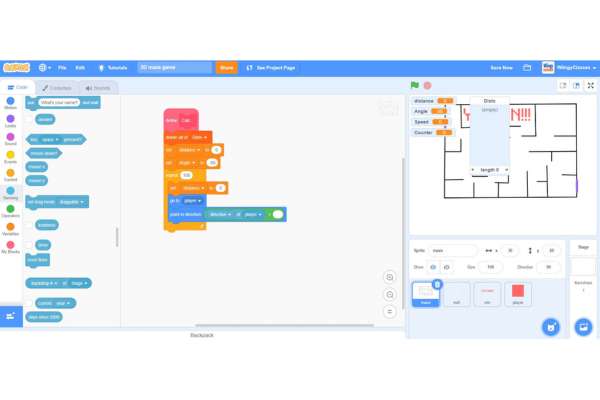
- Step 18: Go to the “Sensing” block in the block palette, select the ‘( ) of ( )’ block, drag it to the coding area, and place it in the first value part of the ‘( ) + ( )’ block.

- Step 19: Select the second and first values as ‘player’ and ‘direction’ in the ‘( ) of ( )’ block from the drop-down menus respectively as shown below. Keep in mind to start by selecting the second value and then going for selecting the first value.
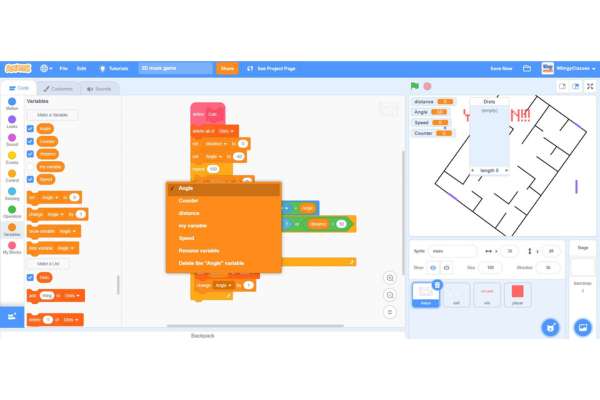
- Step 20: Go to the “Variables” block in the block palette, select the ‘Angle’ block, drag it to the coding area, and place it in the second value part of the ‘( ) + ( )’ block.
- Step 21: Go to the “Control” block in the block palette, select the ‘repeat until ( )’ block, drag it to the coding area, and place it under the ‘point in direction ( )’ block inside the ‘repeat ( )’ block.
- Step 22: Go to the “Operators” block in the block palette, select the ‘( ) or ( )’ block, drag it to the coding area, and place it in the value part of the ‘repeat until ( )’ block.
- Step 23: Go to the “Sensing” block in the block palette, select the ‘touching ( )?’ block, drag it to the coding area, and place it in the first value part of the ‘( ) or ( )’ block.
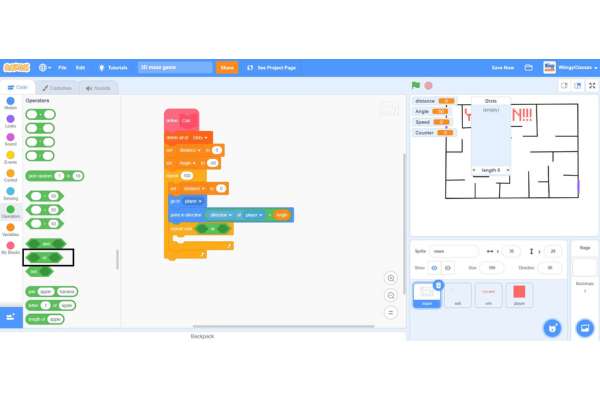
- Step 24: Again go to the “Operators” block in the block palette, select the ‘( ) > ( )’ block, drag it to the coding area, and place it in the second value part of the ‘( ) or ( )’ block.
- Step 25: Go to the “Variables” block in the block palette, select the ‘distance’ block, drag it to the coding area, and place it in the first value part of the ‘( ) > ( )’ block and leave the value in the second part to ‘50’ as shown below.
- Step 26: Go to the “Motion” block in the block palette, select the ‘move ( ) steps’ block, drag it to the coding area, and place it in the ‘repeat until ( )’ block inside the ‘repeat ( )’ block.
- Step 27: In the ‘move ( ) steps’ block, change the value to ‘1’.
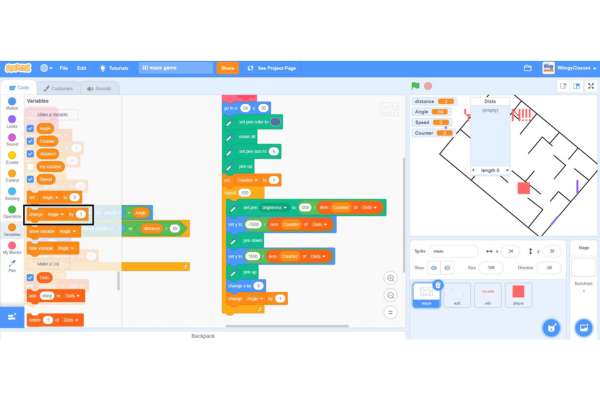
- Step 28: Go to the “Variables” block in the block palette, select the ‘change ( ) by ( )’ block, drag it to the coding area, and place it under the ‘move ( ) steps’ block in the ‘repeat until ( )’ block inside the ‘repeat ( )’ block.
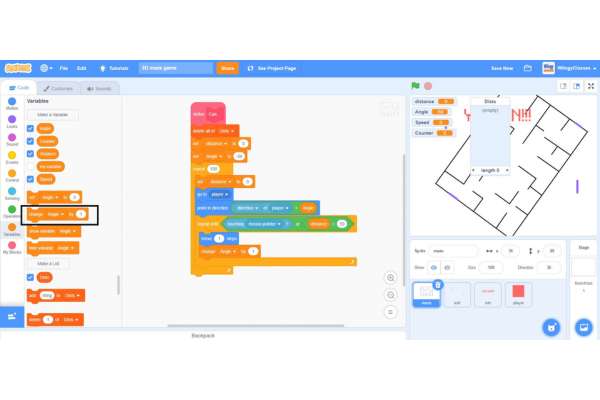
- Step 29: In the ‘change ( ) by ( )’ block, select the first value as ‘distance’ from the drop-down menu and leave the second value as ‘1’.
- Step 30: Go to the “Variables” block in the block palette, select the ‘add ( ) to (Dists)’ block, drag it to the coding area, and place it under the ‘repeat until ( )’ block inside the ‘repeat ( )’ block.
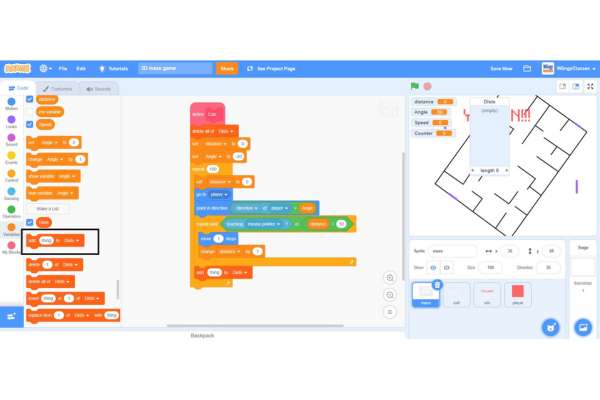
- Step 31: Go to the “Variables” block in the block palette, select the ‘distance’ block, drag it to the coding area, and place it in the first value part of the ‘add ( ) to (Dists)’ block as shown below.
- Step 32: Go to the “Variables” block in the block palette, select the ‘change ( ) by ( )’ block, drag it to the coding area, and place it under the ‘add ( ) to (Dists)’ block inside the ‘repeat ( )’ block.
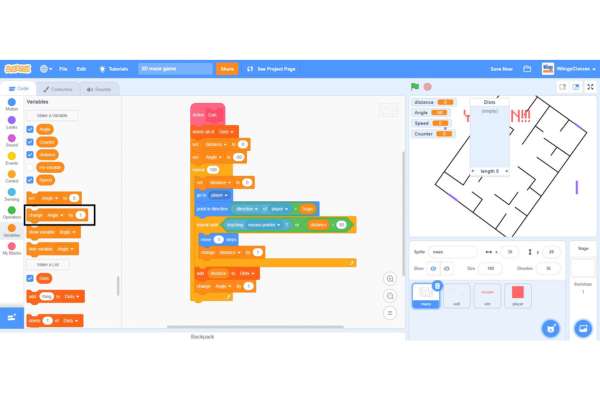
- Step 33: In the ‘change ( ) by ( )’ block, select the first value as ‘Angle’ from the drop-down menu and leave the second value as ‘1’.
Code to keep the player sprite from walking through the walls
Make sure that the player sprite is selected while coding this part.
- Step 1: Go to the “My Blocks” block in the block palette and click on the ‘Make a Block’ option to create a custom block.
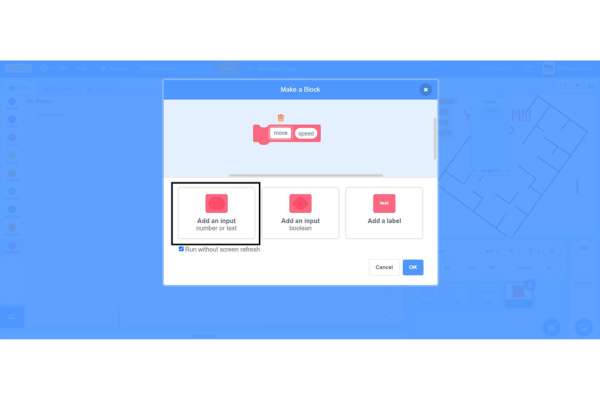
- Step 2: When you click on the ‘Make a Block’ option, the following screen will appear.
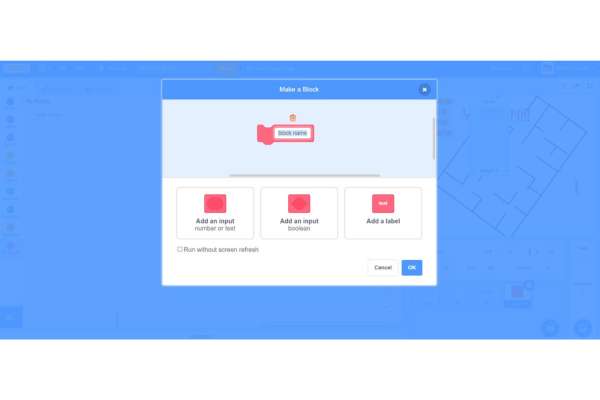
- Step 3: Click on the first option, give the name to the block as ‘move’, and in the value part, enter the value as ‘speed’, and click on the ‘OK’ option which is available at the bottom right corner. Make sure to check the ‘Run without screen fresh’ option while creating the custom block.
- Step 4: After the creation of the custom block, one block would have automatically appeared on the screen, as shown below.
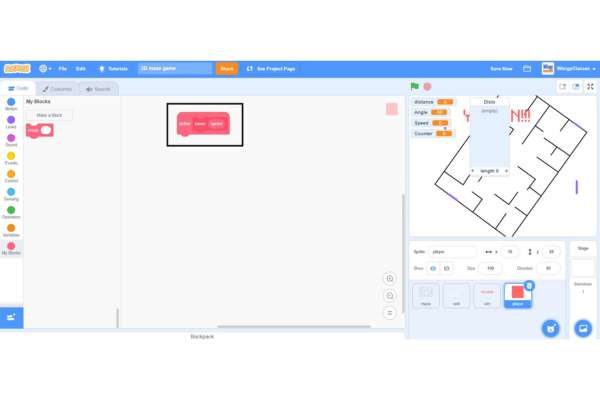
- Step 5: Go to the “Motion” block in the block palette, select the ‘move ( ) steps’ block, drag it to the coding area, and place it under the custom block that you’ve created.
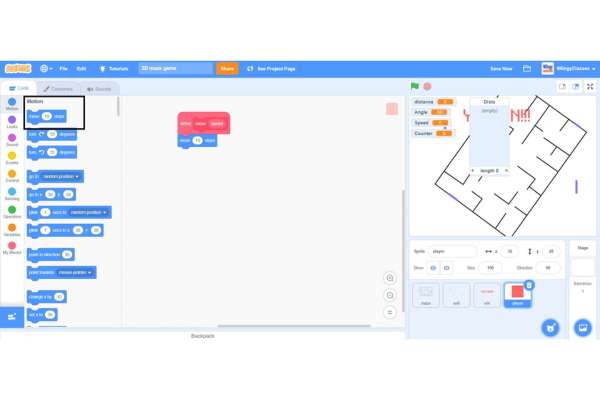
- Step 6: In the ‘move ( ) steps’ block, put the value as ‘speed’ by selecting and dragging the block from the custom block which is on the top of the coding stack blocks.
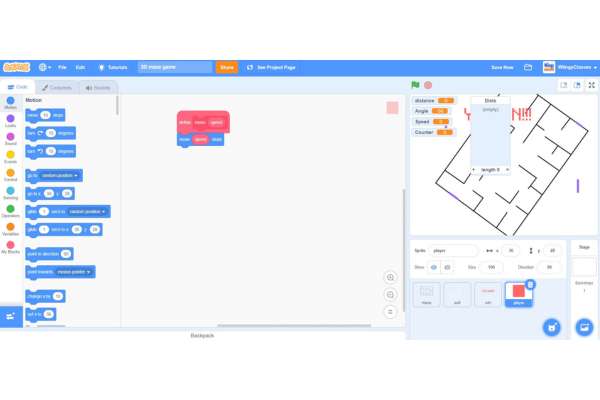
- Step 7: Go to the “Control” block in the block palette, select the ‘if ( ) then ( )’ block, drag it to the coding area, and place it under the ‘move ( ) steps’ block.
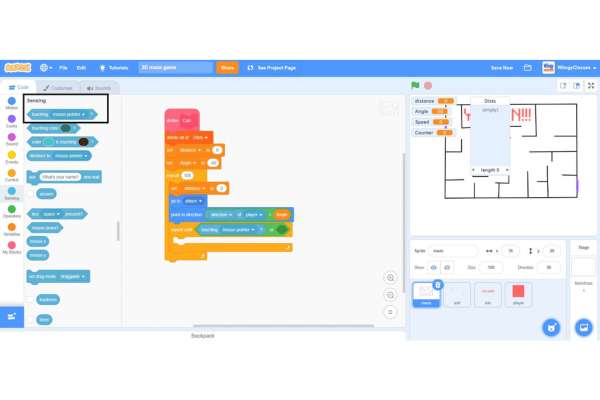
- Step 8: Go to the “Sensing” block in the block palette, select the ‘touching ( )?’ block, drag it to the coding area, and place it in the if condition of the ‘if ( ) then ( )’ block.
- Step 9: In the ‘touching ( )?’ block, select the value ‘maze’ from the drop-down menu.

- Step 10: Go to the “Motion” block in the block palette, select the ‘move ( ) steps’ block, drag it to the coding area, and place it in the then condition of the ‘if ( ) then ( )’ block.
- Step 11: Go to the “Operators” block in the block palette, select the ‘( ) – ( )’ block, drag it to the coding area, and place it in the value part of the ‘move ( ) steps’ block.

- Step 12: In the ‘move ( ) steps’ block, leave the first value blank and put the second value as ‘speed’ by selecting and dragging the block from the custom block which is on the top of the coding stack blocks.

- Step 13: Go to the “Events” block in the block palette, select the ‘when green flag clicked’ block, and drag it to the coding area.
- Step 14: Go to the “Motion” block in the block palette, select the ‘go to x: ( ) y: ( )’ block, drag it to the coding area, and place it in the ‘when green flag clicked’ block.
- Step 15: From the “Motion” block in the block palette, select the ‘point in direction ( )’ block, drag it to the coding area, and place it in the ‘go to x: ( ) y: ( )’ block.
- Step 16: In the ‘point in direction ( )’ block, change the value to ‘0’.
- Step 17: Go to the “Control” block in the block palette, select the ‘forever’ block, drag it to the coding area, and place it under the ‘point in direction ( )’ block.
- Step 18: From the “Control” block in the block palette, select the ‘if ( ) then ( )’ block, drag it to the coding area, and place it inside the ‘forever’ block.
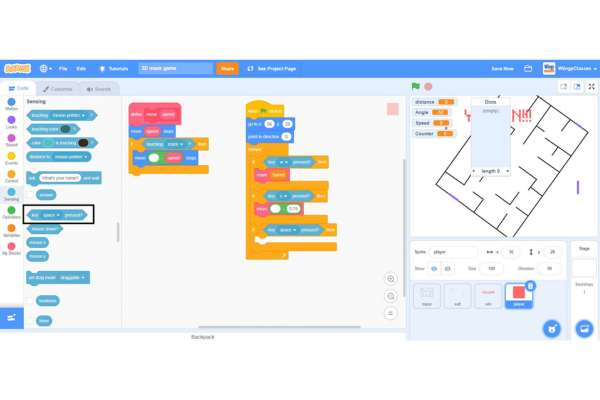
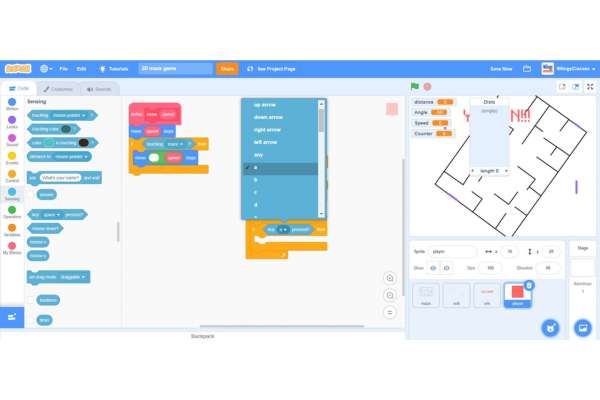
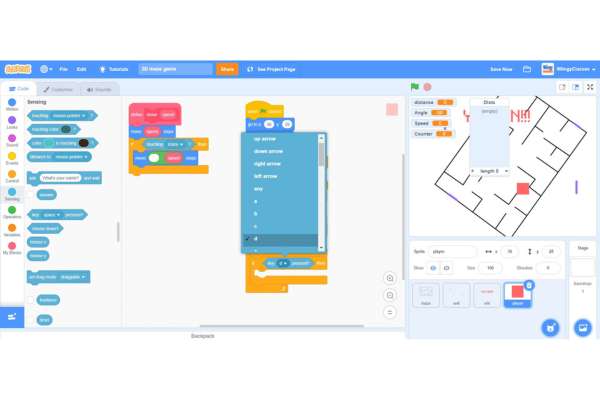
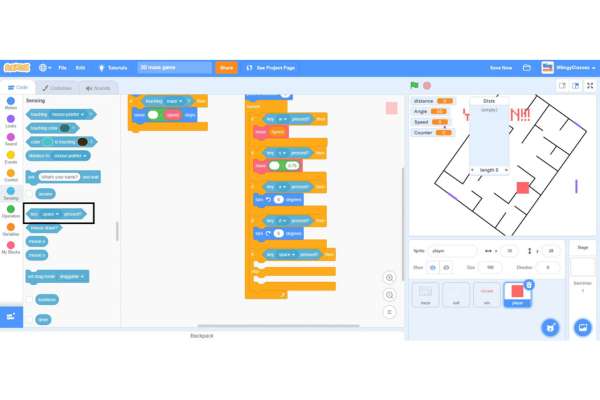
- Step 19: Go to the “Sensing” block in the block palette, select the ‘key ( ) pressed?’ block, drag it to the coding area, and place it in the if condition of the ‘if ( ) then ( )’ block inside the ‘forever’ block.
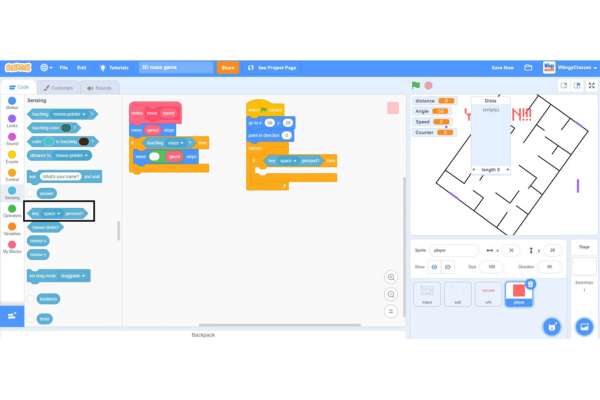
- Step 20: In the ‘key ( ) pressed?’ block, select the value as ‘w’ from the drop-down menu.
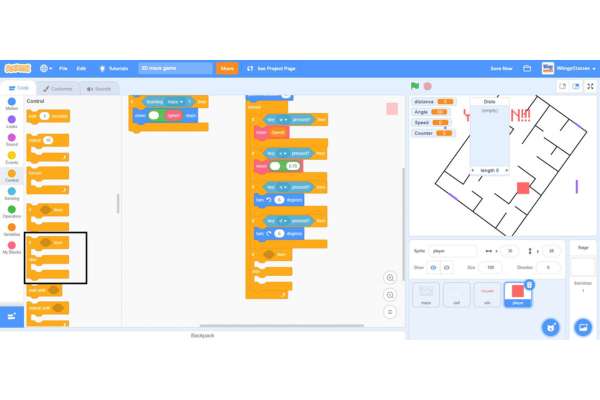
- Step 21: Go to the “My Blocks” block in the block palette, select the ‘move ( )’ block, drag it to the coding area, and place it in the then condition of the ‘if ( ) then ( )’ block inside the ‘forever’ block.

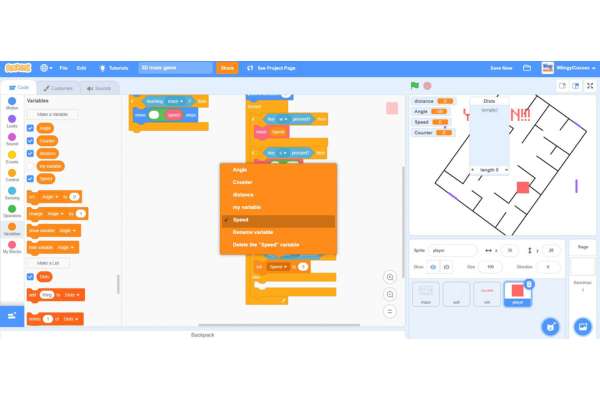
- Step 22: Go to the “Variables” block in the block palette, select the ‘Speed’ block, drag it to the coding area, and place it in the value part of the ‘move ( )’ block.

- Step 23: Go to the “Control” block in the block palette, select the ‘if ( ) then ( )’ block, drag it to the coding area, and place it under the first ‘if ( ) then ( )’ block inside the ‘forever’ block.
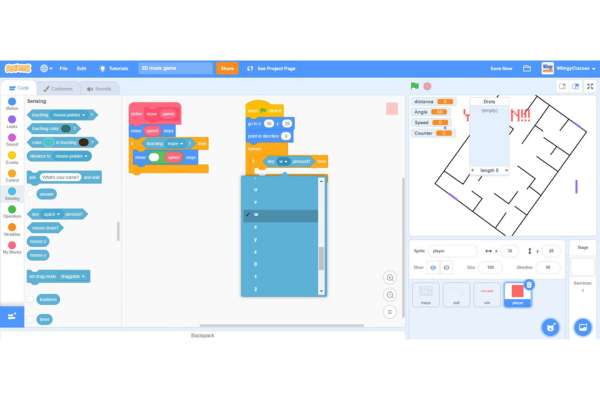
- Step 24: Go to the “Sensing” block in the block palette, select the ‘key ( ) pressed?’ block, drag it to the coding area, and place it in the if condition of the second ‘if ( ) then ( )’ block inside the ‘forever’ block.
- Step 25: In the ‘key ( ) pressed?’ block, select the value as ‘s’ from the drop-down menu.
- Step 26: Go to the “My Blocks” block in the block palette, select the ‘move ( )’ block, drag it to the coding area, and place it in the then condition of the second ‘if ( ) then ( )’ block inside the ‘forever’ block.
- Step 27: Go to the “Operators” block in the block palette, select the ‘( ) – ( )’ block, drag it to the coding area, and place it in the value part of the ‘move ( )’ block.
- Step 28: In the ‘( ) – ( )’ block, leave the first value blank and enter the second value as ‘0.75’.
- Step 29: Go to the “Control” block in the block palette, select the ‘if ( ) then ( )’ block, drag it to the coding area, and place it under the second ‘if ( ) then ( )’ block inside the ‘forever’ block.
- Step 30: Go to the “Sensing” block in the block palette, select the ‘key ( ) pressed?’ block, drag it to the coding area, and place it in the if condition of the third ‘if ( ) then ( )’ block inside the ‘forever’ block.
- Step 31: In the ‘key ( ) pressed?’ block, select the value as ‘a’ from the drop-down menu.
- Step 32: Go to the “Motion” block in the block palette, select the ‘turn left ( ) degrees’ block, drag it to the coding area, and place it in the then condition of the third ‘if ( ) then ( )’ block inside the ‘forever’ block.
- Step 33: In the ‘turn left ( ) degrees’ block, enter the value as ‘6’.

- Step 34: Go to the “Control” block in the block palette, select the ‘if ( ) then ( )’ block, drag it to the coding area, and place it under the third ‘if ( ) then ( )’ block inside the ‘forever’ block.
- Step 35: Go to the “Sensing” block in the block palette, select the ‘key ( ) pressed?’ block, drag it to the coding area, and place it in the if condition of the fourth ‘if ( ) then ( )’ block inside the ‘forever’ block.

- Step 36: In the ‘key ( ) pressed?’ block, select the value as ‘d’ from the drop-down menu.
- Step 37: Go to the “Motion” block in the block palette, select the ‘turn right ( ) degrees’ block, drag it to the coding area, and place it in the then condition of the fourth ‘if ( ) then ( )’ block inside the ‘forever’ block.

- Step 38: In the ‘turn right ( ) degrees’ block, enter the value as ‘6’.
- Step 39: Go to the “Control” block in the block palette, select the ‘if ( ) then ( ) else ( )’ block, drag it to the coding area, and place it under the fourth ‘if ( ) then ( )’ block inside the ‘forever’ block.
- Step 40: Go to the “Sensing” block in the block palette, select the ‘key ( ) pressed?’ block, drag it to the coding area, and place it in the if condition of the ‘if ( ) then ( ) else ( )’ block inside the ‘forever’ block.
- Step 41: Go to the “Variables” block in the block palette, select the ‘set ( ) to ( )’ block, drag it to the coding area, and place it in the then condition of the ‘if ( ) then ( ) else ( )’ block inside the ‘forever’ block.
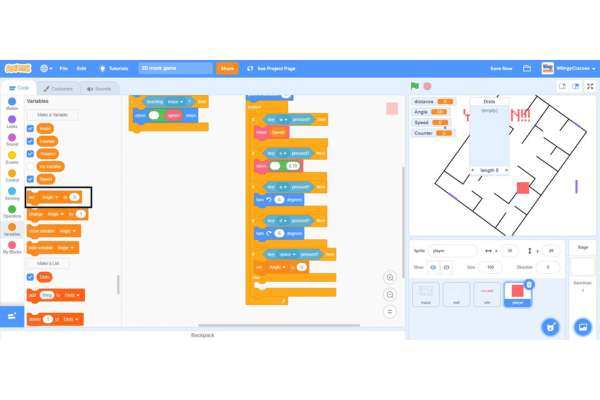
- Step 42: In the ‘set ( ) to ( )’ block, select the first value as ‘Speed’ from the drop-down menu and change the second value to ‘3’.
- Step 43: From the “Variables” block in the block palette, again select the ‘set ( ) to ( )’ block, drag it to the coding area, and place it in the else condition of the ‘if ( ) then ( ) else ( )’ block inside the ‘forever’ block.
- Step 44: In the ‘set ( ) to ( )’ block, select the first value as ‘Speed’ from the drop-down menu and change the second value to ‘0.75’.

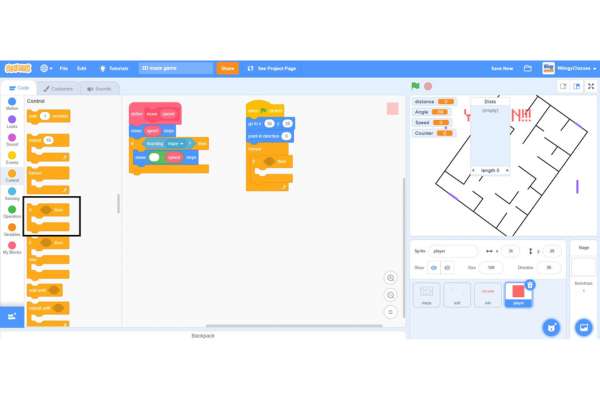
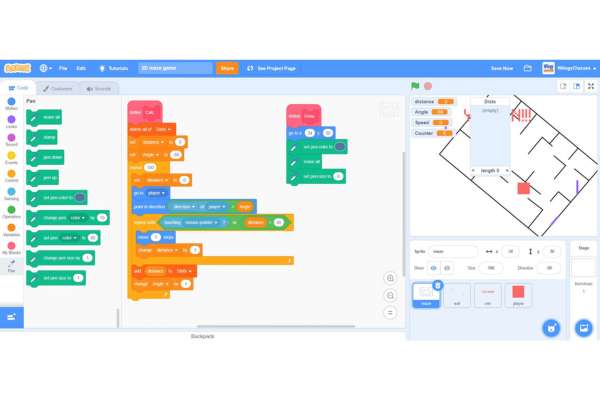
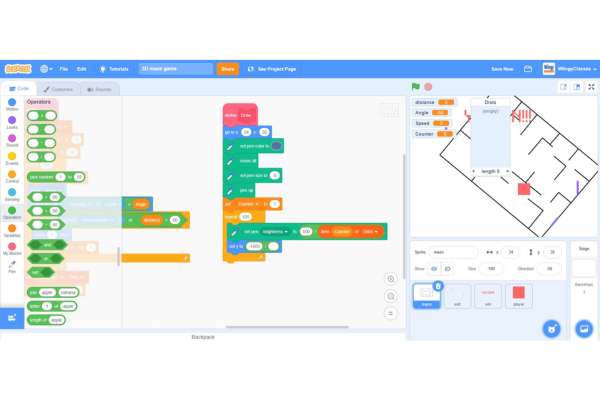
Code for the maze walls
In this part, you need to code for the maze walls in such a way that the maze sprite will make its lines thicker when the player is close and thinner when the player is at some distance from the maze. Make sure that the maze sprite is selected while coding this part.
- Step 1: Go to the “My Blocks” block in the block palette and click on the ‘Make a Block’ option to create a custom block.
- Step 2: When you click on the ‘Make a Block’ option, the following screen will appear.
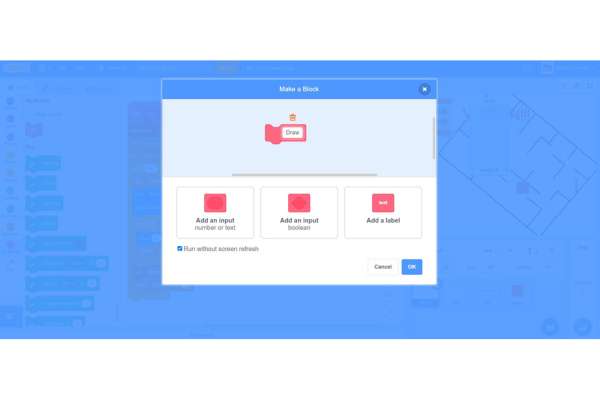
- Step 3: Give the name to the block as ‘Draw’ and click on the ‘OK’ option which is available at the bottom right corner. Make sure to check the ‘Run without screen fresh’ option while creating the custom block.
- Step 4: After the creation of the custom block, one block would have automatically appeared on the screen, as shown below.
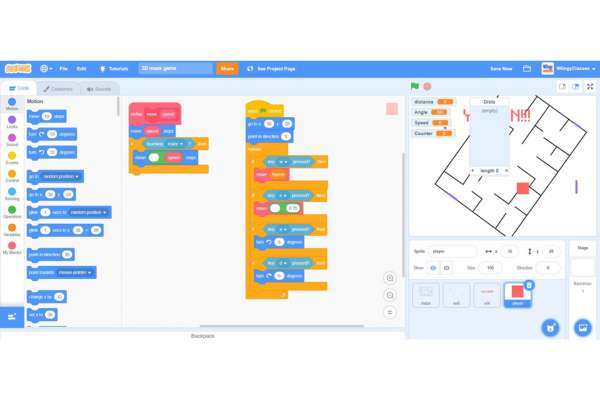
- Step 5: Go to the “Motion” block in the block palette, select the ‘go to x: ( ) y: ( )’ block, drag it to the coding area, and place it under the custom block that you’ve created.
- Step 6: Now, you need to add the ‘Pen’ blocks for further coding. So, to add the ‘Pen’ blocks, click on the ‘extension’ option available at the bottom left side of the screen.

- Step 7: When you click on the ‘extension’ option, the following screen will appear.
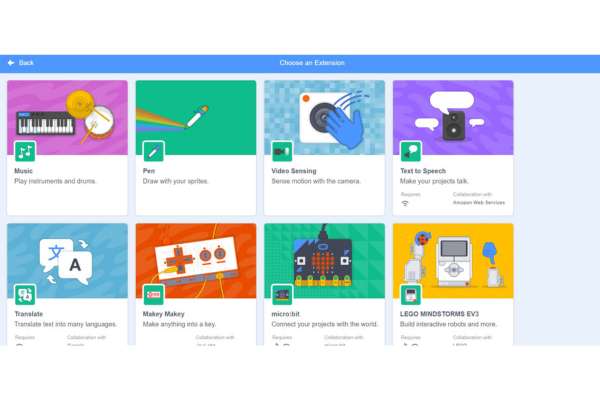
- Step 8: Select the ‘Pen’ option.
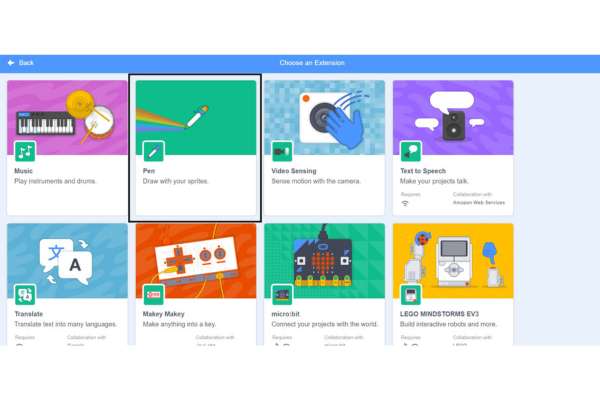
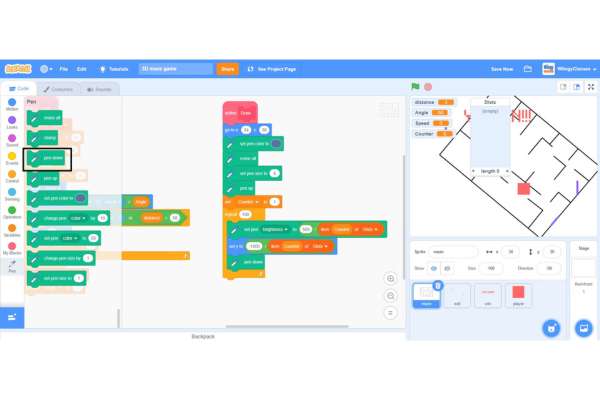
- Step 9: Once you select the ‘Pen’ option, the ‘Pen’ blocks will appear in the block palette as shown below.
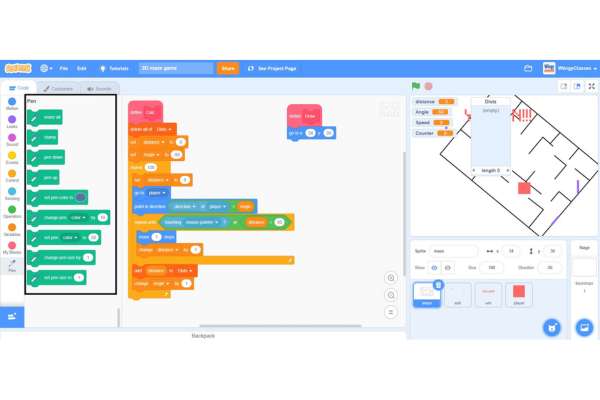
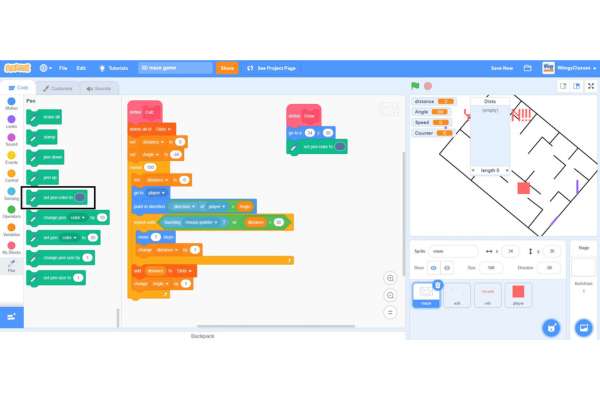
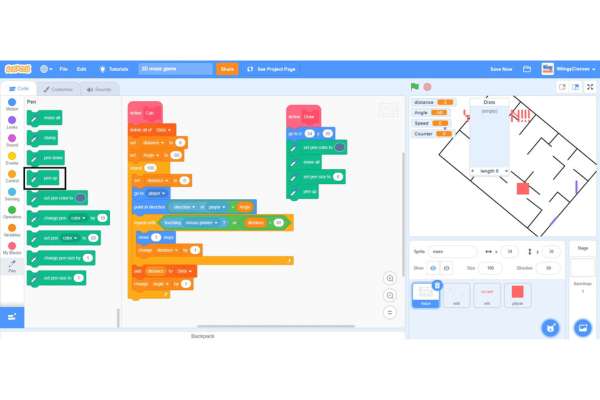
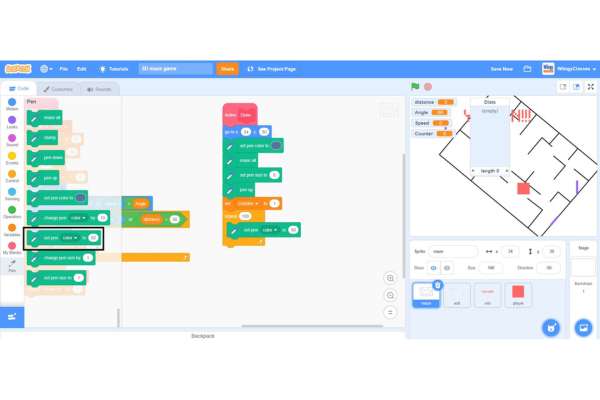
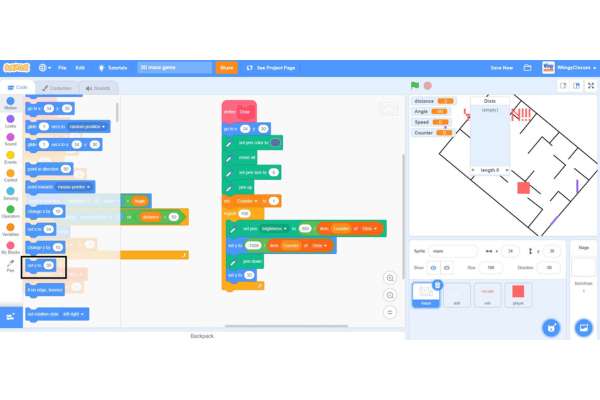
- Step 10: Go to the “Pen” block in the block palette, select the ‘set pen color to ( )’ block, drag it to the coding area, and place it under the ‘go to x: ( ) y: ( )’ block.
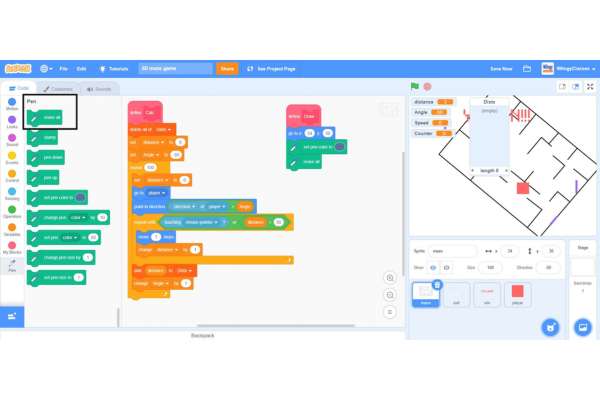
- Step 11: From the “Pen” block in the block palette, select the ‘erase all’ block, drag it to the coding area, and place it under the ‘set pen color to ( )’ block.
- Step 12: Again from the “Pen” block in the block palette, select the ‘set pen size to ( )’ block, drag it to the coding area, and place it under the ‘erase all’ block.
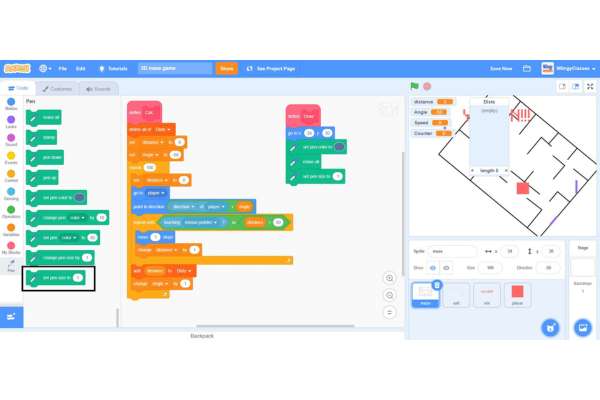
- Step 13: In the ‘set pen size to ( )’ block, change the value to ‘6’.
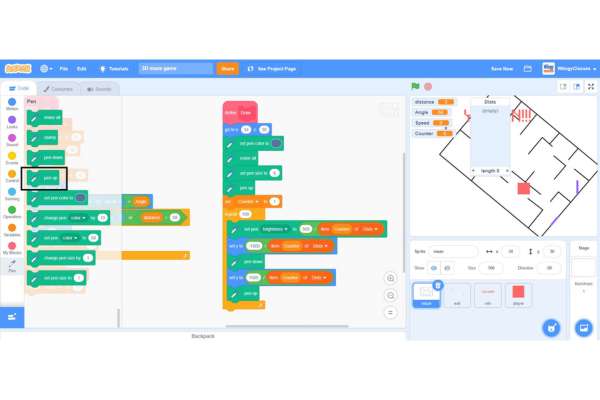
- Step 14: From the “Pen” block in the block palette, select the ‘pen up’ block, drag it to the coding area, and place it under the ‘set pen size to ( )’ block.
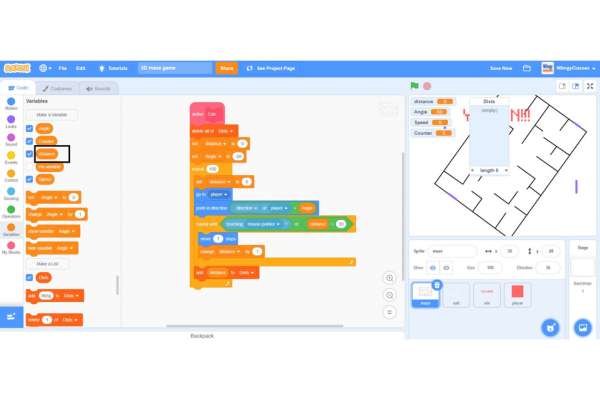
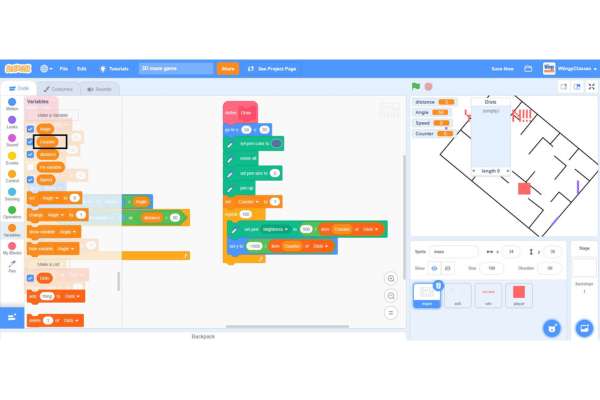
- Step 15: Go to the “Variables” block in the block palette, select the ‘set ( ) to ( )’ block, drag it to the coding area, and place it under the ‘pen up’ block.
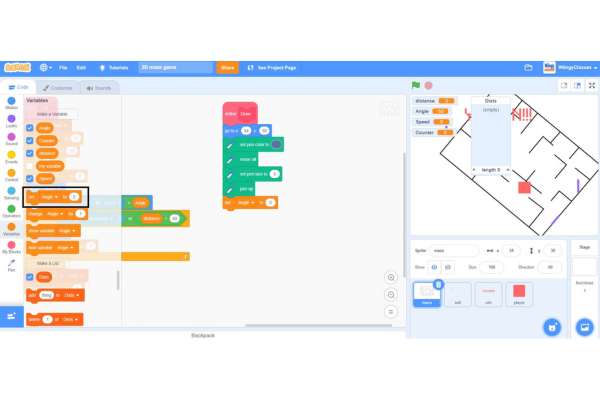
- Step 16: In the ‘set ( ) to ( )’ block, select the first value as ‘Counter’ from the drop-down menu and change the second value to ‘1’.
- Step 17: Go to the “Control” block in the block palette, select the ‘repeat ( )’ block, drag it to the coding area, and place it under the ‘set ( ) to ( )’ block.
- Step 18: In the ‘repeat ( )’ block, change the value to ‘100’.
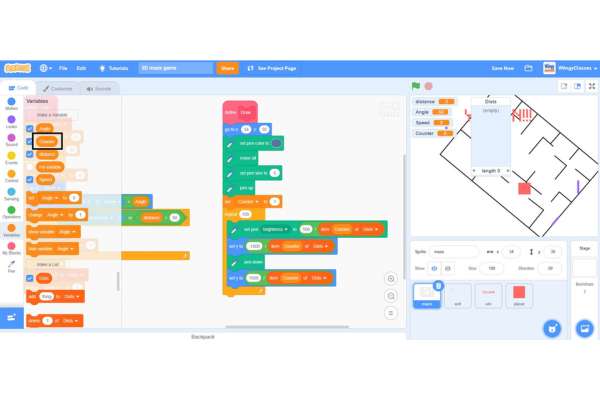
- Step 19: Go to the “Pen” block in the block palette, select the ‘set pen ( ) to ( )’ block, drag it to the coding area, and place it inside the ‘repeat ( )’ block.
- Step 20: In the ‘set pen ( ) to ( )’ block, select the first value as ‘brightness’ from the drop-down menu.
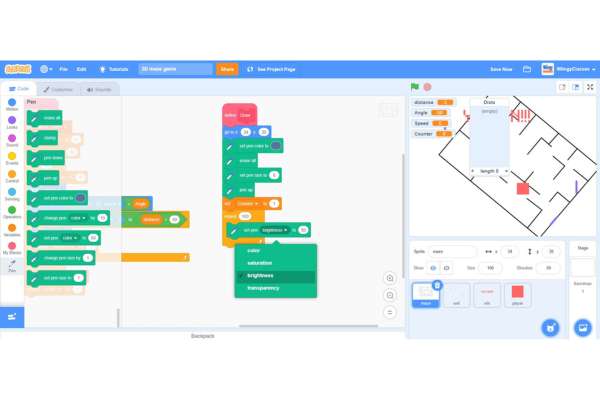
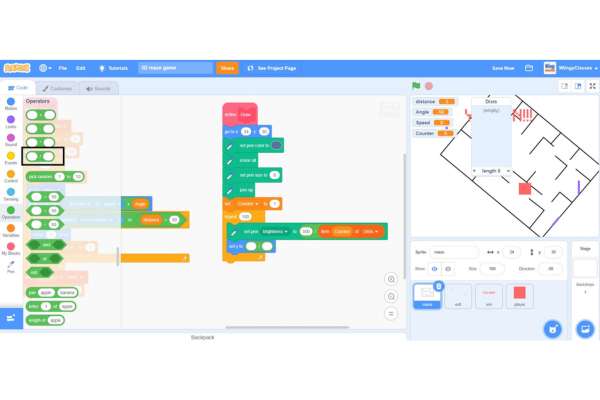
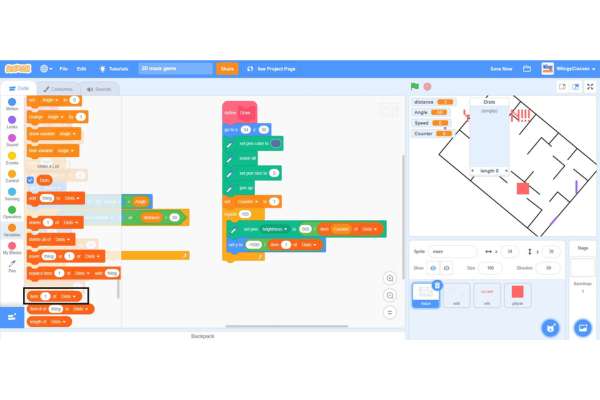
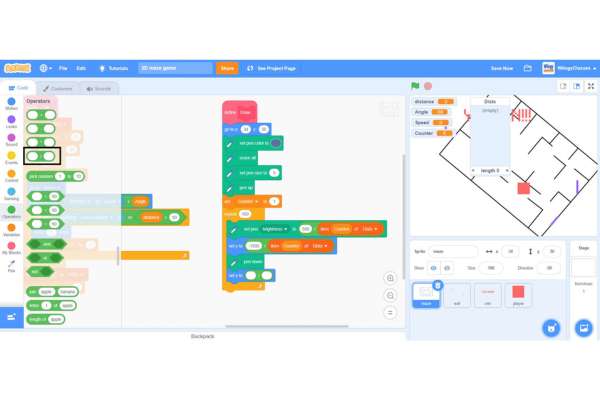
- Step 21: Go to the “Operators” block in the block palette, select the ‘( ) / ( )’ block, drag it to the coding area, and place it in the second value part of the ‘set pen ( ) to ( )’ block.

- Step 22: In the ‘( ) / ( )’ block, enter the first value as ‘500’.

- Step 23: Go to the “Variables” block in the block palette, select the ‘item ( ) of (Dists)’ block, drag it to the coding area, and place it in the second value part of the ‘( ) / ( )’ block.
- Step 24: From the “Variables” block in the block palette, select the ‘Counter’ block, drag it to the coding area, and place it in the value part of the ‘item ( ) of (Dists)’ block.
- Step 25: Go to the “Motion” block in the block palette, select the ‘set y to ( )’ block, drag it to the coding area, and place it under the ‘set pen ( ) to ( )’ block inside the ‘repeat ( )’ block.
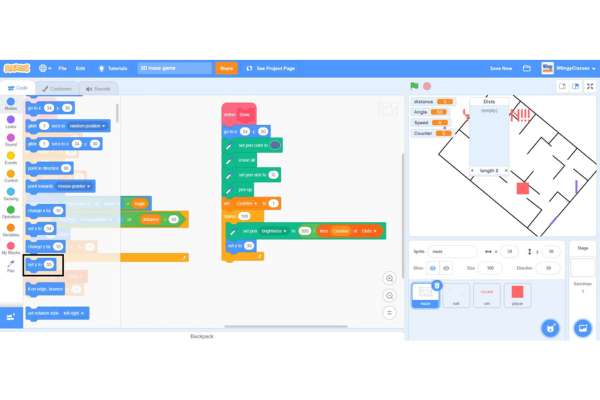
- Step 26: Go to the “Operators” block in the block palette, select the ‘( ) / ( )’ block, drag it to the coding area, and place it in the value part of the ‘set y to ( )’ block.
- Step 27: In the ‘( ) / ( )’ block, enter the first value as ‘-1500’.
- Step 28: Go to the “Variables” block in the block palette, select the ‘item ( ) of (Dists)’ block, drag it to the coding area, and place it in the second value part of the ‘( ) / ( )’ block.
- Step 29: Go to the “Variables” block in the block palette, select the ‘Counter’ block, drag it to the coding area, and place it in the value part of the ‘item ( ) of (Dists)’ block.
- Step 30: Go to the “Pen” block in the block palette, select the ‘pen down’ block, drag it to the coding area, and place it under the ‘set y to ( )’ block inside the ‘repeat ( )’ block.
- Step 31: Go to the “Motion” block in the block palette, again select the ‘set y to ( )’ block, drag it to the coding area, and place it under the ‘pen down’ block inside the ‘repeat ( )’ block.
- Step 32: Go to the “Operators” block in the block palette, select the ‘( ) / ( )’ block, drag it to the coding area, and place it in the value part of the ‘set y to ( )’ block.
- Step 33: In the ‘( ) / ( )’ block, enter the first value as ‘1500’.
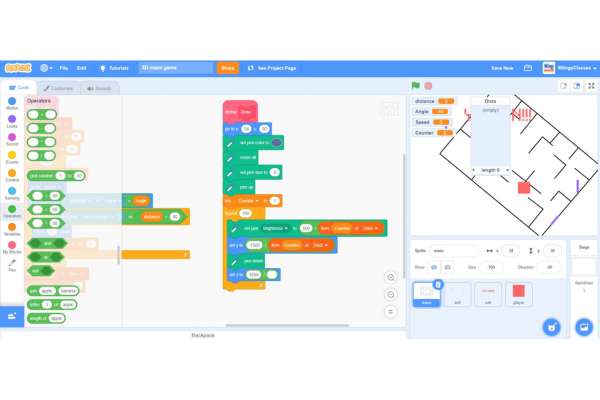
- Step 34: Go to the “Variables” block in the block palette, select the ‘item ( ) of (Dists)’ block, drag it to the coding area, and place it in the second value part of the ‘( ) / ( )’ block.
- Step 35: Go to the “Variables” block in the block palette, select the ‘Counter’ block, drag it to the coding area, and place it in the value part of the ‘item ( ) of (Dists)’ block.
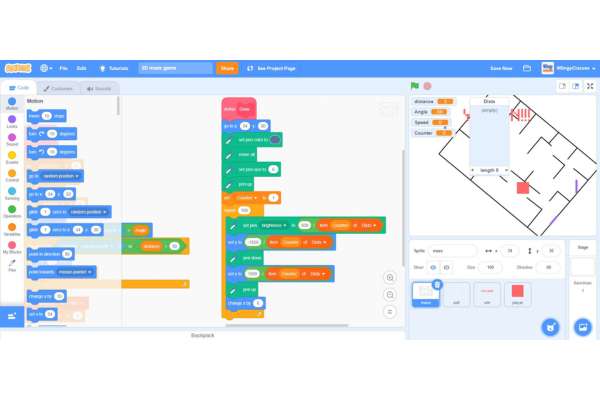
- Step 36: Go to the “Pen” block in the block palette, select the ‘pen up’ block, drag it to the coding area, and place it under the ‘set y to ( )’ block inside the ‘repeat ( )’ block.
- Step 37: Go to the “Motion” block in the block palette, again select the ‘change x by ( )’ block, drag it to the coding area, and place it under the ‘pen up’ block inside the ‘repeat ( )’ block.
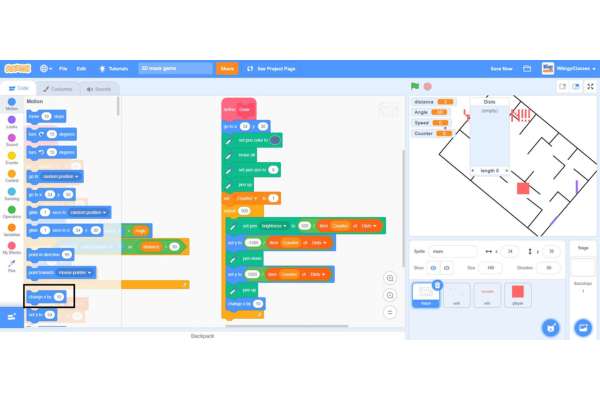
- Step 38: In the ‘change x by ( )’ block, change the value to ‘6’.
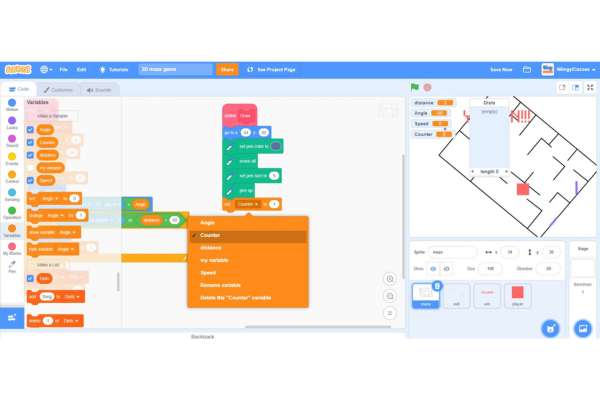
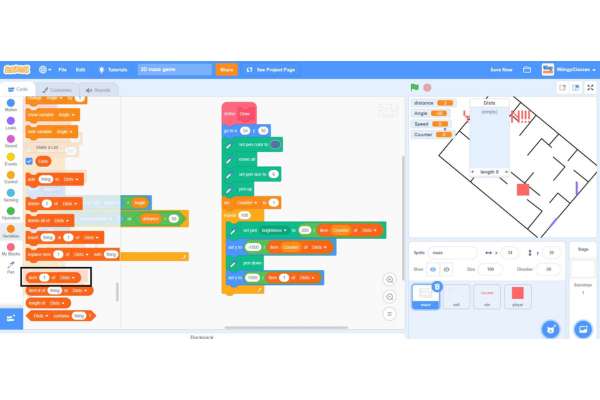
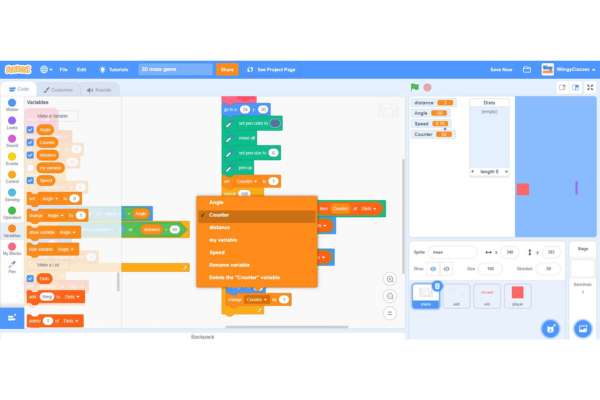
- Step 39: Go to the “Variables” block in the block palette, select the ‘change ( ) by ( )’ block, drag it to the coding area, and place it under the ‘change x by ( )’ block inside the ‘repeat ( )’ block.
- Step 40: In the ‘change ( ) by ( )’ block, select the first value as ‘Counter’ from the drop-down menu and leave the second value as ‘1’.
- Step 41: Go to the “Events” block in the block palette, select the ‘when I receive ( )’ block, and drag it to the coding area.
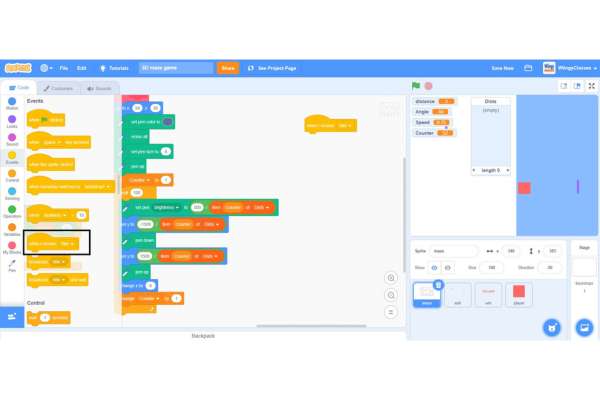
- Step 42: In the ‘when I receive ( )’ block, select ‘New Message’ from the drop-down menu.
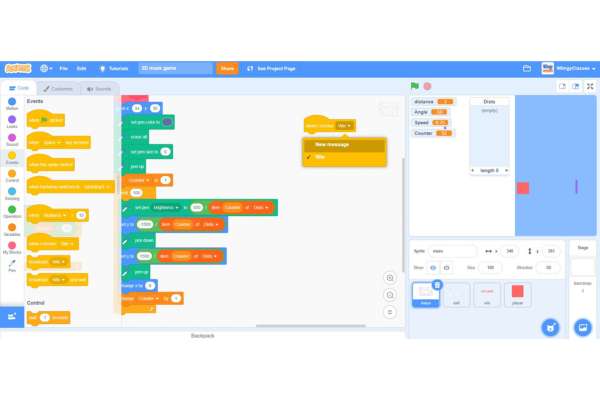
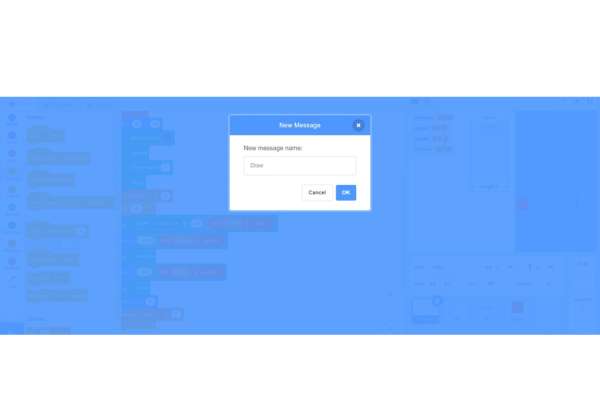
- Step 43: When you select ‘New Message’ from the drop-down menu, the following screen will appear.
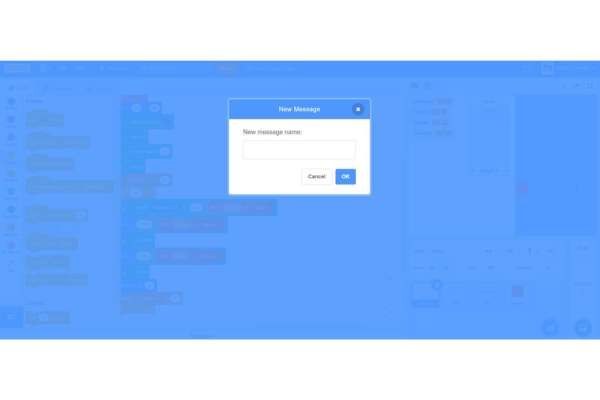
- Step 44: Now, enter the message name as ‘Draw’ and click on the ‘OK’ option.
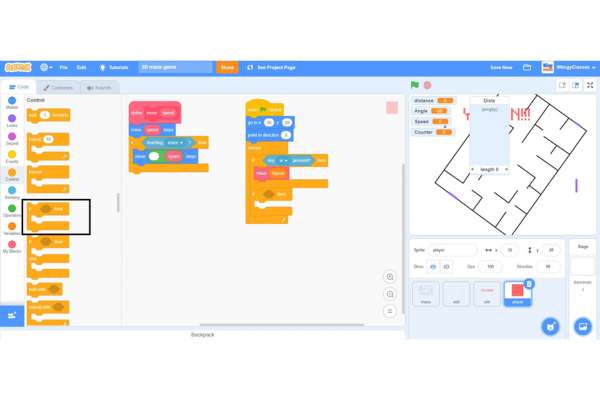
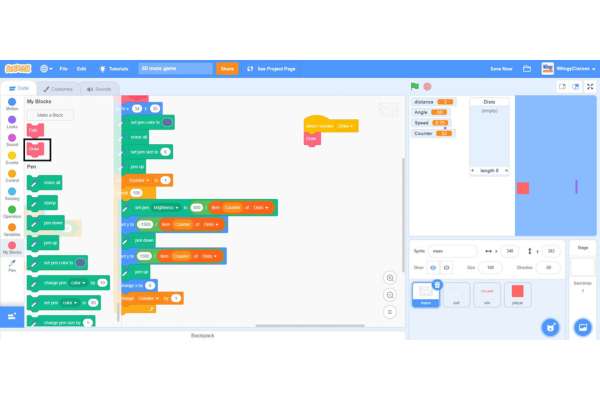
- Step 45: Go to the “My Blocks” block in the block palette, select the ‘Draw’ block, drag it to the coding area, and place it under the ‘when I receive ( )’ block.
Congratulations! your 3D Maze Game is finally ready !!
Free game code access
Conclusion
Creating a game in Scratch may seem initimidating and hard, especially to a beginner who is not fully aware of all the features and functions of all the elements of the Scratch editor. But by remaining consistent with your learning process and with practice you can create many interesting games. If you want more 3D game ideas then go to the project page of Scratch to get some inspiration and start giving shape to your imagination.
Looking to learn Scratch coding? Explore Wiingy’s Online Scratch Coding Classes For Kids to learn from top Scratch coding experts.
Frequently asked questions (FAQs)
What is raycasting?
Raycasting is a method used to efficiently make a 3D game from a 2D game.
What is the difference between 2-dimensional and 3-dimensional surfaces?
The difference between 2-dimensional and 3-dimensional surfaces is that 2-dimensional surfaces have only two axes, that is, the x-axis and y-axis, whereas, 3-dimensional surfaces have one more axis along with the x-axis and y-axis, that is, the z-axis which provides the illusion of depth and runs at a right angle to the x-axis and y-axis
What does radar do in Scratch?
In Scratch, the radar track of the space available between the player and the walls helps in allowing the game visuals to adjust as per the movement of the player.
What perspective do the x-axis and y-axis provide?
The x-axis provides the perspective of left and right coordinates and the y-axis provides the perspective of up and down coordinates.
How to add an extension in Scratch?
To add an extension in Scratch, click on the option available on the bottom-left side of the screen that says ‘Add Extension’.
We hope this game tutorial helped you in understanding all the steps involved in creating a 3D game on Scratch. If you are interested in creating similar projects, then read our game tutorial on how to make the Pac-man game on Scratch.
For more Scratch game tutorials, check out our compilation of some of the most popular Scratch Games for Kids along with step-by-step instructions on how to build those games.