Create a Paint Application in Scratch 3.0 | Pen Extension in Scratch
- Aditi |
- August 21, 2024
Updated By
Reviewed By

Creating a Paint application in Scratch 3.0 is an interesting concept that new users may find intriguing to create on their own. The process may sound difficult and intimidating but it is not. We have explained the whole process below in an uncomplicated way.
Looking to learn Scratch coding? Explore Wiingy’s Online Scratch Coding Classes For Kids to learn from top Scratch coding experts.
This is Chapter 4.8 in the
Advanced Scratch Tutorial
How to Create a Paint Application in Scratch 3.0?
For creating a paint application in Scratch, you must follow the following steps:
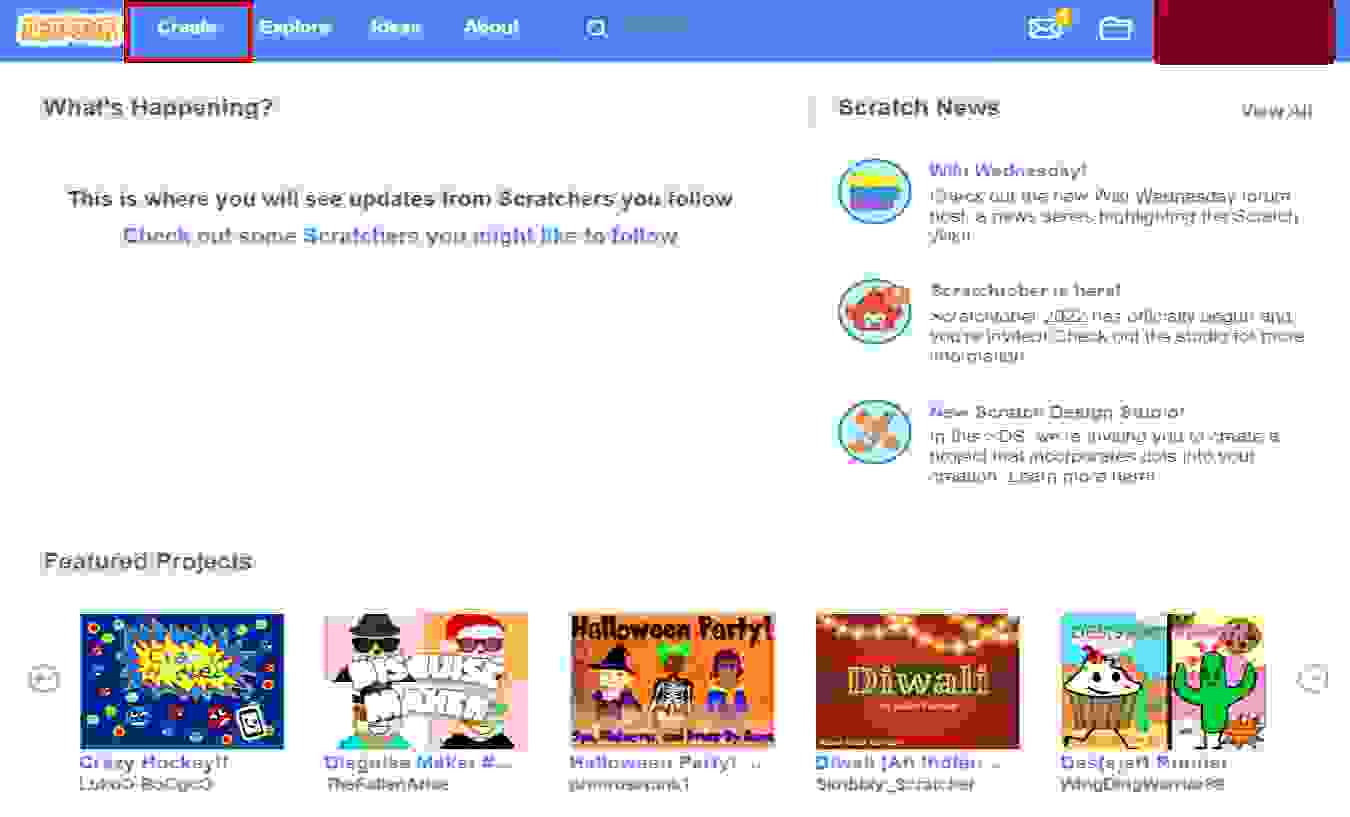
Step 1: Go to the Scratch Programming Editor and click on the ‘Create’ option available at the top of the screen.
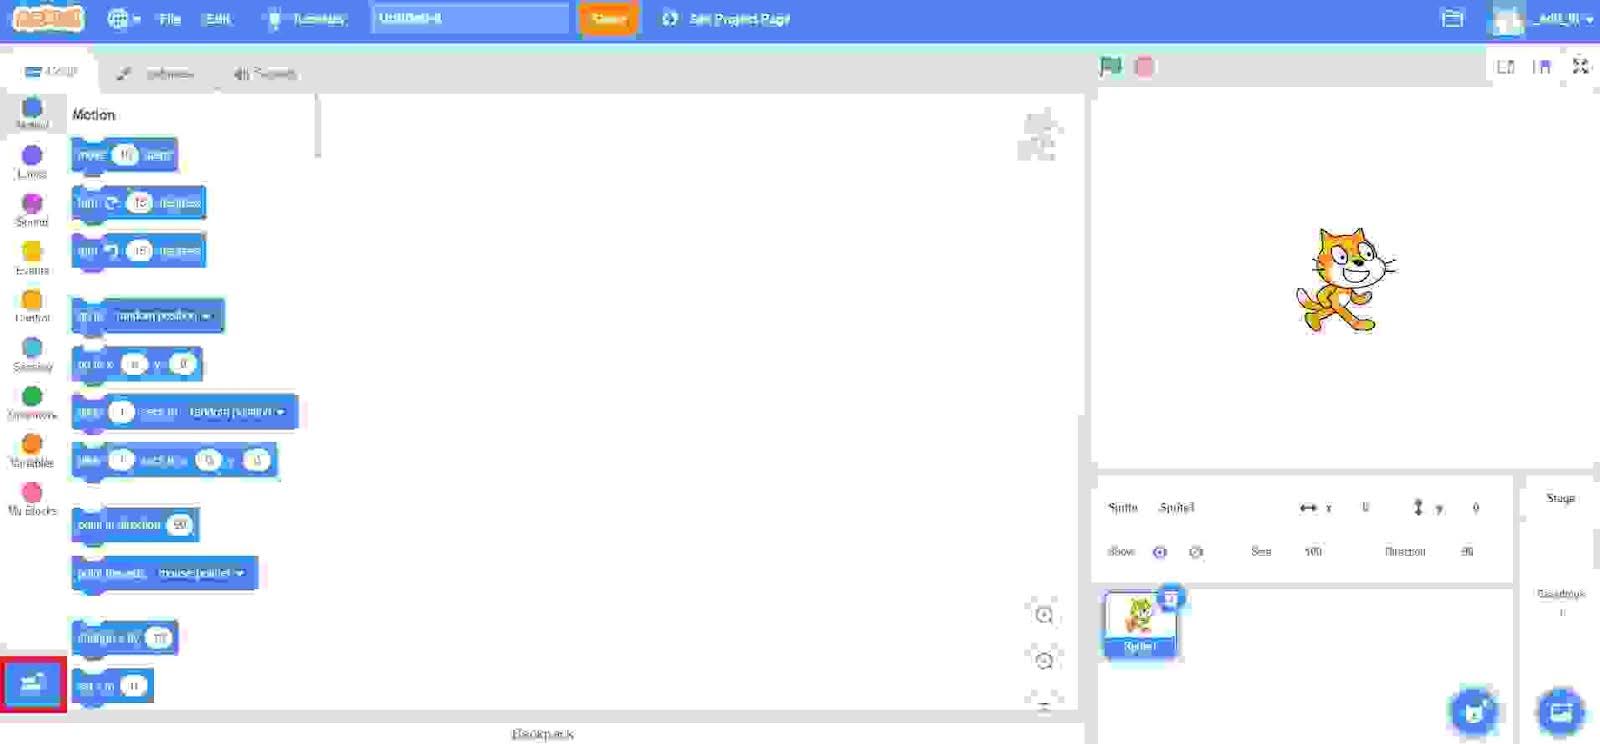
Step 2: Click on the ‘Add Extension’ button, which is in blue color available at the bottom-left corner of the page.
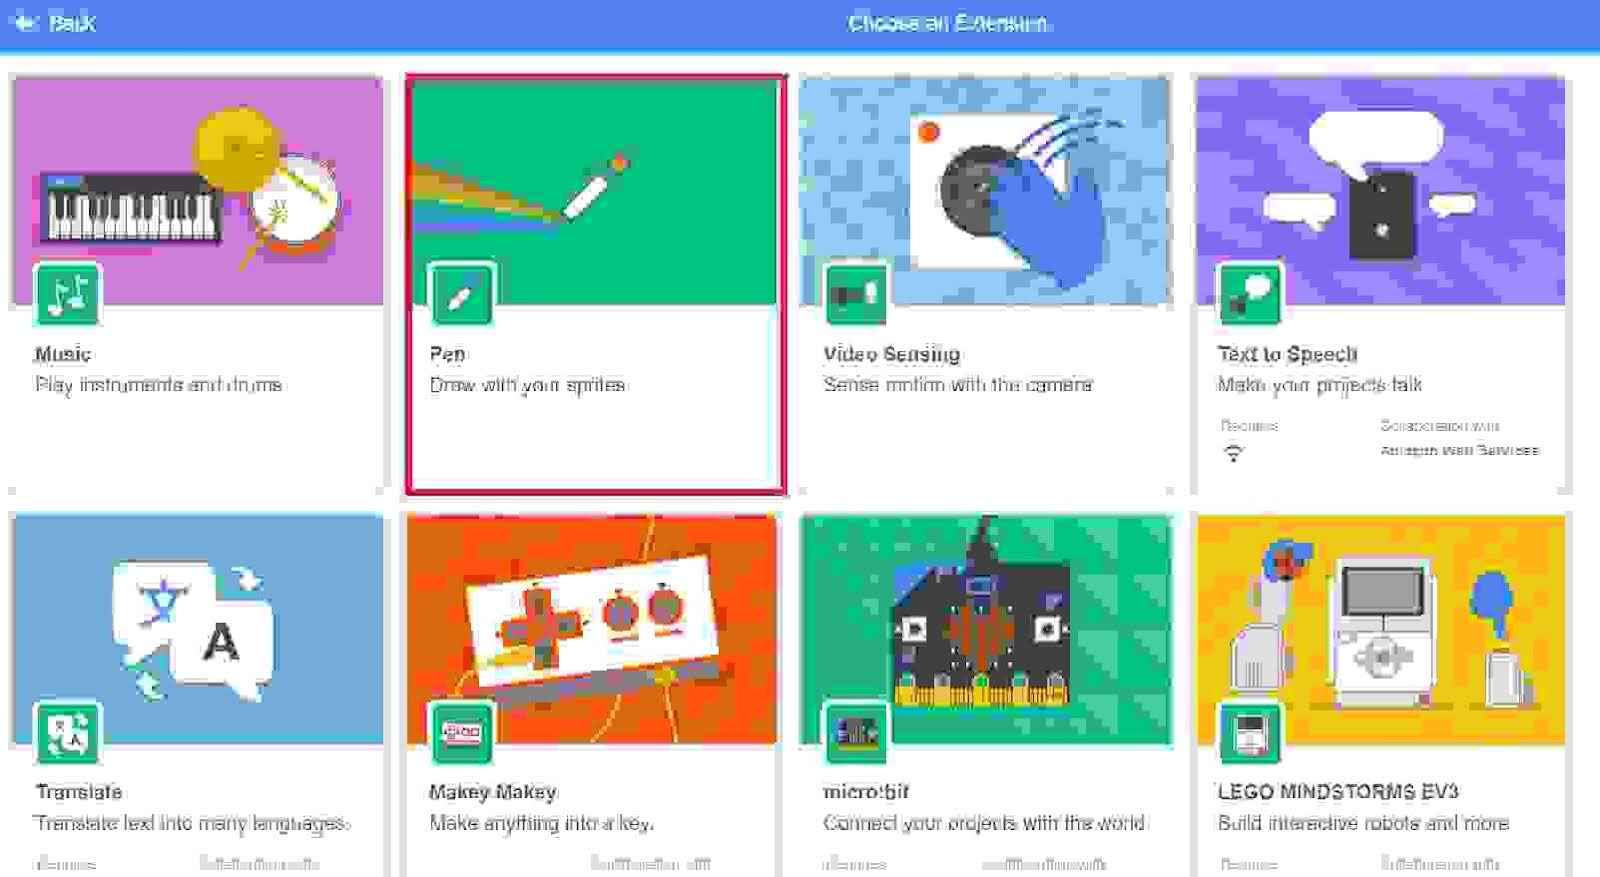
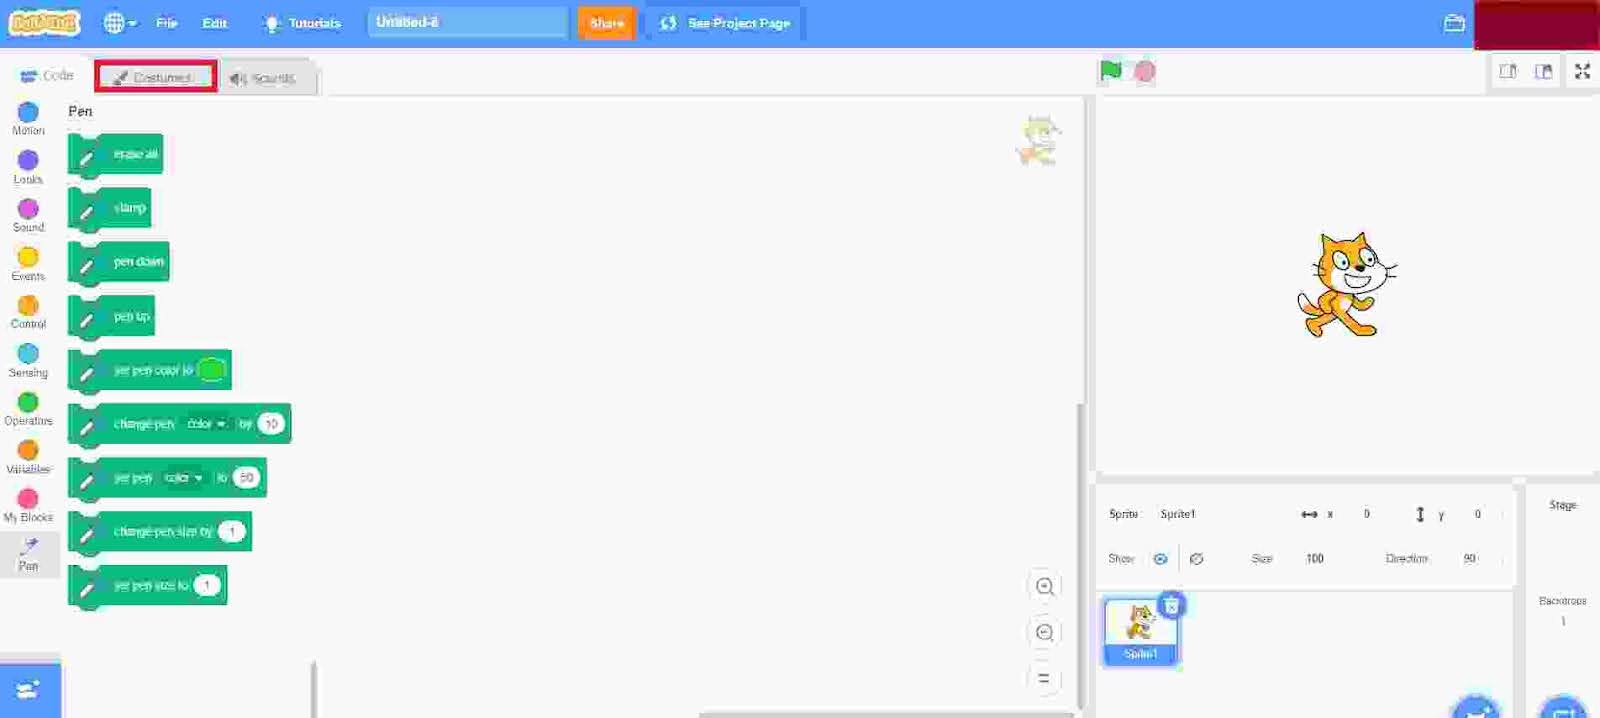
Step 3: Now you will be directed to a page where you will find many extensions. Out of all the extensions, choose the “Pen” extension.
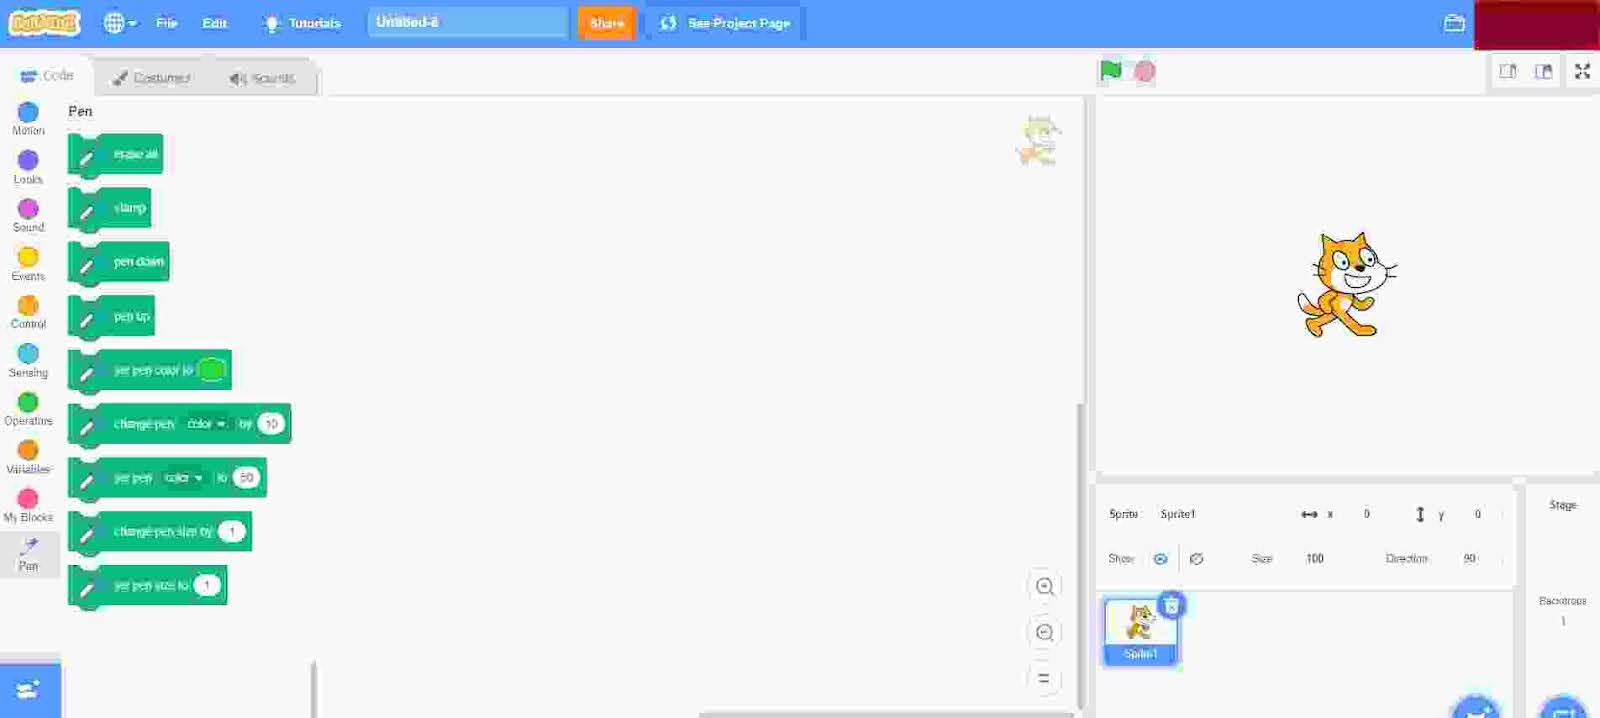
Step 4: After choosing the pen extension, you will see the Pen extension blocks appear in the Scratch editor.
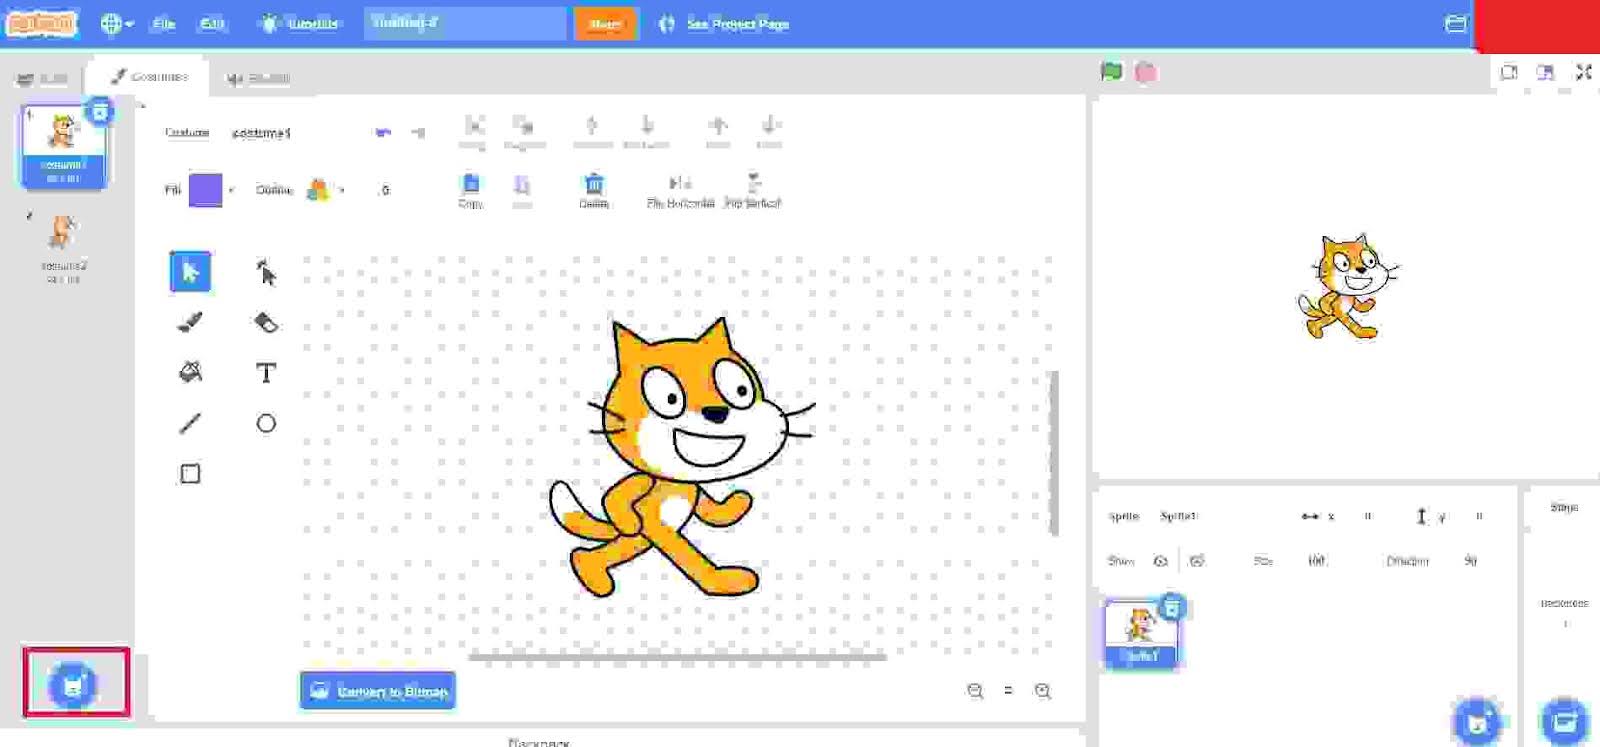
Step 5: Then click on the ‘Costumes’ button available at the top of the screen next to the ‘Code’ button.
Step 6: After clicking on the costumes button, you will see the following interface on the screen. Then click on the ‘Choose a Costume’ button available at the bottom-left corner of the screen.
Step 7: Now, you will see a few options, choose the “Paint” option.
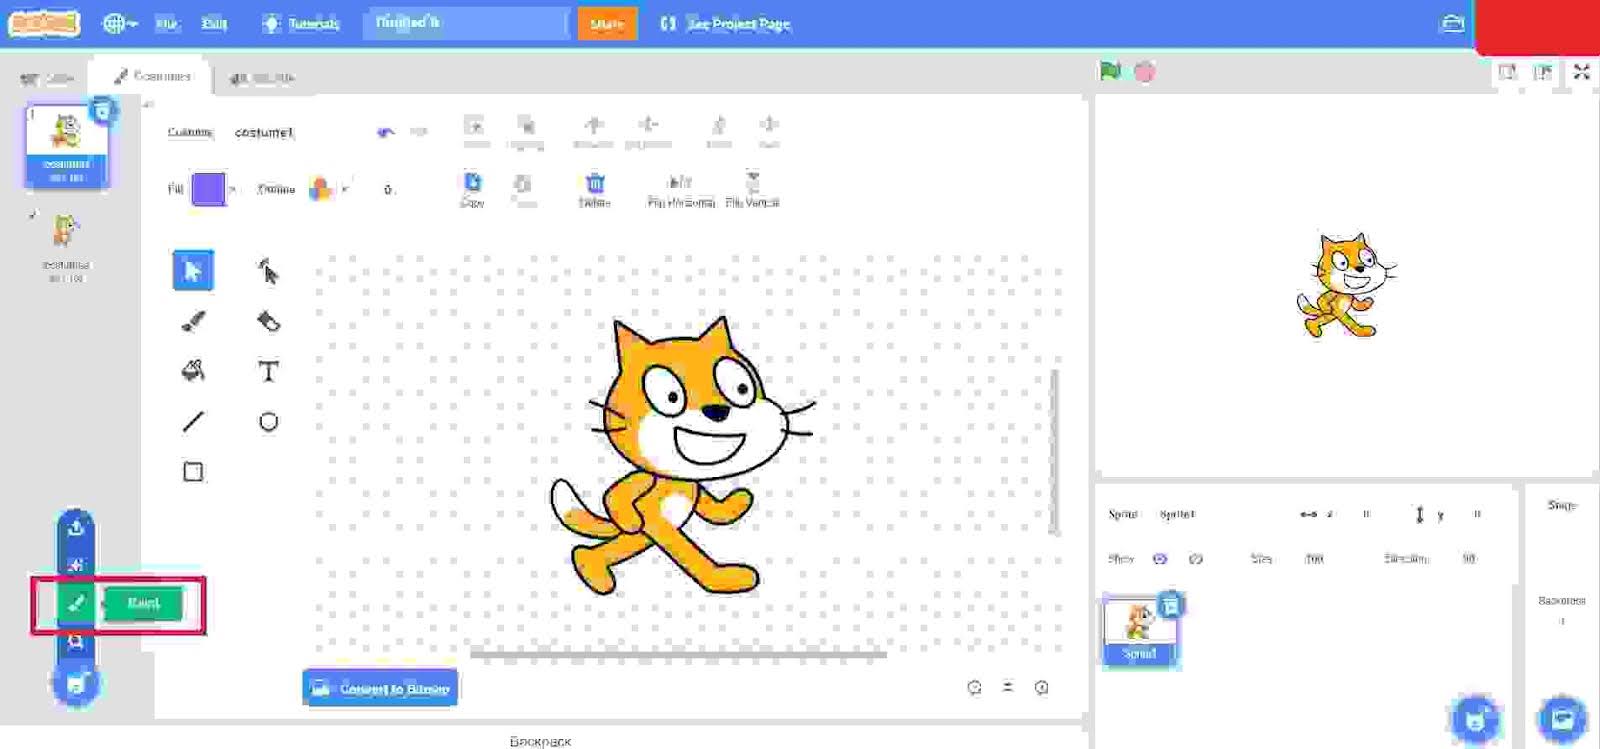
Step 8: After choosing the paint option, you will get an empty costume as shown below. Click on the “circle” design to draw a circle sprite.
Now, you need to code in order to move the circle sprite without moving it manually Scratch.
How to Code to Create the Paint Application in Scratch 3.0?
Follow the steps to code the paint application in Scratch 3.0:
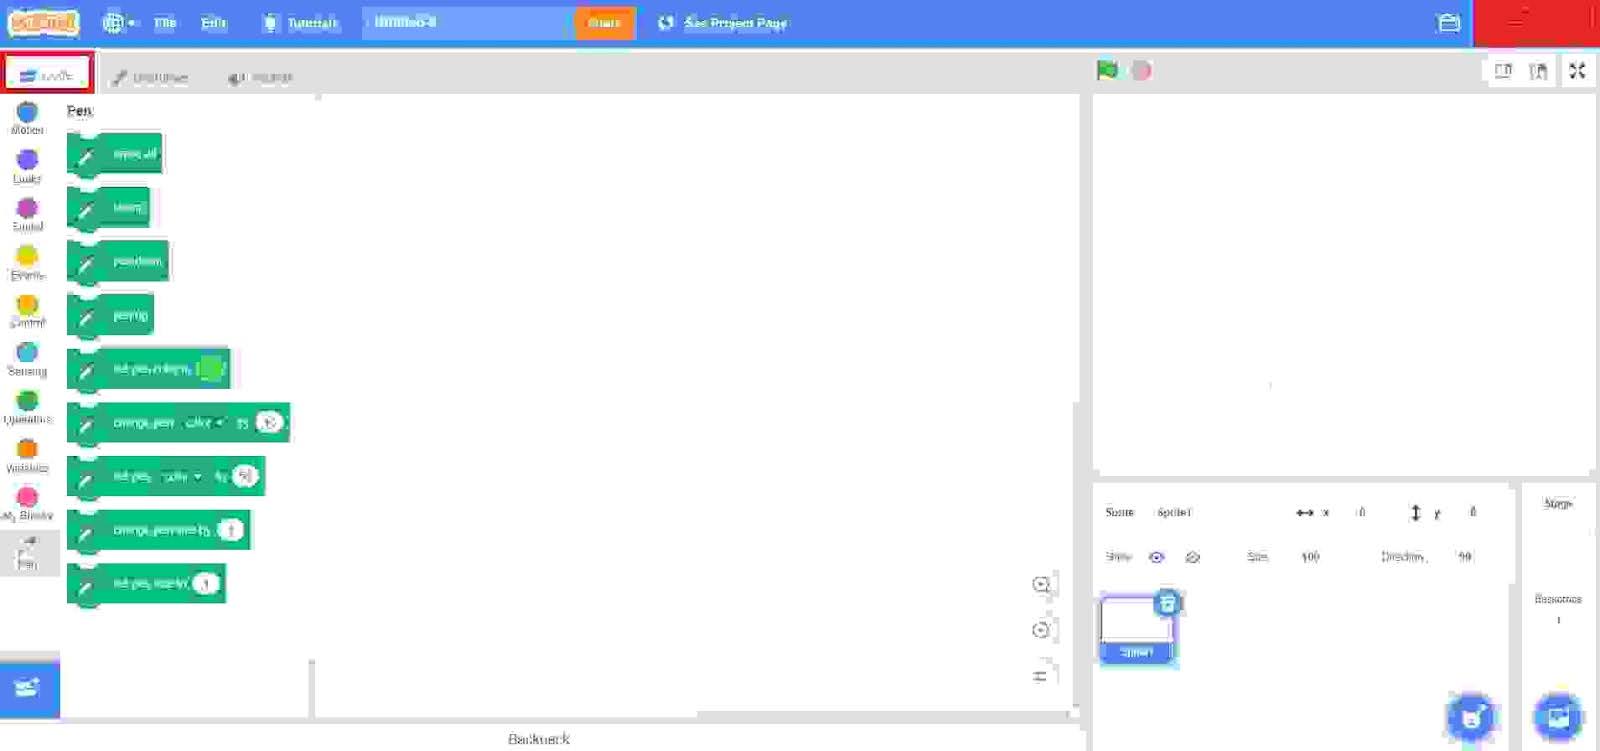
Step 1: Click on the “Code” option available at the top-left of the screen.
Step 2: Now, click on the “Events” option available in the block palette and choose and drag the first option under the “Events” block, that is ‘When Green Flag Clicked’, to the codes screen for coding.
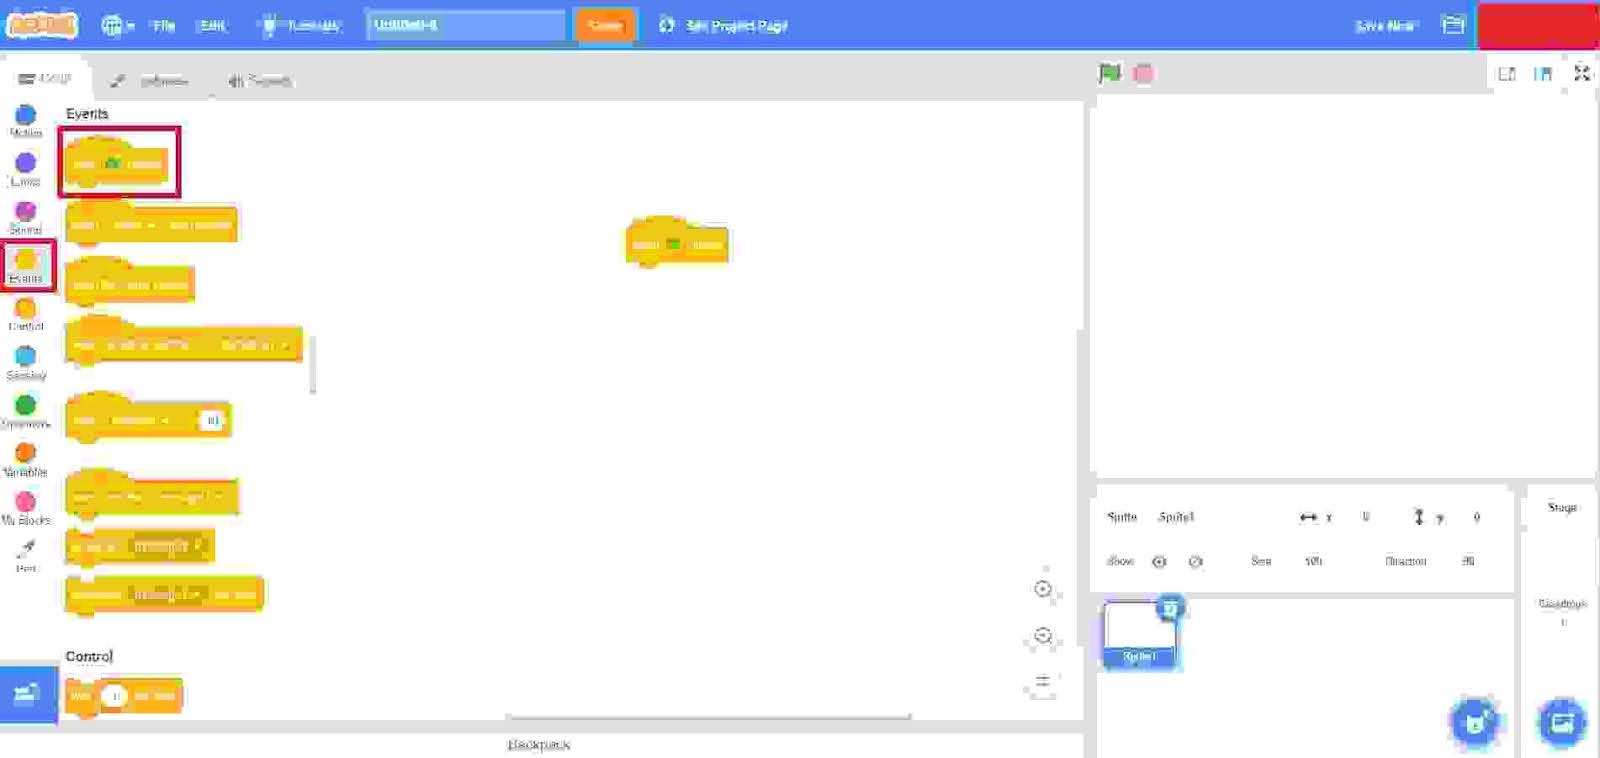
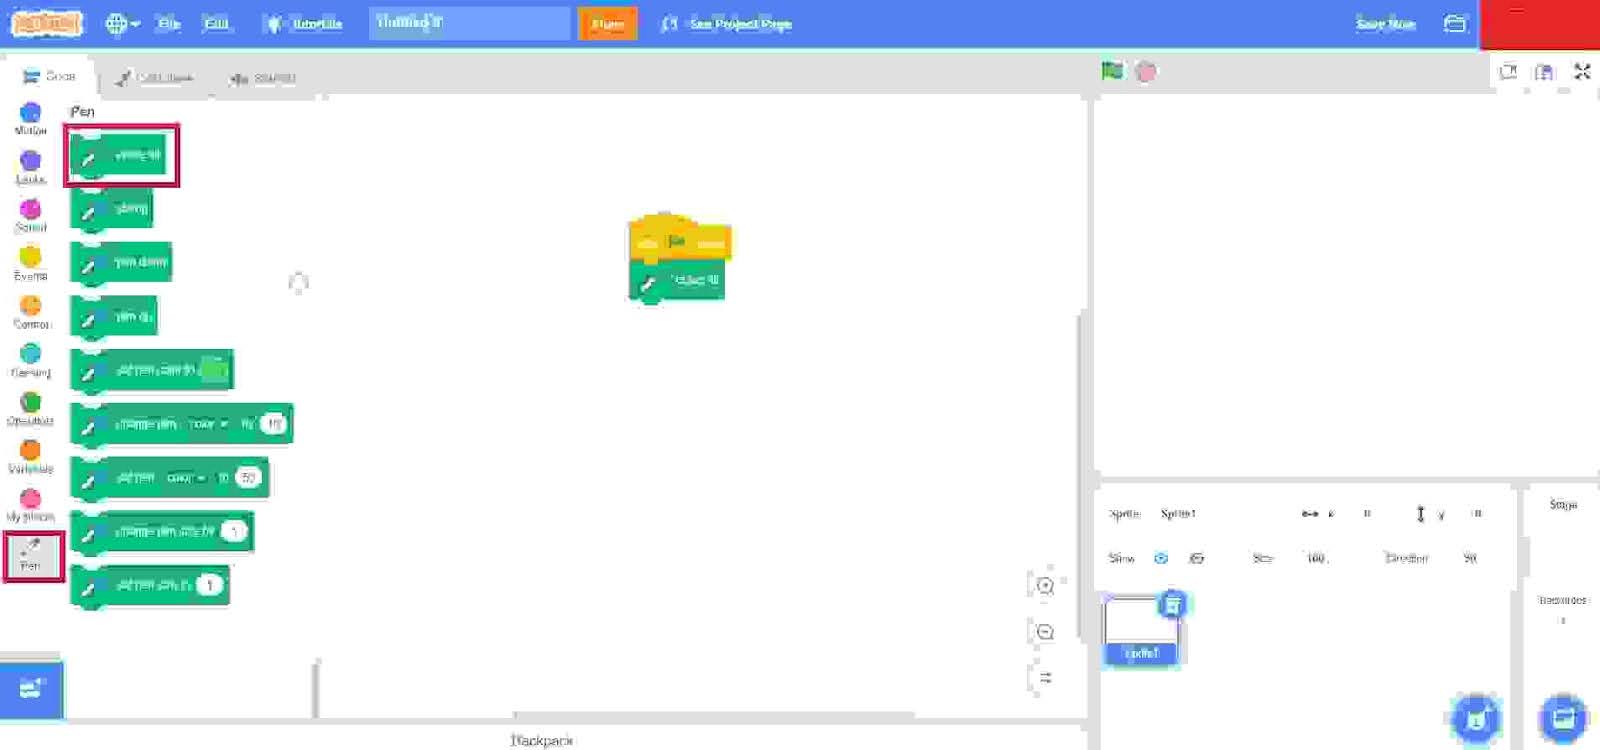
Step 3: Click on the “Pen” extension block available at the left side of the screen and choose and drag the first option under the Pen, that is “Erase All”, to the codes screen for coding and fit under the “When Green Flag Clicked”.
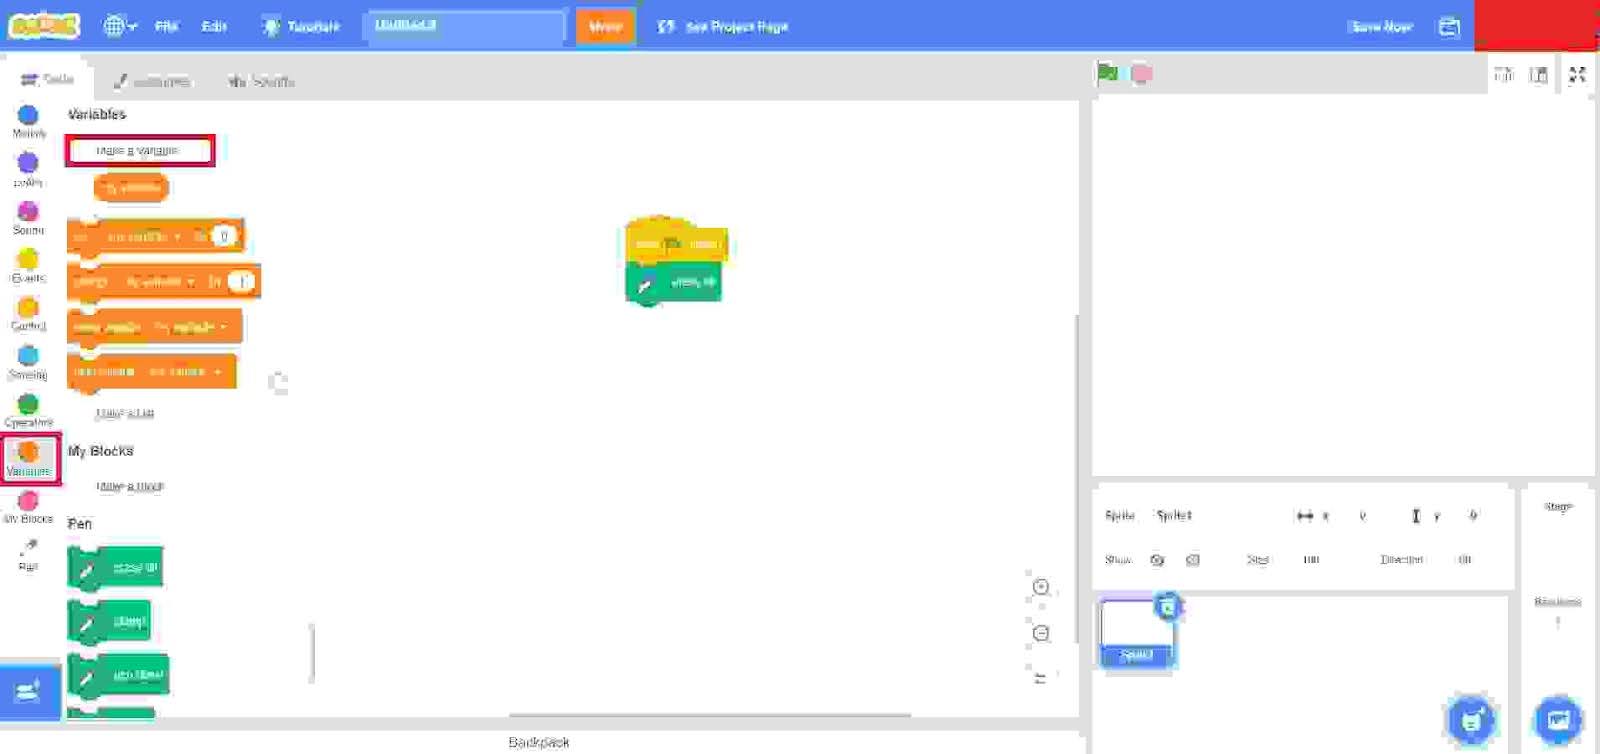
Step 4: Click on the “Variables” button available on the left side of the screen and choose and select the first option under the Variables, that is “Make a Variable”.
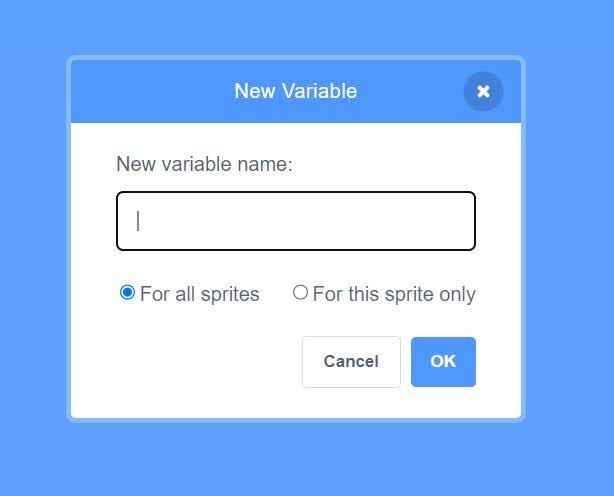
Step 5: After selecting the make a variable option, you will the following interface on the screen. Enter a variable name, let color, in this case, and let the ‘For all sprites’ option ticked and click ‘OK’.
Step 6: Now, choose and drag the ‘Set color to 0’ option to the codes screen for coding and fit under the ‘Erase All’.

Step 7: Instead of 0, now change it to ‘BLUE’.

Step 8: Now, make another variable of the name ‘size’ using the make a variable option.

Step 9: Choose and drag the ‘Set size to 0’ option to the codes screen for coding and fit under the ‘Set color to 0’.
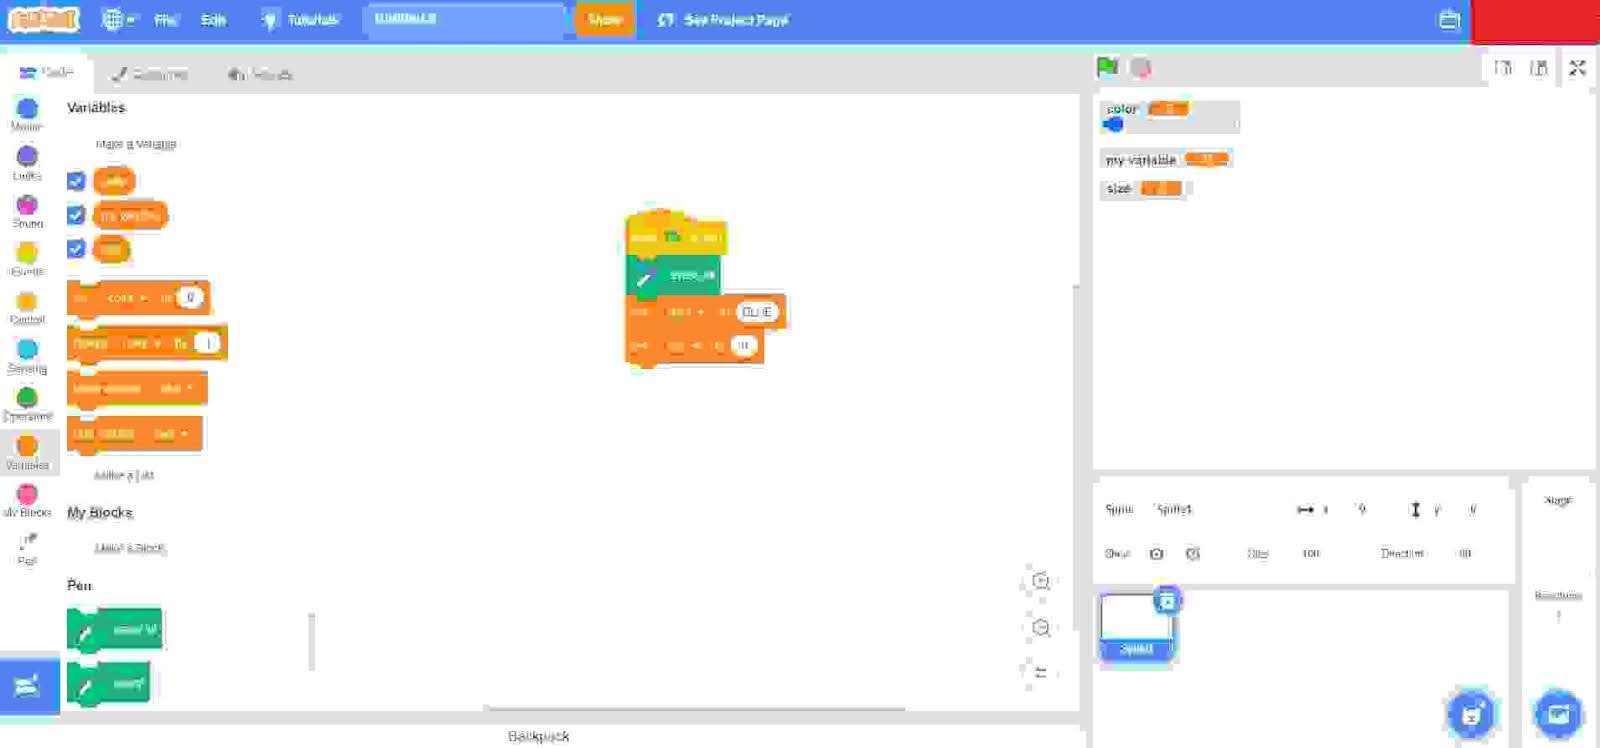
Step 10: Instead of 0, now change it to ‘1’.

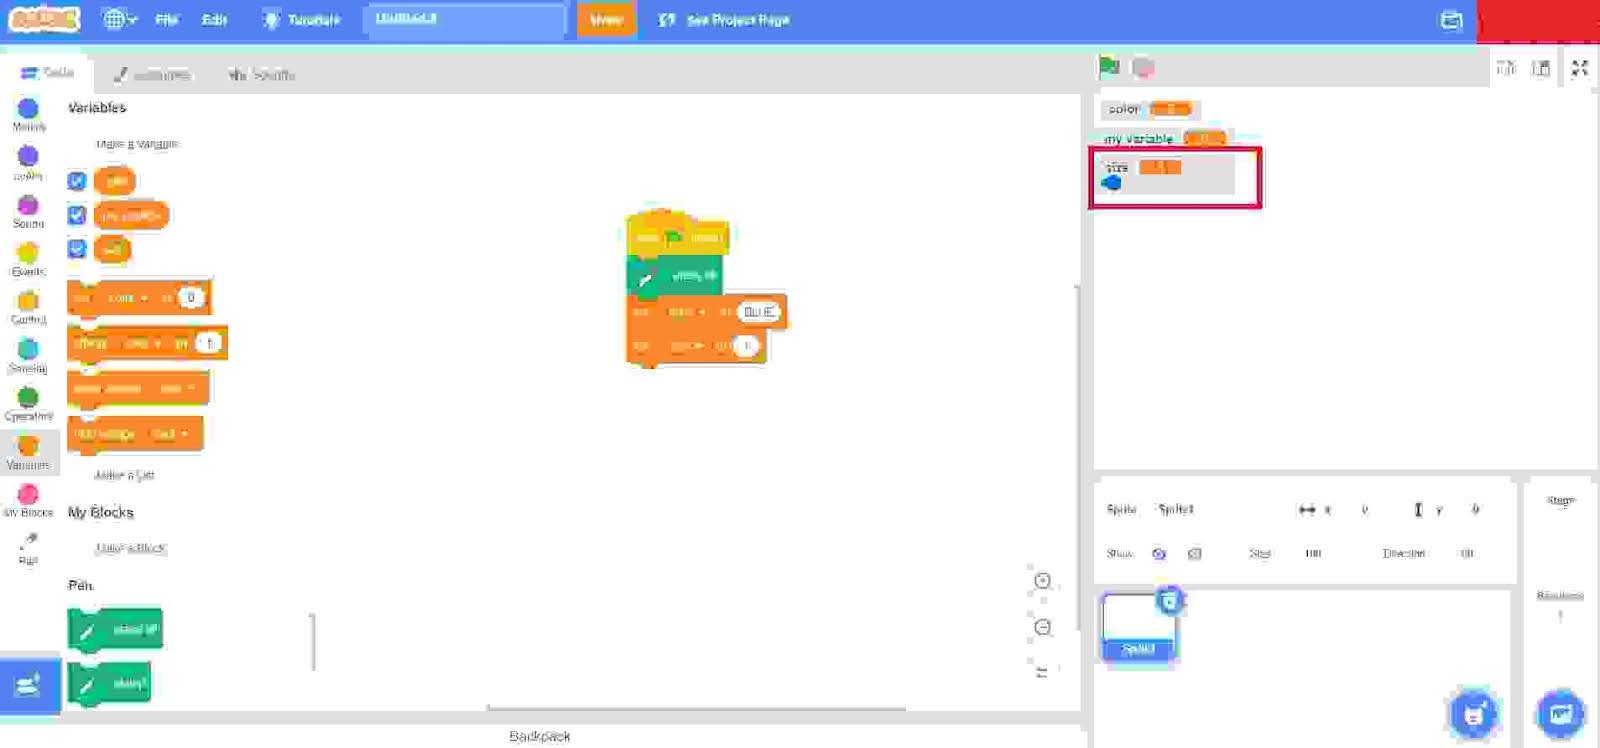
Step 11: Now, move the cursor to the right side of the screen and move the slider for ‘size’.
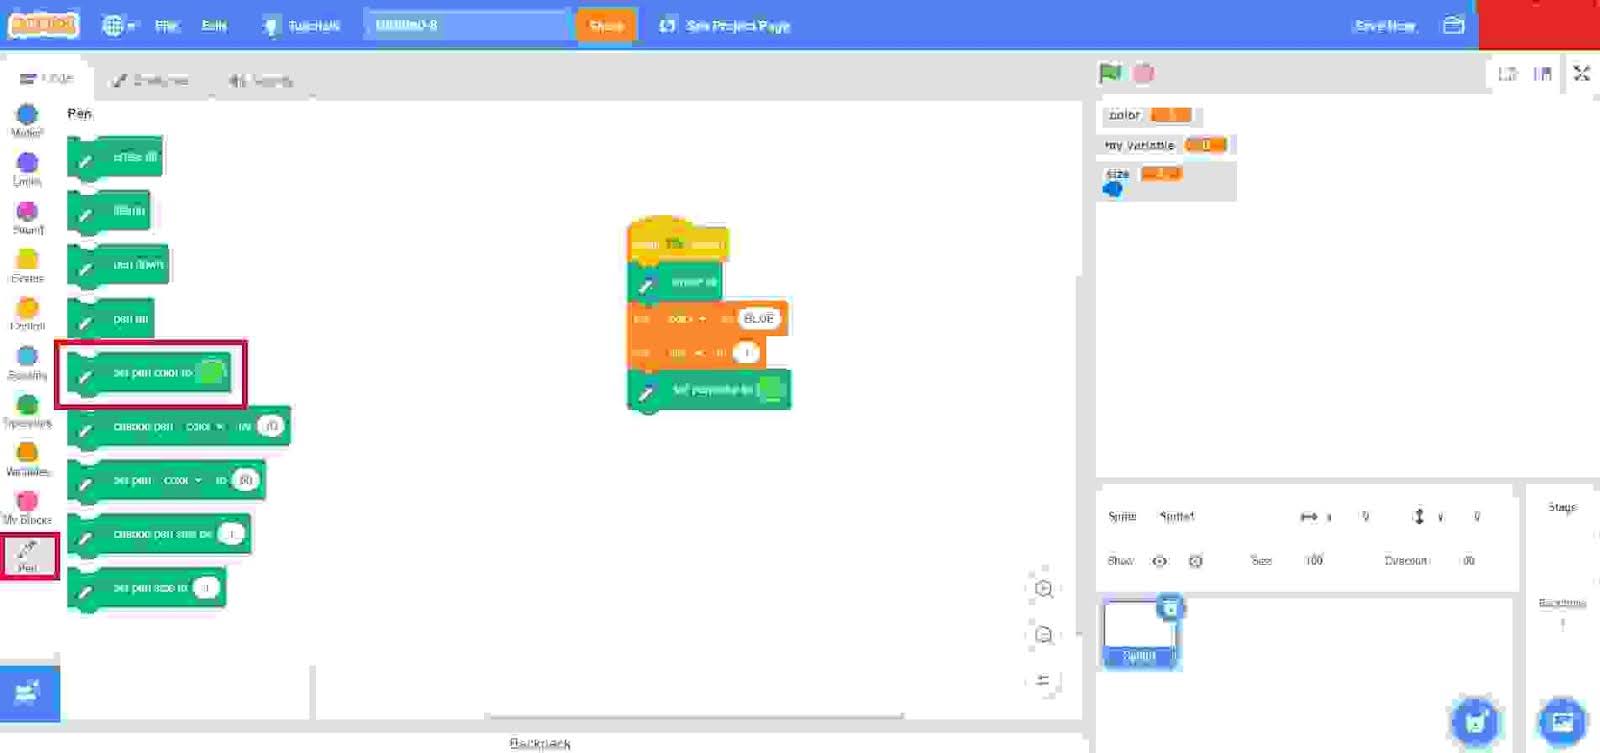
Step 12: Click on the ‘Pen’ button available at the left side of the screen and choose and drag the ‘Set pen color to’ option to the codes screen for coding and fit under the ‘Set size to 1’.
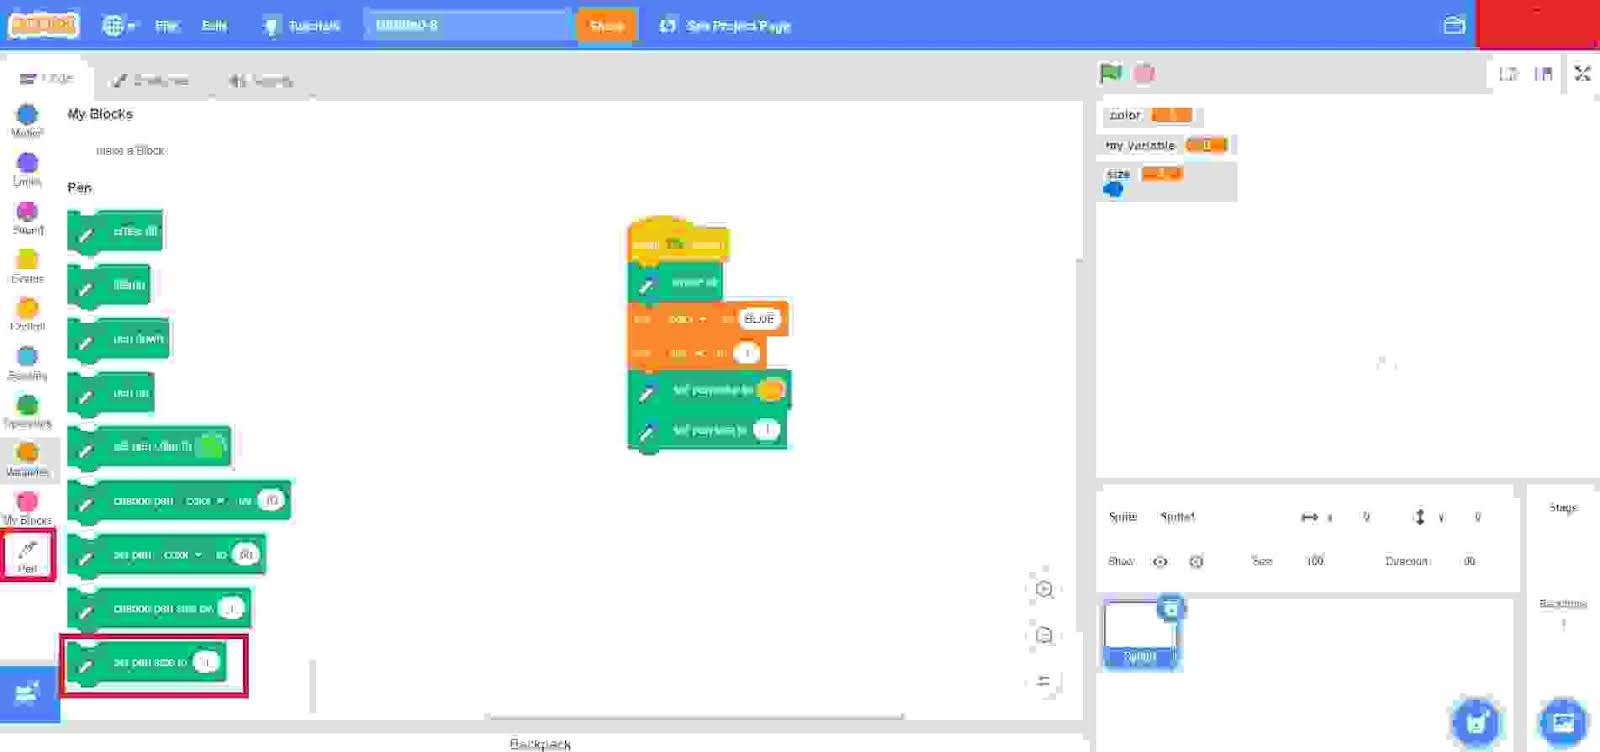
Step 13: Drag another option ‘Set pen size to’ to the codes screen for coding and fit under the ‘Set pen color to’.
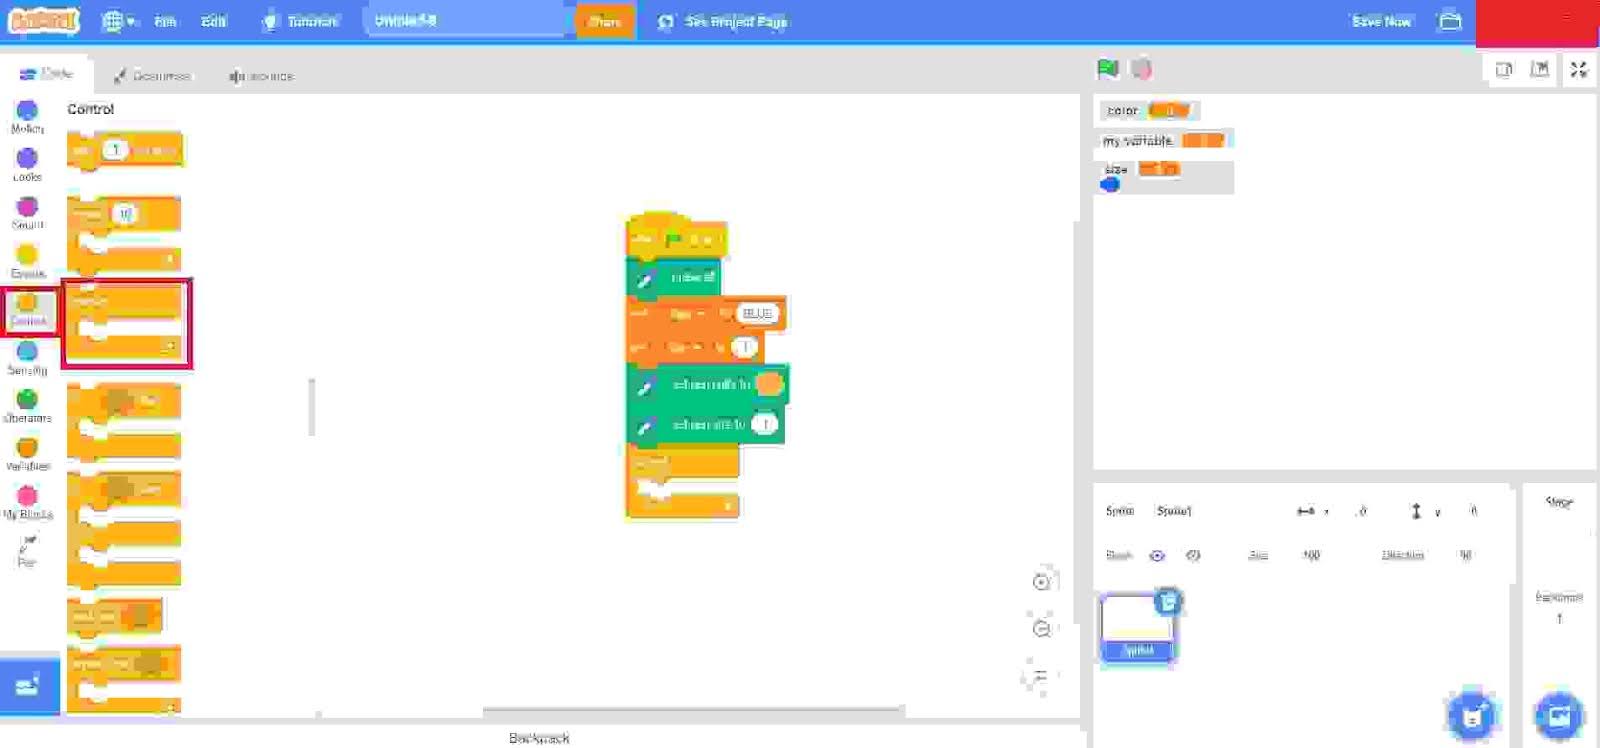
Step 14: Click on the ‘Control’ button available at the left side of the screen and choose and drag the ‘forever’ option to the codes screen for coding and fit under the ‘Set pen size to’.
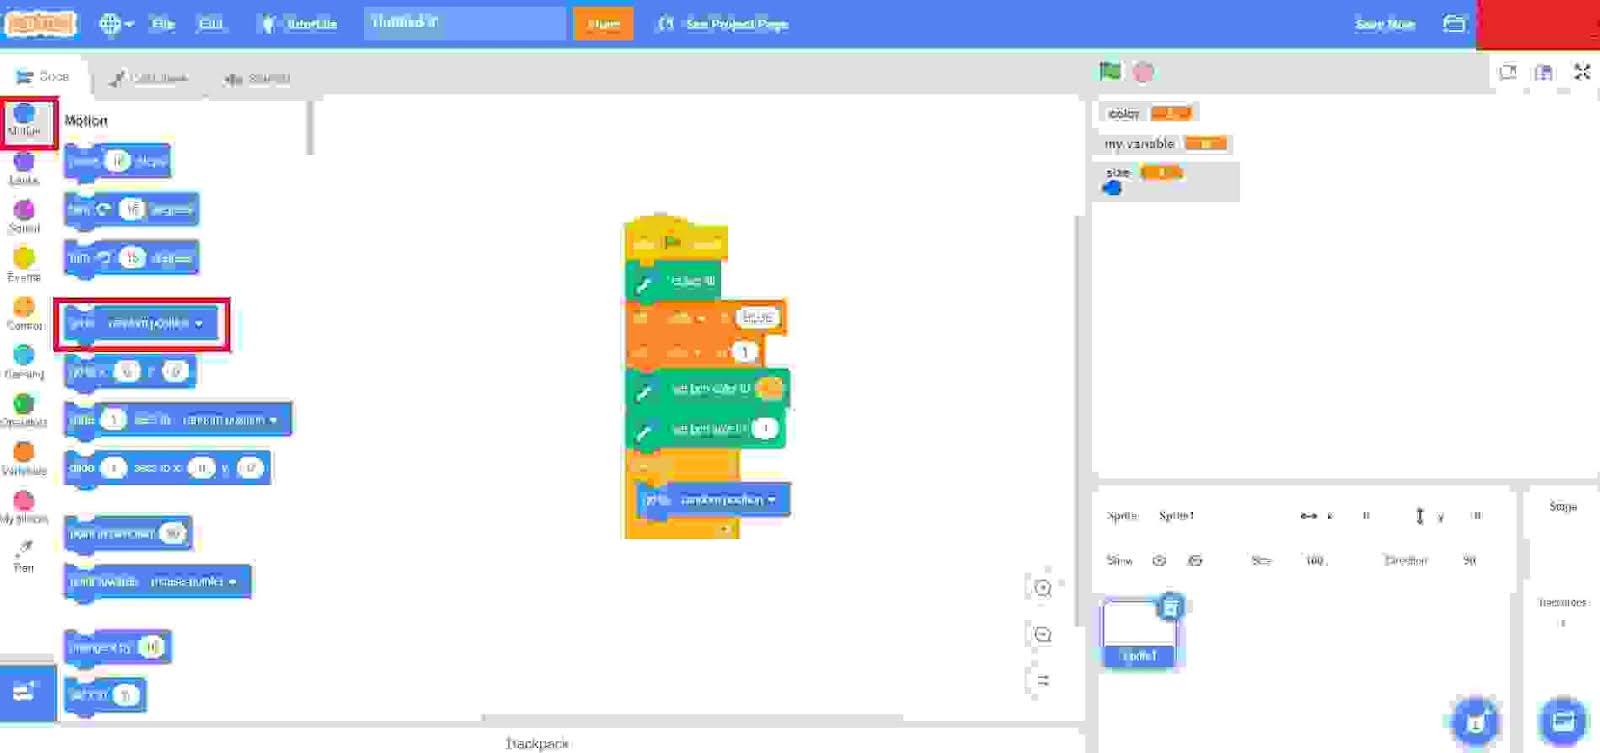
Step 15: Click on the ‘Motion’ button available at the left side of the screen and choose and drag the ‘Go to random position’ option to the codes screen for coding.
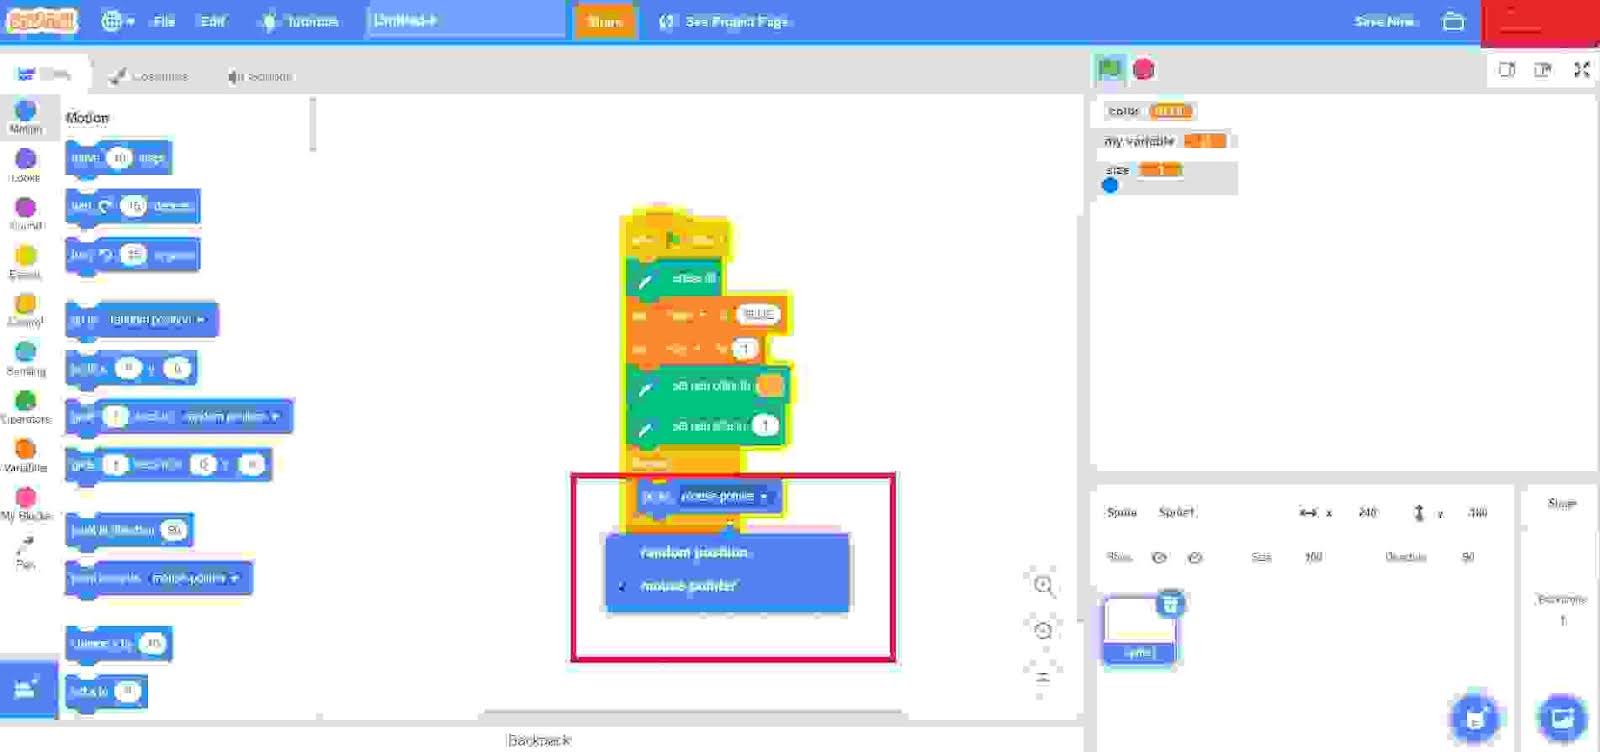
Step 16: Click on the random position and select the ‘mouse-pointer’ option.
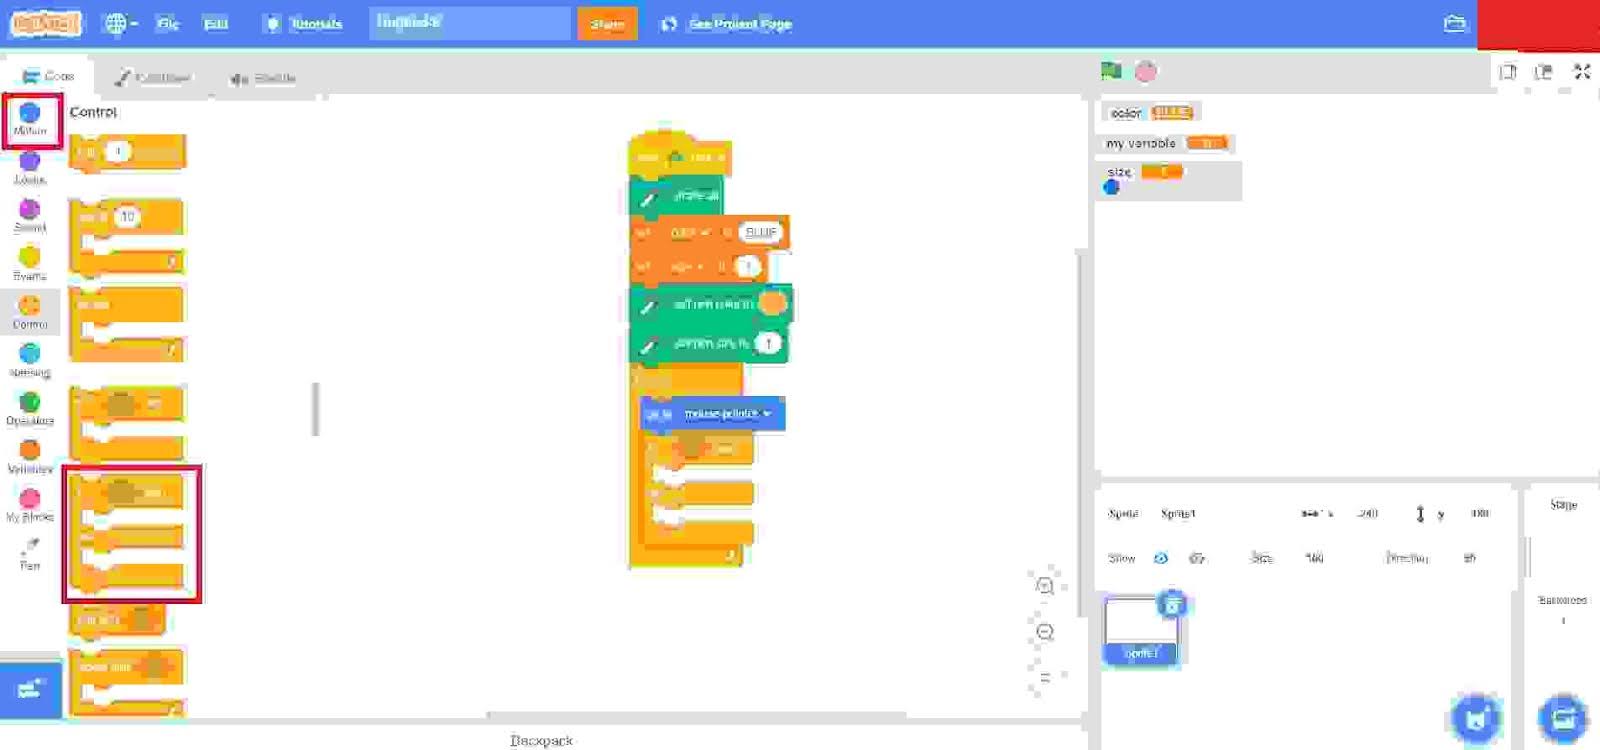
Step 17: Click on the ‘Motion’ button available on the left side of the screen and choose and drag the ‘if-else’ option, to the codes screen for coding.
Step 18: Click on the ‘Pen’ button available at the left side of the screen and choose and drag the ‘pen down’ and ‘pen up’ options under the “if and else” block respectively to the codes screen for coding.
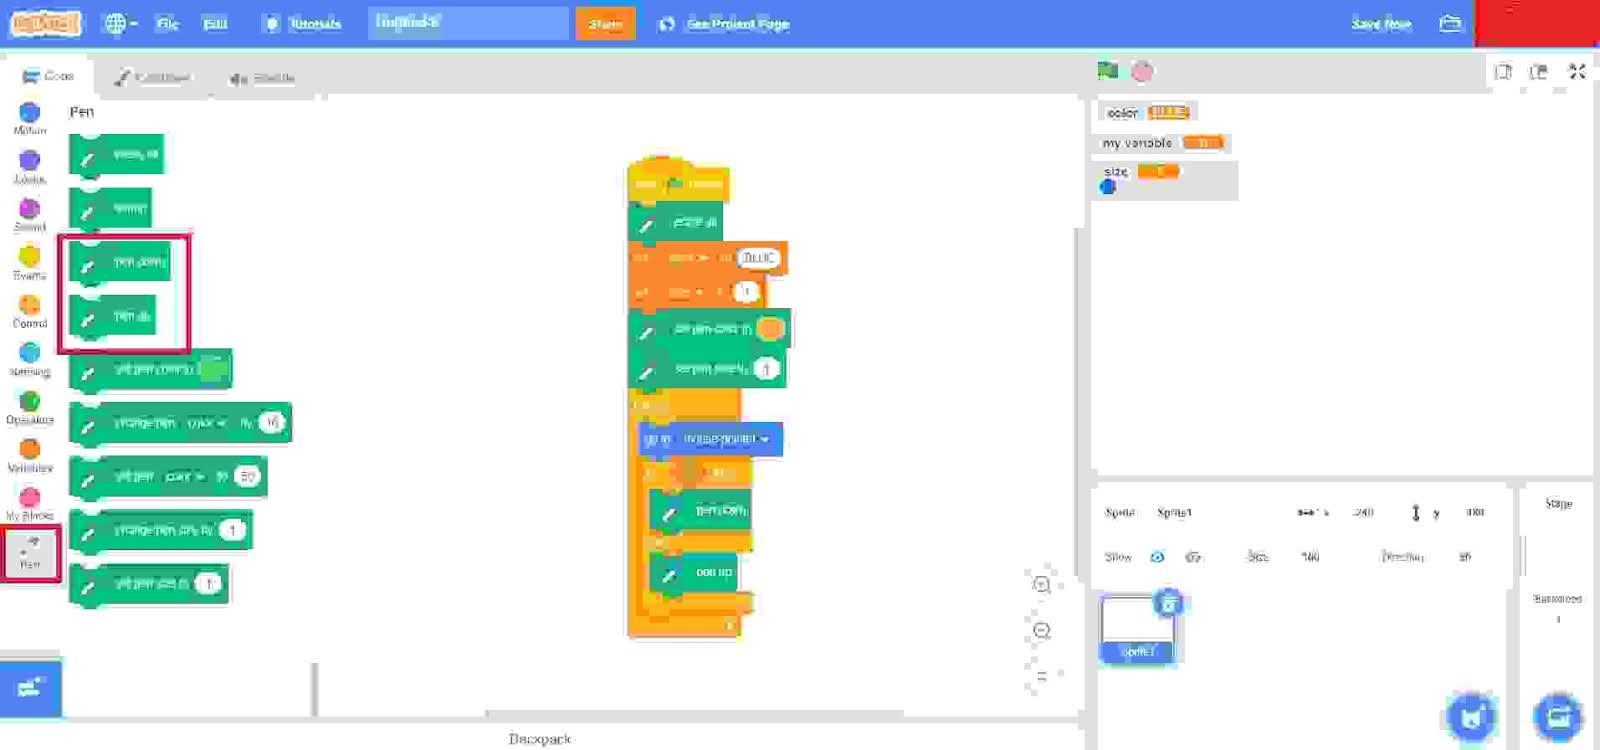
Step 19: Also drag the ‘set pen size to’ button to the codes screen.
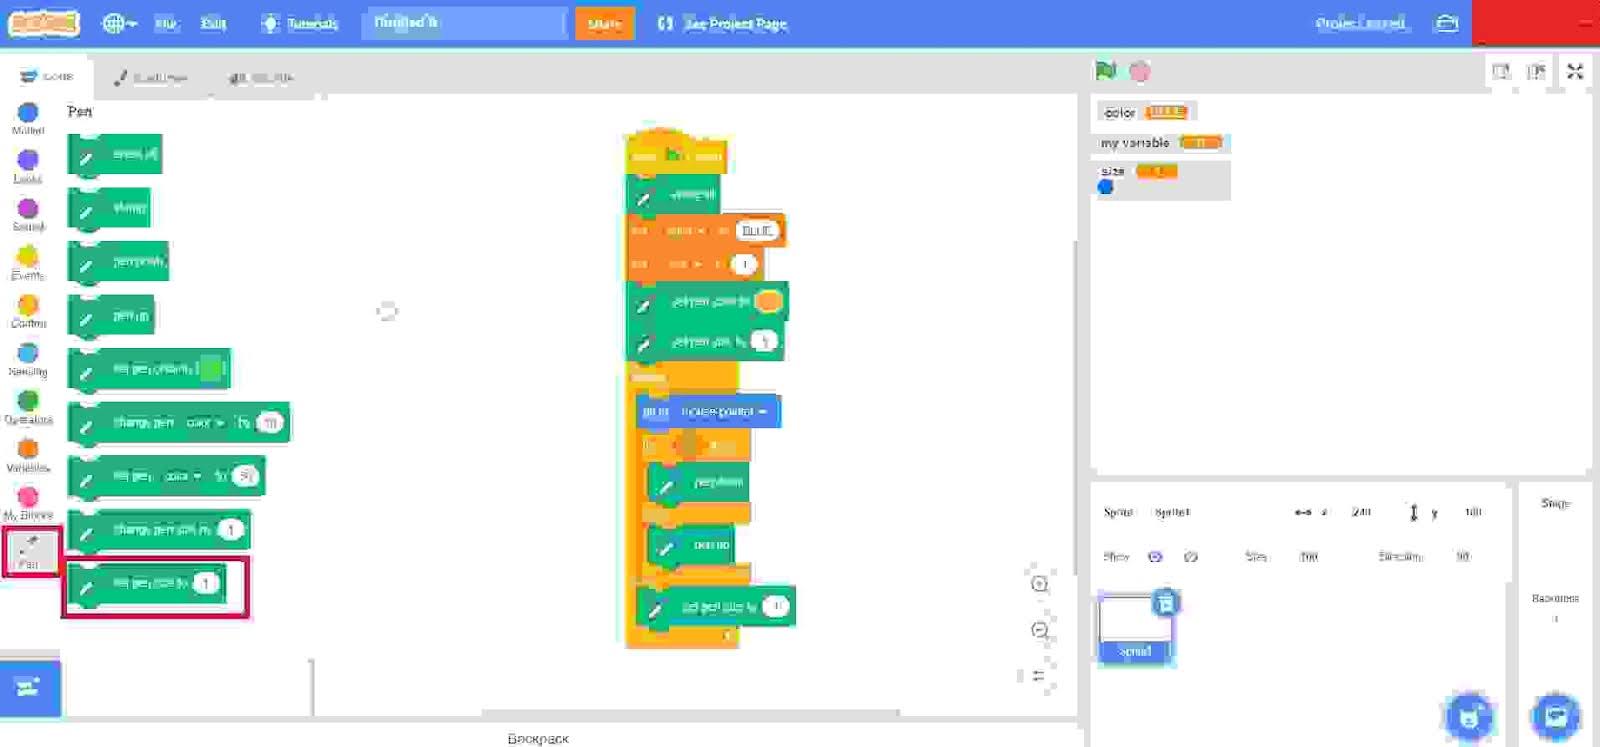
Step 20: Once you run the code as per the above-explained steps, your custom paint application in Scratch will finally get ready. Find the code below.

Conclusion
Currently, Scratch is one of the most popular platforms for learning code, especially because of its block-based coding feature and easy-to-use interface. For creating a paint application in Scratch, just take your first step and start experimenting and exploring the platform. This is the best way to learn about the features of a new platform.
Many beginners wonder and struggle with creating a paint application in Scratch. Well, if you also struggle with this problem, the best step-by-step solution is explained above.
Looking to learn Scratch coding? Explore Wiingy’s Online Scratch Coding Classes For Kids to learn from top Scratch coding experts.
Frequently Asked Questions (FAQs)
How to create a paint application in Scratch?
To create a paint application in Scratch, just click on the ‘Costumes’ button, and using the paint option, you can start creating a paint application in Scratch.
What are the major factors behind the growing popularity of the Scratch platform?
Scratch is famous among kids and beginners because of its simple interface and block-based coding. This helps the users in learning to code easily and effectively.
Which extension is used for creating a paint application in Scratch?
Pen extension is used for creating a paint application in Scratch.
How many languages are available on the Scratch platform?
More than 70 languages are available in the Scratch platform to help its users learn easily and effectively.
What is the advantage of using Scratch for painting?
Scratch allows you to create paint applications using various extensions which help in creating your project with more details and specifications.
We hope you understand how to create a paint application in Scratch and share your projects in Scratch. If you have any doubts, you can ask our doubts in the comment section.


